


6. Spool holder assembly
102
Original Prusa MINI+ kit assembly
STEP 3
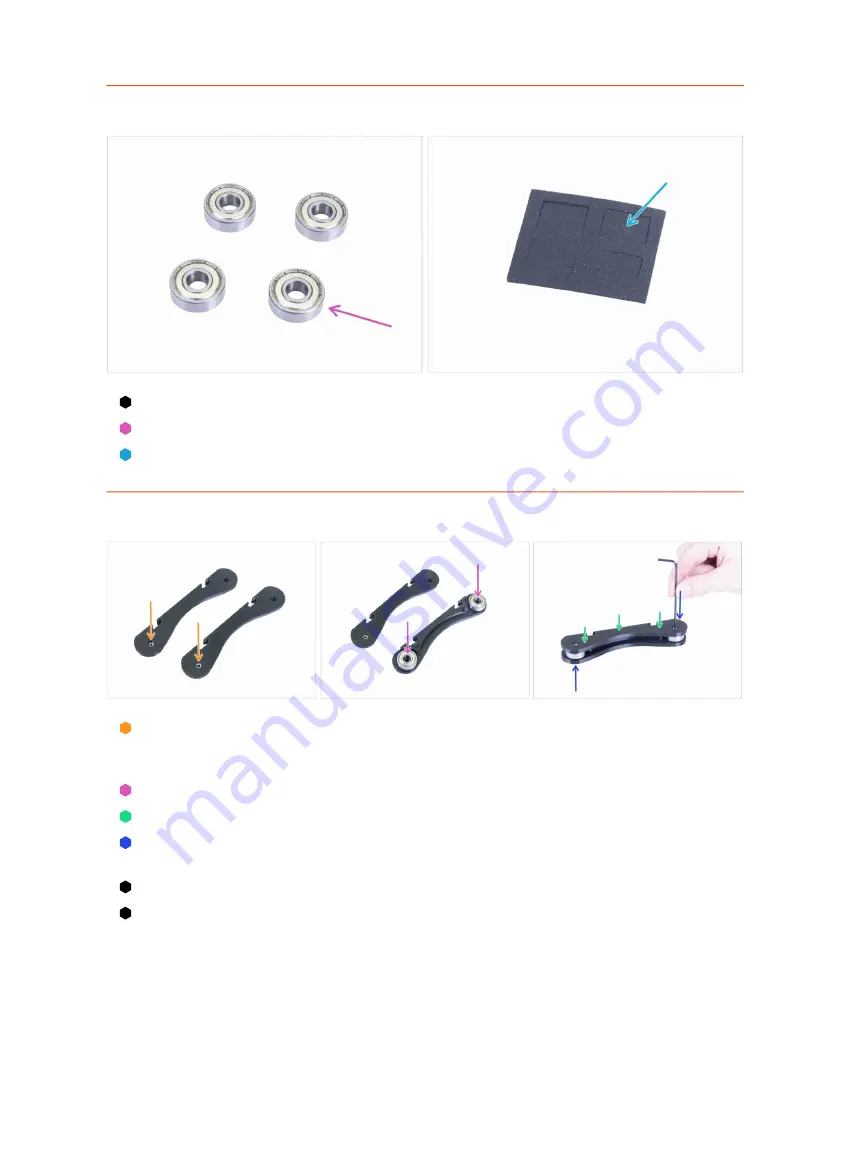
Spool holder: parts preparation
For the following steps, please prepare:
Bearing 608b (4x)
Anti-vibration pad (4x)
STEP 4
Assembling the spool holder base(s)
Take two of the BASE parts and insert the M3n nuts into the holes in both of them -
see the picture (they are identical). If you can't push them in, insert a screw from
the opposite side to pull them in.
Flip one of the BASE parts and insert two bearings in it.
Put the second BASE part on top of the bearings.
Insert the M3x12 screw from the top and tighten it. Flip the base assembly over and
do the same.
Make sure both bearings can rotate freely. If not, release the screw(s) slightly.
Repeat this step for the second base assembly.
Summary of Contents for Original Prusa MINI
Page 5: ...Original Prusa MINI kit assembly 5 1 Introduction ...
Page 14: ...14 Original Prusa MINI kit assembly 2 YZ axis assembly ...
Page 47: ...Original Prusa MINI kit assembly 47 3 X axis Extruder assembly ...
Page 73: ...Original Prusa MINI kit assembly 73 4 Print head Heatbed assembly ...
Page 87: ...Original Prusa MINI kit assembly 87 5 LCD assembly Electronics ...
Page 100: ...100 Original Prusa MINI kit assembly 6 Spool holder assembly ...
Page 105: ...Original Prusa MINI kit assembly 105 7 Preflight check ...
Page 109: ...109 Notes ...
Page 110: ...110 ...
Page 111: ...111 Notes ...
Page 112: ...112 ...
Page 113: ...113 Notes ...
Page 114: ...114 ...
Page 115: ...115 Notes ...
Page 116: ...116 ...


