


2. YZ - axis assembly
Original Prusa MINI+ kit assembly
31
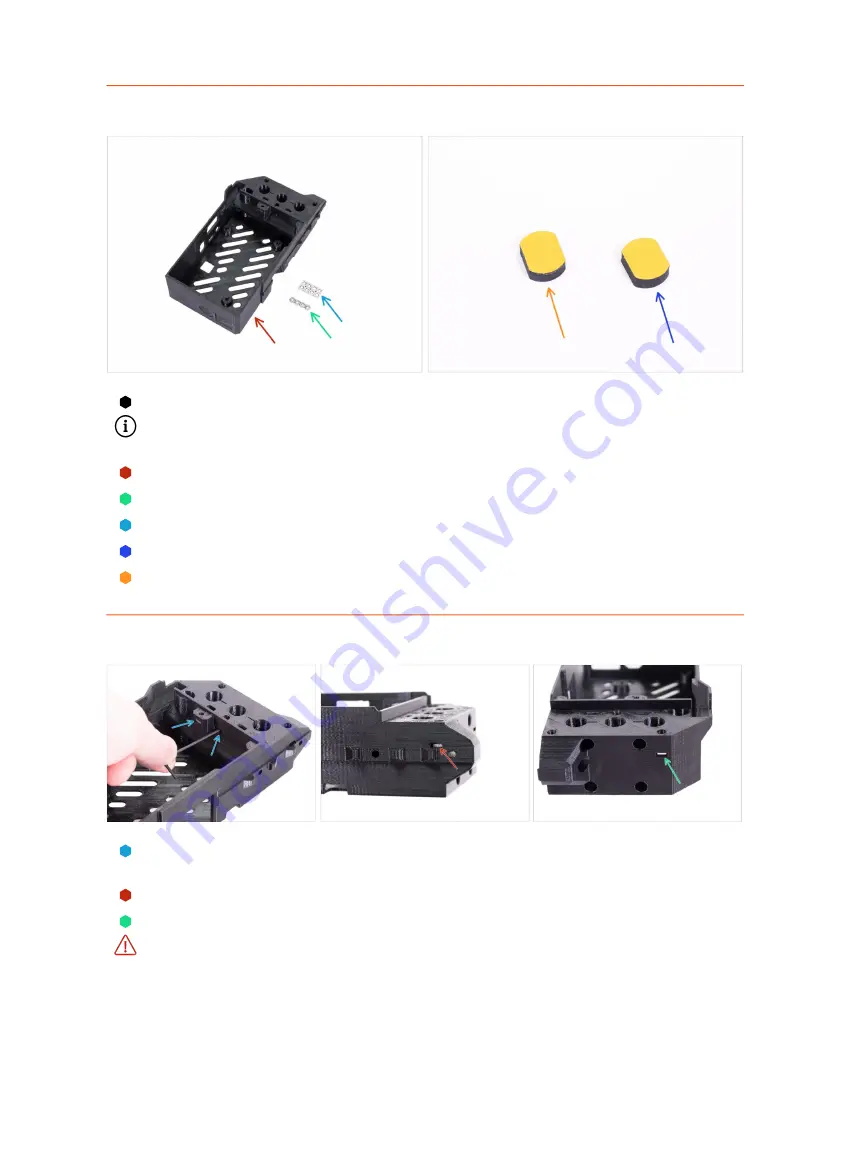
STEP 32
MINI-Z-bottom: parts preparation
For the following steps, please prepare:
Fasteners needed for the following steps are in the
Y & Z-axis
package. Please,
prepare this bag.
MINI-Z-bottom (1x)
M3n nut (4x)
M3nS nut (8x)
Anti-vibration foam pad (1x)
The remaining foam pad is a spare.
STEP 33
Assembling the MINI-Z-bottom
Look inside the MINI-Z-bottom, locate two holes and insert two M3nS nuts. Use the
1.5mm Allen key to push the nuts fully inside.
Insert one M3nS nut into the hole on the side.
Insert one M3nS nut from the front side of the part.
Always make sure that
all M3nS nuts are inserted all the way down into the holes.
Summary of Contents for Original Prusa MINI
Page 5: ...Original Prusa MINI kit assembly 5 1 Introduction ...
Page 14: ...14 Original Prusa MINI kit assembly 2 YZ axis assembly ...
Page 47: ...Original Prusa MINI kit assembly 47 3 X axis Extruder assembly ...
Page 73: ...Original Prusa MINI kit assembly 73 4 Print head Heatbed assembly ...
Page 87: ...Original Prusa MINI kit assembly 87 5 LCD assembly Electronics ...
Page 100: ...100 Original Prusa MINI kit assembly 6 Spool holder assembly ...
Page 105: ...Original Prusa MINI kit assembly 105 7 Preflight check ...
Page 109: ...109 Notes ...
Page 110: ...110 ...
Page 111: ...111 Notes ...
Page 112: ...112 ...
Page 113: ...113 Notes ...
Page 114: ...114 ...
Page 115: ...115 Notes ...
Page 116: ...116 ...


