


17
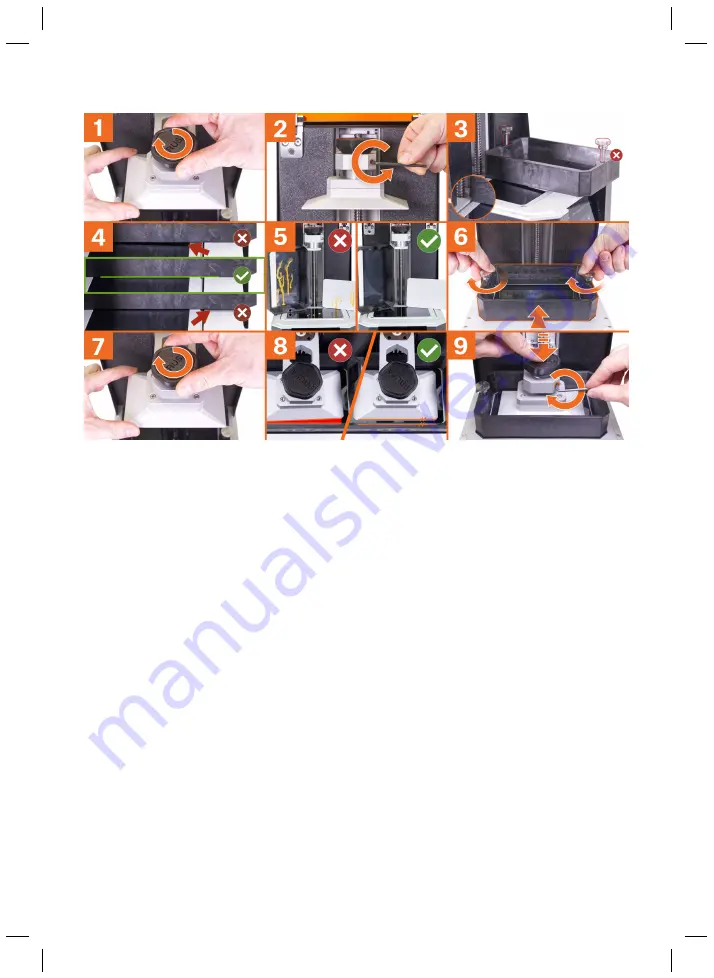
Make sure the print platform is clean, slide it onto the platform holder on the cantilever and
1.
tighten the black knob.
Loosen the screw on the cantilever using an Allen key. The platform should move quite freely,
2.
but the knob on top has to remain tightened
Take the empty resin tank, remove both large screws, rotate it by 90° and place it across the
3.
silver printer frame as depicted in the picture. Make sure the tank rests flat and level on the
printer frame lip and
not on the display
Use the on-screen controls to move the tilt until the display and frame are in direct contact
4.
with the resin tank. The tank must not be lifted above the frame. See the picture below for a
reference. Tap or hold the on-screen buttons to move the platform.
Before you proceed further, make sure that both the platform and the tank are perfectly clean.
5.
Place the resin tank on the tilt bed and secure it with both screws. Tighten them evenly and
6.
with the same amount of force, otherwise, the tank may end up in a skewed position
Make sure the platform is secured by the black knob.
7.
The print platform will go all the way down and touch the bottom of the tank. Rotate the
8.
platform so it's parallel with the edge of the screen / side of the tank.
Apply a slight downward pressure on the black knob with one hand and use the other hand to
9.
tighten the screw on the cantilever.
That’s it!
The printer is now calibrated and doesn’t have to be calibrated again unless you
transport it to a new location or replace certain parts of the printer (e.g. the FEP foil). The print
platform is secured by the black knob at the top of the cantilever and removing it from the printer
won’t affect the calibration.
Once the calibration is done, the Main Menu is displayed. Please see chapters
Navigating the
menus
and
Menu structure
for more information.


