PS Engineering Inc. ®
PAR200A Audio Selector Panel, COM radio Controller and Intercom System
Installation and Operator’s Manual
200-228-0200
Page 2-5
Rev. 4, DEC. 2017
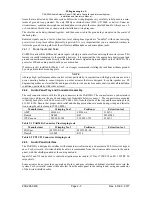
Avoid routing the cable round tight bends.
Avoid kinking the cable even temporarily during installation.
Secure the cable so that it cannot interfere with other systems.
2.5.4
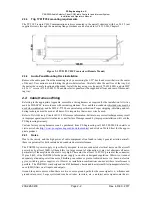
TY91/92 TNC Antenna connection
The VHF Com radio uses a solder/crimp TNC connector, Amphenol 31-2.
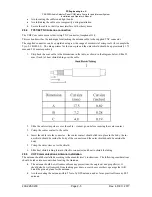
This section describes the technique for attaching the antenna cable to the supplied TNC connector.
The supplied connector can be completed using a wide range of commercial crimp tools (for example the
Tyco 5-1814800-3). The die apertures for the inner pin and the outer shield should be approximately 1.72
mm and 5.41 mm respectively.
1.
Strip back the coax cable to the dimensions in the table, as shown in the diagram below. Slide 25
mm (1 inch) of heat shrink tubing over the cable.
2.
Slide the outer crimp sleeve over the cable – it must go on before securing the center contact.
3.
Crimp the center contact to the cable.
4.
Insert the cable into the connector – the center contact should click into place in the body, the in-
ner shield should be inside the body of the connector and the outer shield should be outside the
body.
5.
Crimp the outer sleeve over the shield.
6.
Slide heat shrink tubing forward (flush to connector) and heat to shrink the tubing.
2.5.5
VHF Communications Antenna Installation
The antenna should be installed according to the manufacturer’s instructions. The following considerations
should be taken into account when locating the Antenna.
The antenna should be well removed from any projections, the engine(s) and propeller(s). It
should also be well removed from landing gear doors, access doors or others openings that will
break the ground plane for the antenna.
Avoid mounting the antenna within 2 feet of a GPS antenna, and as far as practical from any ELT
antenna.

