Falcon
®
4220 Quick Reference Guide
10
Falcon
®
4220 Windows
®
CE PDA
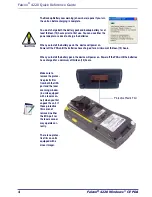
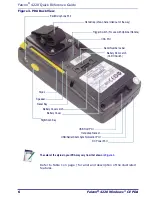
2. Move the Battery Latch Switch to the “Off” position (see
Figure 4
).
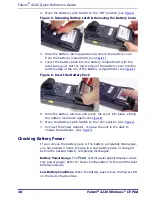
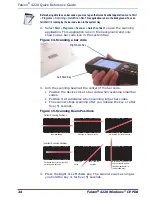
Figure 5. Releasing Battery Latch & Removing the Battery Cover
3. Slide the battery latch upwards and remove the battery cover
from the battery compartment (see
Figure 5
).
4. Insert the battery pack into the battery compartment with the
label facing out. Set the lower edge of the battery cover into the
bottom edge of the rim of the battery compartment (see
Figure 6
).
Figure 6. Insert the Battery Pack
5. Slide the battery latch up and press the cover into place, sliding
the battery lock down again (see
Figure 6
).
6. Move the Battery Latch Switch to the “On” position (see
Figure 4
).
7. Connect the Power Adaptor or place the unit in the dock to
charge the batteries. (see
Figure 7
).
Checking Battery Power
If you remove the battery pack or the battery completely discharges,
you have about 2 hours to swap in a new battery pack or charge it
before the backup battery completely discharges.
Battery Power Gauge.
The
Power
control panel applet displays a bat-
tery power gauge. Refer to “Power Configuration” in the 4220 Product
Reference Guide.
Low Battery Conditions.
When the battery pack is low, the Power LED
on the device flashes blue.


