background image

Summary of Contents for 1970 Moped

Page 1: ...PUCH 1970 and 1971 MOPED MAINTENANCE MANUAL Includes Technical Data Description Maintenance and service Trouble Shooting Steyr Daimler Puch PUCH SERVICE AUSTRIA 907 1 71 033 1...

Page 2: ...i PUCH Motor Cycles mm D E S C R I P T I O N A N D M A I N T E N A N C E STEYR DAIMLER PUCH AKTIENGESELLSCHAFT A U S T R I A A U T R I C H E...

Page 3: ...TABLE OF CONTENTS 1 Technical Data see attached data sheet 2 Description 3 Maintenance and Service 4 Trouble Shooting 5 Index V...

Page 4: ...repairs which may cost you much time and money The section on trouble shooting will inform you about many sources of faults But do not undertake fumbling things that can only be executed expertly by...

Page 5: ...2 DESCRIPTION H 7 I 2 1 CONTROLS Location and working of the controls may be seen from the data sheet hereto attached 2 2 FIRST PUTTING INTO SERVICE 2 3 BEFORE EVERY TRIP 2 4 DRIVING INSTRUCTIONS 2 1...

Page 6: ...ided for the purpose either an oil control plug or a dipstick on the right hand side gearbox cover a Oil control plug version fig 1 With the vehicle in horizontal position normal posi tion oil level i...

Page 7: ...for location see data sheet The intake muffler air filter must be wetted by motor oil SAE 40 vor 50 except vehicles with dry air filter 2 24 Checking the inflating pressure For pressure figures see da...

Page 8: ...slightly 0 In automatic models with pedals pull lever for release of starting device see data sheet 0 Crank engine by means of pedals or kick starter 0 In case the choke has been operated push in pro...

Page 9: ...ion will thus be considerably reduced Throttle opening should be turned to what the engine just needs sharp opening of the throttle twist grip only increases fuel consumption When driving speed has to...

Page 10: ...control lever and engage neutral gear In order to shut off the engine 0 Press short circuiting button Pull out ignition key models with ignition lock shut fuel cock 0 shut off the vehicle 2 46 Driving...

Page 11: ...STRUCTIONS 2 7 0 Operate clutch control lever and engage 2nd gear 3rd gear whilst pedalling Mount the auto cycle and set it going like a bicycle whit pulled down clutch lever Before stopping engage ne...

Page 12: ...3 MAINTENANCE AND SERVICE 3 2 LUBRIFYING THE VEHICLE 3 3 MAINTENANCE OPERATIONS 3 4 CLEANING THE VEHICLE 3 5 LAYING UP 3 1...

Page 13: ...ed working methods and every working facility will carry out any overhauling and repair work rationally economically and rapidly The PUCH ORGANIZATION will always be pleased to give you further inform...

Page 14: ...ough the filler hole fill in motor oil for capacity and oil quality see data sheet attached to this booklet oil brands according to lubricants chart until original oil level is reached i e until oil l...

Page 15: ...section 3 3 10 and the connecting link correctly placed closed side in moving sense 3 23 G r e a s i n g t h e c h a s s i s By means of lubricating grease for quality see lubricants chart The lubrica...

Page 16: ...ould only be carried out according to the instructions given in the repair manual by a PUCH service station capacities given in the data sheet attached to this booklet 3 25 Lubrifying the grease felt...

Page 17: ...rse to force when screwing in Screw in by hand 2 or 3 turns only then you may use the spark plug wrench Standard plug according to data sheet 3 3 2 Decarbonizing the engine The constitution of deposit...

Page 18: ...ying sur faces on cylinder ond cylinder cover by wiping them and re fit without gasket Tighten the four cylinder head nuts crosswise Exhaust port In order to clean the exhaust port take off the exhaus...

Page 19: ...3 8 MAINTENANCE AND SERVICE llllUJll l im nmn lM K n i ff K Fig 7a...

Page 20: ...muffler inside Oil deposits on fastening device and in the pipes of the after silencer must carefully be removed If necessary renew gaskets We warn against modifying the silencer inside especially aga...

Page 21: ...g the fuel pipes Drain fuel tank Pull fuel pipe from cock and carburetter and blow clear Unscrew fuel cock upper union nut Take out fuel strainer and clean it blow clear fuel cock 3 3 6 Cleaning the c...

Page 22: ...er is cleaned regulating the id ling speed will be necessary Carry through with a hot engine Adjust set screw on carburetter body until engine idles correctly 3 3 8 Checking the ignition system Igniti...

Page 23: ...adjusting is necessary 10 1 loosen fastening screw 10 2 and turn the whole breaking anvil 10 4 For re adjusting the anvil put a screwdriver into the setting groove If the gap has been modified also c...

Page 24: ...he headlamp bulb For this purpose take off the light unit Unscrew the light unit fastening screws then take out the light unit 11 12 13 Exception headlamp housing of the VS model series see special re...

Page 25: ...from the front First unscrew by about 8 mm the headlamp setting screw threaded pin M6 located at the bottom of the head lamp Then unscrew by 8 turns each of the two full dog point screws M 8 on the ri...

Page 26: ...e spring on top of light unit behind the stiffening rib of the headlamp bracket Screw in left full dog point screw to bed light unit tighten the right full dog point screw Screw in headlamp setting sc...

Page 27: ...setting cross If necessary loosen the fastening screw and turn the headlamp by hand Tighten screws again After having checked the far light beam check dip light The latter is adjusted correctly if th...

Page 28: ...ain sprockets it must easily go up and down by 10 to 15 mm When checking the chain tension first loosen wheel nuts take care to tight equally the two chain tightener for the wheel to keep in track Do...

Page 29: ...gear Tension bowden cables uniformly by means of the setscrew or by displacing the supporting shackle Both cable casings should have an equal axial play measured at the tensioners of about 1 mm Some...

Page 30: ...le use both brakes but cautiously too jerky braking may entail crashing More over locking wheels lengthen the braking distance Too high braking efficiency In case the brakes have not been made use of...

Page 31: ...h of grease reducing considerably braking efficiency Never touch the braking surface with oily fingers Renewing the brake linings For renewal of the brake linings do not use other pro W i 2ZS D Q 5 Fi...

Page 32: ...the bearings Be fore re assembling grease by means of anti frictior bearing grease see lubricants chart 3 3 15 Checking and greasing the steering bearings Take down the steering bearings according to...

Page 33: ...3 22 MAINTENANCE AND SERVICE 6 Fig 20 Fig 20a...

Page 34: ...MAINTENANCE OPERATIONS 3 23 Fig 21 ft Fig 22...

Page 35: ...d system 0 Loosen wing nut and remove brake rod Unscrew linch pin and pull out 0 Remove brake support 0 Loosen hub from elastic clutch pull wheel to the right Incline vehicle to the left and take out...

Page 36: ...r refitt ing inflate the air tube but not too strongly brush it with talcum and put it into the halfmounted tyre Fit the tyre Take care not squeeze or twist the air tube The chafing strip separating t...

Page 37: ...order to wip dry use a chamois piece Application of a mild lacquer preservative is most commendable Chromium parts should also be cleaned from time to time especially during winter and be greased by a...

Page 38: ...ted parts with lacquer preservative In order to prevent the tank from rusting it is com mendable for it to be filled up with fuel In case the garage should not be fireproof flush the tank with oil Clo...

Page 39: ...ill not be warmed up sufficiently water vapour inevitably created by the combustion process will condense and cause bearings and cylinder working surfaces to rust Putting into operation again 0 With t...

Page 40: ...t 4 TROUBLE SHOOTING r 4 1...

Page 41: ...i ately in order to prevent more costly damages Inadequate handling in case of defect must be avoided at any rate Consult in time a reliable workshop For all requests for information and orders of spa...

Page 42: ...stance from central electrode and turn the engine over Spark good Inspect fuel feed and car buretter see below Spark insufficient Check spark upon cylinder cover Hold ignition wire at about 0 5 cm dis...

Page 43: ...ng rupted Remedy By operating the tickler check carburetter for fuel No fuel in carburetter R e p a i r f l o a t n e e d l e and or f u e l s u p p l y Set right Start with throttle wide open Remedy...

Page 44: ...tly it starts R e s e t i g n i t i o n t i m i n g For nominal value and remedy see sec tion 3 3 1 Use winter grade oil of high quality in gearbox see lubricants chart opposing little resistance to c...

Page 45: ...g aid or tickler Lack of fuel in carburetter or tank fuel cock closed fuel feed interrupted or clogged spark plug soiled Main jet clogged water before main jet Ignition misfires due to incorrect worki...

Page 46: ...g owing to incandescent ignition sparkover in the plug ignition lead loose broken ignition lead with accidental ground Engine runs but output insufficient Engine misfires induction and com pression b...

Page 47: ...rbonized cooling air insufficient due to dirt on cooling ribs Starting aid working all the time fuel consumption due to leakage in pipes carburetter flooding float valve leaky When engine hot Plug too...

Page 48: ...g broken plug insufficiently tightened plug sealing or faying surface of cylinder cover defective breather screw not tightened Engine stops by itself gradually after misfiring Insufficient fuel feed d...

Page 49: ...ock repair button stop when switched off because short off but goes on circuiting button running regularly defective Carburetter fire Backfiring in the If fuel cock accessible shut fuel supply carbure...

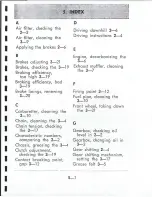
Page 50: ...ing the 3 4 Chain tension checking the 3 17 Characteristic numbers comparing the 2 2 Chassis greasing the 3 4 Clutch adjustment checking the 3 19 Contact breaking point gap 3 12 Driving downhill 2 6 D...

Page 51: ...N Nipples 3 4 Nuts tightening the 3 21 P Parking 2 6 Plastic purifier 3 26 R Rear light bulb changing the 3 16 Rear suspension unit changing oil 3 5 Rear wheel taking down the 3 24 S Screws tightenin...

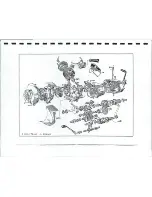
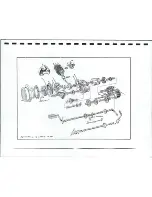
Page 52: ...m K QS SS0 Z SflEJ T J A i M U J EWC V...

Page 53: ...a asH b 0 3 3PE D T AA J V J P EA WA C...

Page 54: ...3 A IW ft 4 SP D TRANi M ENClfiJE 3k A SS 0...

Page 55: ...m 0 4 SPEED TIUMS VJV P fjClA E...

Page 56: ...nw W fi3F o A l T 0 l T i Z Pte Q TtAHS...

Page 57: ...TELtSCo P C F6R K...

Page 58: ...REAl SUSPEtiSlOfJ o u 1...

Reviews: