7.
DO NOT OVERREACH.
Keep proper footing and balance at all times to prevent
tripping, falling, back injury, etcetera.
8.
INDUSTRIAL APPLICATIONS MUST FOLLOW OSHA REQUIREMENTS.
9.
STAY ALERT.
Watch what you are doing at all times. Use common sense. Do
not use this product when you are tired or distracted from the job at hand.
10.
CHECK FOR DAMAGED PARTS.
Before using this product, carefully check
that it will operate properly and perform its intended function. Check for dam -
aged parts and any other conditions that may affect the operation of this product.
Replace or repair damaged or worn parts immediately.
11.
REPLACEMENT PARTS AND ACCESSORIES:
When servicing, use only identi-
cal replacement parts. Only use accessories intended for use with this product.
Approved accessories are available from Harbor Freight Tools.
12.
MAINTAIN THIS PRODUCT WITH CARE.
Keep this product clean and dry for
better and safer performance.
13.
MAINTENANCE:
For your safety, service and maintenance should be performed
UHJXODUO\E\DTXDOL¿HGWHFKQLFLDQ
14.
USE THE RIGHT TOOL FOR THE JOB.
Do not attempt to force a small tool or
attachment to do the work of a larger industrial tool. There are certain applica-
tions for which this tool was designed. It will do the job better and more safely
at the rate for which it was intended. Do not modify this tool, and do not use this
tool for a purpose for which it was not intended.
WARNING:
The warnings, precautions, and instructions discussed in this manual
cannot cover all possible conditions and situations that may occur. The operator
must understand that common sense and caution are factors, which cannot be
built into this product, but must be supplied by the operator.
4
SPECIFIC PRODUCT WARNINGS AND PRECAUTIONS
1.
WARNING:
0DNHVXUHWR¿OOWKH $LU&RPSUHVVRUZLWKDSUHPLXPTXDOLW
y,
ZHLJKWQRQGHWHUJHQWFRPSUHVVRURLOEHIRUHHDFKXVH5XQQLQJWKH
Air Com-
SUHVVRUZLWKQRRLORUORZRLOZLOOFDXVHGDPDJHWRWKHHTXLSPHQW
Note:
7KHRLO
UHVHUYRLUKDVDQRSWLPDOFDSDFLW\RIRXQFHVRIRLO
2.
WHEN CHECKING THE OIL LEVEL:
Make sure to
unscrew
GRQRWSXOOWKH
%UHDWKHU
V
DOYH%RXW
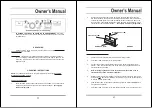
(See Figure C, and Assy. Diagram B.)
3.
MAKE SURE ALL TOOLS AND EQUIPMENT USED WITH THE AIR COM-
PRESSOR ARE RATED TO THE APPROPRIATE CAPACITY.
'RQRWXVHDQ\
WRRORUHTXLSPHQWWKDWGRHVQRWRSHUDWHIURPWR
115 PSI.
4.
DRAIN AIR COMPRESSOR EVERY DAY.
'RQRWDOORZPRLVWXUHWREXLOGXS
LQVLGHWKH
Air Compressor.
(See
“
INSPECTION, MAINTENANCE, AND CLEAN-
ING”
section of this manual.)
5.
MAINTAIN A SAFE WORKING ENVIRONMENT.
.HHSWKHZRUNDUHDZHOOOLW
0DNHVXUHWKHUHLVDGHTXDWHVXUURXQGLQJZRUNVSDFH $OZD\VNHHSWKHZRUN
DUHDIUHHRIREVWUXFWLRQVJUHDVHRLOWUDVKDQGRWKHUGHEULV'RQRWXVHWKH
Air
&RPSUHVVRULQDUHDVQHDUÀDPPDEOHFKHPLFDOVGXVWVDQGYDSRUV
6.
AVOID INJURY:
1HYHUGLUHFWWKH $LU)ORZ
V
DOYH$DWSHRSOHRUDQLPDOV
(See
Assy. Diagram A.)
7.
DO NOT ALTER OR REMOVE THE FACTORY SEALED PRESSURE
RELEASE VALVE (5A). (See Assy. Diagram A.)
8.
DO NOT OPEN THE WATER DRAIN VALVE (10A) SO THAT MORE THAN
FOUR THREADS ARE SHOWING. (See Assy. Diagram A.)
9.
AN EXTENSION CORD MUST NEVER BE USED WITH THIS ITEM.
Connecting this item to an outlet through an extension cord MAY CAUSE
ELECTRICAL DAMAGE TO THE MOTOR and could present a FIRE HAZARD.
10.
THIS COMPRESSOR MAY REQUIRE A DEDICATED ELECTRICAL CIRCUIT
AS THE AMPERAGE DRAW UNDER FULL LOAD COMBINED WITH USE OF
ANY OTHER ITEM MAY OVERLOAD YOUR CIRCUIT.
11.
WARNING:
7KLVSURGXFWFRQWDLQVRUSURGXFHVDFKHPLFDONQRZQWRWKH6WDWHRI
&DOLIRUQLDWRFDXVHFDQFHUDQGELUWKGHIHFWVRURWKHUUHSURGXFWLYHKDUP
&DOHDOWK 6DIHW\&RGH
et seq.
12.
WARNING:
3HRSOHZLWKSDFHPDNHUVVKRXOGFRQVXOWWKHLUSK\VLFLDQVEHIRUH
XVLQJWKLVSURGXFW2SHUDWLRQRIHOHFWULFDOHTXLSPHQWLQFORVHSUR[LPLW\WRDKHDUW
SDFHPDNHUFRXOGFDXVHLQWHUIHUHQFHWRRUIDLOXUHRIWKHSDFHPDNH
r.

