background image

18

MAINTENANCE

Regular maintenance will extend the life of this generator and improve its performance.  The warranty does not cover 

items that result from operator negligence, misuse, or abuse.  To receive full value from the warranty, operator must 

maintain the generator as instructed in this manual, including proper storage.

Before inspecting or servicing this machine, make sure the engine is off and no parts are 

moving.  Disconnect the spark plug wire and move it away from the spark plug. 

Pre-Operation Steps

Before starting the engine, perform the following pre-operation steps:

• Check the level of the engine oil and the fuel tank level.  Check for any leakage.

• Check fuel hose for cracks or damage.  Replace if necessary.

• 

pick up loose debris.  If dirt is caked on, use a soft bristle brush. 

• Inspect the work area for hazards.

After Each Use

Follow the following procedure after each use:

• Shut off engine.

• Store unit in a clean and dry area.

WARNING!

Maintenance Schedule

If you are unsure of how to perform a maintenance task, have the unit serviced by a PU

LSAR

dealer

CAUTION!

CAUTION!

Only use specified PULSAR replacement parts

.

After First 5 Hours


Change Oil


After 8 Hours or Daily


Clean Debris from Generator and Air Filter area


Check Engine Oil Level


Annually (25 hr Use)


Check and Clean Air Cleaner


Inspect

 Muffler and Spark Arrester


Annually (100 hr Use)


Service Spark Plug 


Inspect Fuel Valve and Fuel Lines for leaks or damage


Inspect Muffler and Spark Arrester


Check and Clean Air Cleaner Assembly, Replace Air 


Filter


Clean Cooling System Cylinder Head Fins and Flywheel Fan


Change Engine Oil after the first 25 hours, again at 50 hours; then every 100 

hours thereafter

.

Summary of Contents for PG2300iSCO

Page 1: ...Inverter Gasoline OPERATOR S MANUAL Model PG2300iSCO support pulsar products com...

Page 2: ...l system 11 Adding Fuel 11 Adding Checking Oil 12 Operation 13 Grounding the Generator 13 How to Start Engine 13 How to Stop Engine 14 Attaching Electronic Devices 14 Charging a 12 Volt Battery 15 AC...

Page 3: ...our generator will give you many years of reliable service Product Specifications This generator is an engine driven revolving field alternating current AC portable generator It is designed to supply...

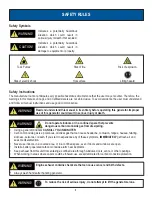
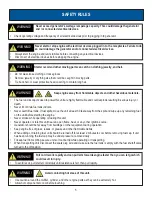
Page 4: ...te indoors or in a confined space that prevents dangerous carbon monoxide gas from dissipating Using a generator indoors CAN KILL YOU IN MINUTES Carbon monoxide gas is a poisonous odorless gas that ca...

Page 5: ...and other flammable debris When adding or draining fuel unit should be turned off for at least 2 minutes to cool before removing fuel cap If unit has been running the fuel cap may be under pressure re...

Page 6: ...quipment Only when operating at the preset governed speed this generator will supply the correct rated frequency and voltage WARNING Generator must be properly grounded to prevent electrocution Only o...

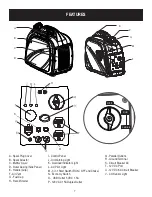
Page 7: ...ter Q Parallel Outlets R Ground Terminal S Circuit Breaker AC T 12V DC Port U 12V DC 8A Circuit Breaker V CO Sensor Light CH O KE O FF I Control Panel J Oil Warning Light K Overload Indicator Light L...

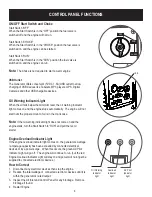
Page 8: ...ight If the engine overload indicator light comes on the generator s wattage amperage capacity has been exceeded by connected electrical devices or by a power surge When this occurs the green AC Pilot...

Page 9: ...devices until the load is within the specified rated output To re establish power return the DC Circuit Breaker back to the ON position CAUTION If the DC Circuit Breaker turns off again stop using th...

Page 10: ...or neutral conductor is bonded to the generator frame in accordance with NEC Article 250 34 C Only operate generator on a level surface Always connect the nut and ground terminal on the frame to an ap...

Page 11: ...erator produces a very high voltage which could result in burn or electrocution causing serious injury or death Connecting Generator to an Electrical System If connecting generator to a building s ele...

Page 12: ...ine Insert a funnel into the crankcase dipstick hole and carefully add the specified amount of 4 Cycle engine oil SAE 10W 30 to empty reservoir until or oil reaches the outer edge of the oil fill hole...

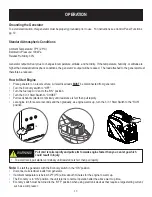
Page 13: ...he ON position Turn the 3 in 1 Start Switch to CHOKE Pull recoil handle starter cord slowly until resistance is felt then pull rapidly Let engine run for several seconds and then gradually as engine w...

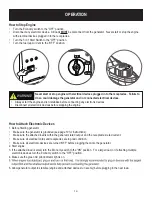
Page 14: ...he fuel cap Air Vent to the OFF position How to Attach Electronic Devices 1 Before Starting generator Make sure the generator is grounded see page 10 for instructions Make sure the attached load is wi...

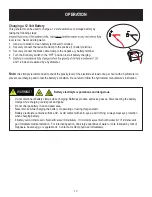
Page 15: ...ur with a hydrometer to prevent overcharging and to test the battery s condition Be careful to follow the hydrometer manufacture s instruction Do not disconnect battery clamps while charging Batteries...

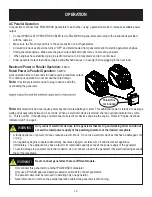
Page 16: ...d or plug If an appliance begins to operate abnormally becomes sluggish or stalls turn off and disconnect appliance immediately The appliance may have a fault or its rated load capacity exceeds the po...

Page 17: ...or 800 800 Laser Printer 250 950 Copy Machine 700 800 Power Tools 1000W Quartz Halogen Work Light 1000 1000 Airless Sprayer HP 600 800 Reciprocating Saw 750 950 Circular Saw 7 1400 2300 Miter Saw 10 8...

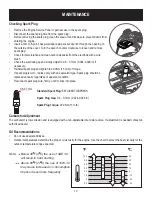
Page 18: ...e debris If dirt is caked on use a soft bristle brush Inspect the work area for hazards After Each Use Follow the following procedure after each use Shut off engine Store unit in a clean and dry area...

Page 19: ...n access to the spark plug Disconnect the spark plug wire from the spark plug Before removing the spark plug clean the area around its base to prevent debris from entering the engine Insert a 19mm 6 p...

Page 20: ...nerator to collect used oil Allow oil to drain completely Return generator to a level surface Crankcase Dipstick hole Use a clean rag to wipe up any spilled oil Replace crankcase dipstick Reinstall ou...

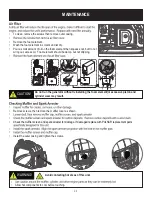
Page 21: ...should be damp but not dripping Do not run the generator without reinstalling the foam element or excessive piston and cylinder wear may result CAUTION Remove screws then remove the muffler cover as...

Page 22: ...must be Shipped Run and Stored in the upright position as seen For semi long term storage add fuel stabilizer to prevent stale fuel from causing acid and gum deposits in the fuel system For long term...

Page 23: ...MAINTENANCE CH O K E O FF Remove the spark plug and pour about 1 teaspoon of 10W30 Engine oil into the spark plug hole Reinstall the spark plug With the 3 in 1 switch in the OFF position pull the rec...

Page 24: ...er 3 Dirty Air filter 4 Engine needs servicing 1 See pg 17 Don t overload generator 2 Clean or replace fuel filter 3 Replace Air filter 4 Contact service department Engine hunts or falters 1 Choke was...

Page 25: ...WIRING DIAGRAM 25 Model Revision Level 01 Doc Revision Level 01 Title SCHEMATIC Model PG2300iSCO Doc No 504617 01 Ed Date 11 15 21...

Page 26: ...O Sensor shuts off the engine notifies the user with a RED indicator light and directs the user to read the Action Label for steps to take The CO Sensor DOES NOT replace carbon monoxide alarms Install...

Reviews: