background image

7

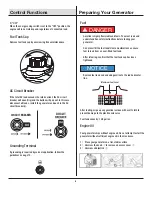
Preparing Your Generator

Starting The Generator

Shutting Down the Generator

Using the Generator

4

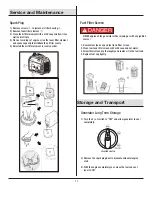
Use a funnel to add 12 fluid ounces (0.35L) of 10w-30

      engine oil to the crankcase, verify oil level with the dipstick.
5

Reassemble oil access cover and tighten the knob.

Pre-use inspection


Fuel

Check fuel level; add if necessary.

Oil

Check oil level; add if necessary.
Check for any oil leaks.

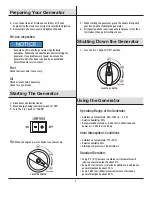
1

Disconnect all electrical loads.

2

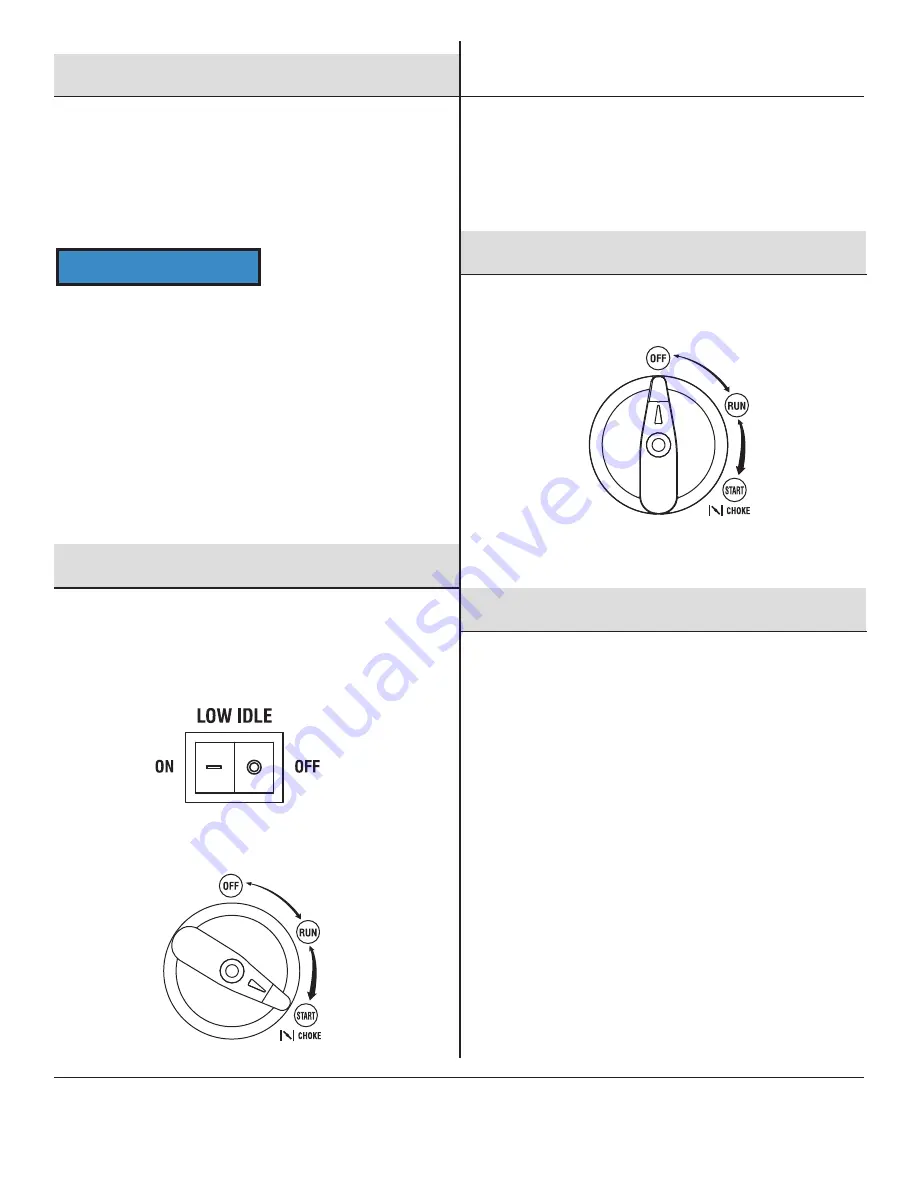
Move Energy Saving (Low Idle) switch to "OFF".

3

Turn the 3 in 1 knob to "CHOKE"

Tip:

 When the engine is warm, choke is not necessary.

5

When starting the generator, grasp the handle firmly with

      your free hand to stabilize the generator.
6

First gently pull the recoil rope until resistance is felt, then

      let it retract, then pull it swiftly at once.

1

Turn the 3 in 1 knob to "OFF" position

Operating Range of the Generator

• Ambient air temperature: 23F–104F (-5 ~ 40°C)
• Relative humidity <95%
• Recommended elevation <5,000 feet (1,500m) reduced

   power at >3,300 feet (1,000 m)

Ideal Atmospheric Conditions

• Ambient air temperature: 77F (25°C)
• Relative humidity: 30%
• Atmospheric pressure: 1,000 millibars

Standard Deration:

• Every 9°F (5°C) increase in ambient air temperature will
   reduce generator output by about 2%
• Every 30% of increase in relative humidity of air will reduce
   generator output by about 1.5%
• Every 1,000 feet, (300m) elevation increase will reduce
   generator output by about 4.5%

Even when not in use the generator is potentially
hazardous. Follow the checklist below before starting the
generator. If any problems are found, do not use the
generator until it has been repaired by an authorized
Pulsar Products service center.

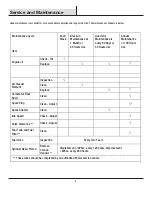
NOTICE

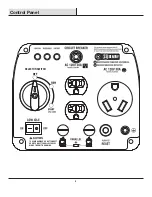
SELECTOR SWITCH

SELECTOR SWITCH

Summary of Contents for PGD40iSCO

Page 1: ...port pulsar products com 866 591 8921 STOP DO NOT RETURN TO STORE HAVE QUESTIONS OR NEED SERVICE FUEL SOURCE CIRCUIT BREAKER INDICATOR LIGHT LOW IDLE PARALLEL CONNECTION TO AVOID DAMAGE DO NOT CONNECT OR DISCONNECT PARALLEL CABLES WHILE THE UNIT IS RUNNING SELECTOR SWITCH SELECTOR SWITCH TO AVOID DAMAGE DO NOT CONNECT OR DISCONNECT PARALLEL CABLES WHILE THE UNIT IS RUNNING PROTECTION AGAINSTCARBON...
Page 2: ...t If the generator is resold kindly include this manual with the generator DANGER indicates an imminently hazardous situation which if not avoided will result in death or serious injury WARNING indicates a potentially hazardous situation which if not avoided could result in death or serious injury CAUTION indicates a potentially hazardous situation which if not avoided may result in minor or moder...

Page 3: ...Monoxide can KILL YOU in minutes Avoid running the generator in the rain or very high condensing humidity Never smoke or allow any heat source near the generator while refueling it Always shut down the generator and allow it to cool before refueling This is a portable generator DO NOT attempt to connect it to any mains panel Take care not to spill any gasoline and wipe up any accidental spills at ...

Page 4: ...NNECT OR DISCONNECT PARALLEL CABLES WHILE THE UNIT IS RUNNING PROTECTION AGAINSTCARBONMONOXIDE CO SENTRY OFF 3 Names of Components Before operating your generator you must read and understand the manual and familiarize yourself with the safe operation practices Lifting Handle Left Enclosure Control Panel Recoil Start Spark Plug Access Rear Panel Muffler Fuel Tank Cap Oil Fill Access Air Filter Acc...

Page 5: ...4 Control Panel SELECTOR SWITCH TO AVOID DAMAGE DO NOT CONNECT OR DISCONNECT PARALLEL CABLES WHILE THE UNIT IS RUNNING PROTECTION AGAINST CARBON MONOXIDE CO SENTRY OFF ...

Page 6: ...GHT INDICATOR LIGHT INDICATOR LIGHT Overload Indicator Red When the overload indicator illuminates the generator has detected excess electrical load and the circuit breaker may open trip If the overload indicator illuminates and the generator has no electrical output perform the following Disconnect all electrical loads then and shut down the generator Reduce total draw of electrical loads connect...

Page 7: ...ing wipe up any gasoline residue with a soft cloth to prevent damage to the plastic enclosures Fuel tank capacity 1 US gallon Engine Oil Your generator ships without engine oil Do not attempt to start the generator without sufficient engine oil in the crankcase 1 Place your generator on a flat stable surface 2 Unscrew the knob to remove oil access cover 3 Unscrew oil dipstick CIRCUIT BREAKER Gasol...

Page 8: ...act then pull it swiftly at once 1 Turn the 3 in 1 knob to OFF position Operating Range of the Generator Ambient air temperature 23F 104F 5 40 C Relative humidity 95 Recommended elevation 5 000 feet 1 500m reduced power at 3 300 feet 1 000 m Ideal Atmospheric Conditions Ambient air temperature 77F 25 C Relative humidity 30 Atmospheric pressure 1 000 millibars Standard Deration Every 9 F 5 C increa...

Page 9: ...t Tip If total load is less than half rated capacity move the Energy Saving Switch to ON If the generator supplies power to multiple devices plug in those devices in from large to small according to rated electrical load Generator grounding Generator Grounding If grounding is required by code or application follow the guidelines below If you have ANY doubt contact a licensed electrician Use ground...

Page 10: ... Fuel Hose Inspection Every Two Years Remove Carbon Deposit Check Fill Check Adjust These tasks should be completed by an authorized Pulsar service center Displacement 225cc every 125 hours displacement 225cc every 250 hours Cylinder Head Piston Fuel Tank and Fuel Filter Valve Clearance Spark Arrester Spark Plug Carburetor Float Bowl Each Week Break In Maintenance at 1 Month or 20 Hours Use Quarte...

Page 11: ... until all oil has drained wipe up any spills 6 Refill crankcase with 12 ounces 0 35l 10w 30 engine oil check with dipstick 7 Tighten oil dipstick replace oil access cover and tighten the knob Air Filter A dirty air filter can cause poor performance and engine damage Perform inspection and cleaning per the maintenance schedule on page 9 If the generator is used in high temperature or under high lo...

Page 12: ... reverse order 1 Remove fuel tank cap and fuel tank filter screen 2 Clean fuel tank filter screen with mild soap and hot water 3 Allow filter screen dry thoroughly and replace it in the fuel tank 4 Replace fuel cap tightly Generator Long Term Storage 1 Turn the 3 in 1 switch to OFF and allow generator to cool completely 2 Remove the spark plug boot to prevent accidental engine start 3 With the eng...

Page 13: ...l tank leave some expansion space Do not run the generator while transporting Protect from direct sunlight Do not transport the generator across rough terrain Engine No Start Fuel System 1 There is no fuel 2 Fuel doesn t reach combustion chamber 3 Contaminated or old fuel 4 There is debris in the fuel valve 5 Carburetor is fouled service carburetor Insufficient Engine Oil Oil level is too low Igni...

Page 14: ...ion Splash Lubrication Noise dB at 7m 62 63 Generator Rated Power kW 1 8 2 8 Rated Voltage V 120 120 Rated Frequency Hz 60 60 Rated Power Factor 1 1 Phase Number Single Phase Single Phase Configuration Motor Brushless Permanent Magnet Voltage Regulation Inverter Regulation Frequency Regulation Inverter regulation Overall Dimension mm 18 9 x11 5 x17 18 9 x11 5 x17 Net Weight Single cylinder four st...

Page 15: ...14 Circuit Diagram 60Hz 120V Electrical Schematic Diagram ...

Reviews: