background image

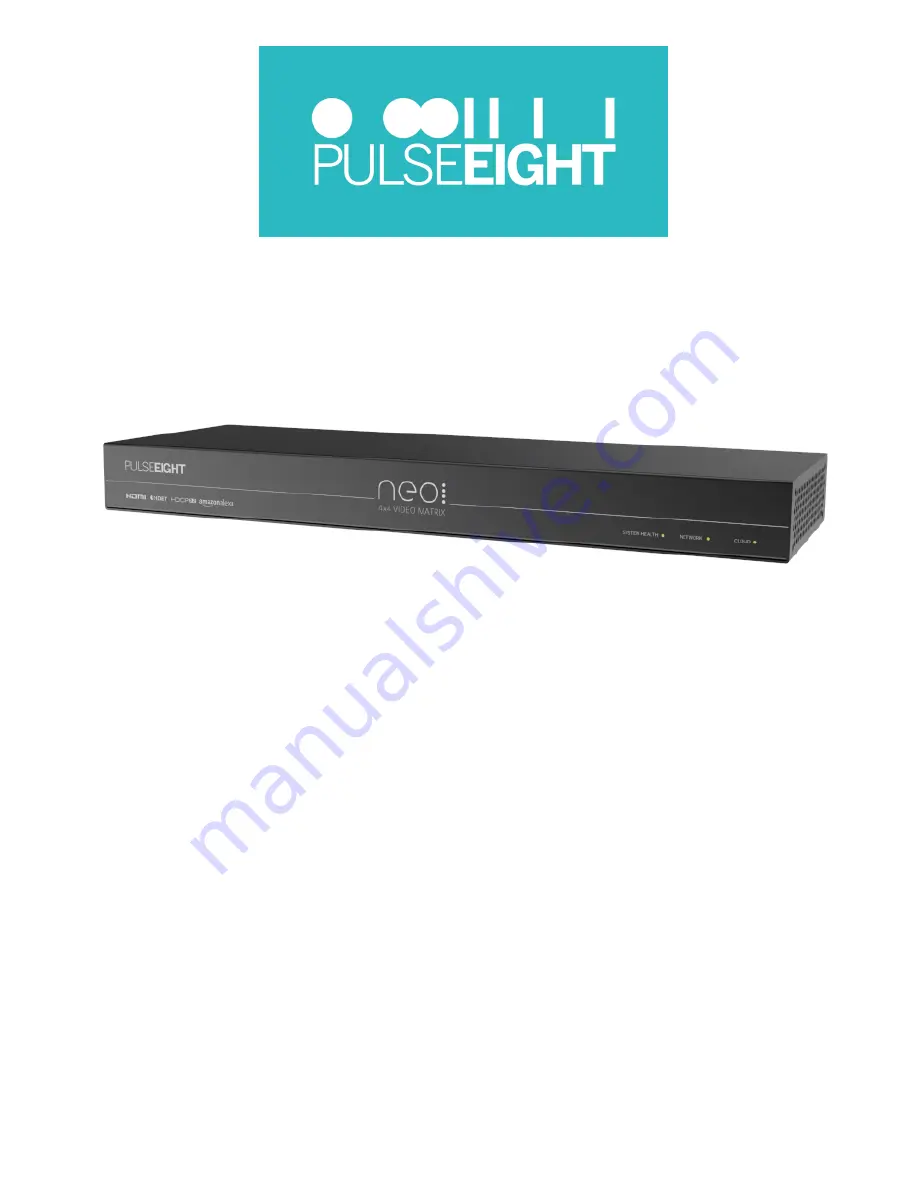
neo:4 Professional Video Mat-

rix


Product User Guide

Summary of Contents for neo 4*4 Video Matrix

Page 1: ...neo 4 Professional Video Mat rix Product User Guide...

Page 2: ...e 5 Panel on page 6 Cabling on page 8 Setup on page 10 Web Interface Setup on page 16 Monitoring Portal on page 32 EDID Management on page 36 Concept Wiring Guideline on page 42 Driver Integration on...

Page 3: ...llation includ ing 4 neo Lite HDBaseT Class B PoH receivers KEY FEATURES l Ultra HD 4K Video Transmission up to 340Mhz 1080p 3D l Supports 4K up to 40 metres l Supports 1080p up to 70 metres l 4 x HDM...

Page 4: ...o 4 Professional Chassis 1U size l 4 x neo Lite Receivers l Country Specific Power Cord l Power Supply l 1 x Infrared Blaster Cable Packs l Installation Guide Note The items listed above comes in a ki...

Page 5: ...disperse the heat If placed in a poorly vent ilated area your equipment may heat up and cause minor irreparable damage to the circuitries Allowing systems to run for prolonged periods under high tempe...

Page 6: ...supplied IR Emitters See full installation guide to identify IR buds I Control IR Input General IR input designed for legacy control systems or where direct IR input is required we recommend the use...

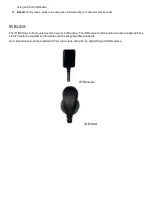
Page 7: ...BUDS The IR Emitter is to be mounted over the source s IR window The IR Receiver bud should be mounted underneath the sink TV with the smallest end forwards and the sticky pad affixed upwards Our vid...

Page 8: ...are not supported Due to the inherent properties of a CCA this will cause an HDBaseT performance issue SHIELDED CABLES If you prefer shielded FTP cables please ensure compatible shielded features are...

Page 9: ...ocal building regulations may apply to the installation of cabling in prop erties It is important to check building regulations to guarantee that you are in accordance with the laws of your territory...

Page 10: ...lu Ray player to the HDMI inputs of the matrix Note It is recommended for ease of setup to connect devices from Input 1 to Input 4 although this is not necessary 4 Connect the supplied IR Emitter Iden...

Page 11: ...pplied neo Receiver s HDBaseT In port The receiver should be situated at the output end i e TV 7 Attached a supplied IR receiver shiny surface into the Receiver s IR RX port and attach the bud to the...

Page 12: ...connect sink devices directly via high speed HDMI cables The output of these ports mirror the output of the adjacent HDBaseT ports Note Can also be used in conjunction with a HDMI Extender Set sold se...

Page 13: ...initialization sequence Note The initialization process takes between 20 seconds and up to 2 minutes However it is possible that a firmware update may be available the first time the unit is powered O...

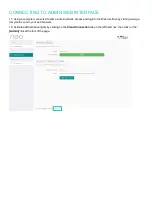
Page 14: ...to same router network access and login to the Web Interface by visiting www go tomymatrix com in your web browser 18 Activate administrative rights by clicking on the Cloud Connection tab on the lef...

Page 15: ...our Pulse Eight rep resentative 20 Within this interface are many setup options please refer to the full installation guide for further details LED STATUS 21 Check the LEDs on the HDBaseT ports of the...

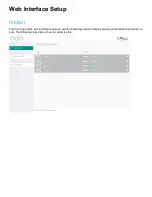
Page 16: ...eb Interface Setup WEB UI The front page of the web interface features a user friendly drag and drop display showing all available inputs and out puts The following steps instruct how to customise thi...

Page 17: ...same router network access and login to the Web Interface by visiting www go tomymatrix com in your web browser Activate administrative rights by clicking on the Cloud Connection tab on the left hand...

Page 18: ...on page insert your Installer ID into the box and save changes this will enable the matrix to be linked to your monitoring account Note If you do not know your Installer ID please check your cloud mon...

Page 19: ...PUT AND OUTPUT OPTIONS Once you have activated administrative rights the Video Routing page should have the following icons When clicked a popup with additional options for the select device will appe...

Page 20: ...l Kodi l Dish l DirecTV Hidden The toggle Hidden The toggle switch can be turned on to hide the selected input from the end user s web interface EDID Profile Drop down menu to select an alternative ED...

Page 21: ...o programme Set Top Box IP control Simply select the type of device from the dropdown list and insert that device s IP address into the adjacent box Note This option only appears if the Input s name i...

Page 22: ...display Remote Module Details This will display a popup detailing the output s remote end details Link Status Indicates if the link is active Link Quality Indicated the quality of the link Click the...

Page 23: ...boxes will indicate if performing correctly along with the reading of the internal temperature sensor that will indicate if the system is overheating Under the System Health tab you will also find Ad...

Page 24: ...R receiver is picking up noise Example of failure message The IR receiver connected to this port is occasionally picking up stray IR messages this may occasionally interrupt IR communication to the co...

Page 25: ...plain if your cables meet the above criteria but are still marked as Poor due to this spiking only happening after a few hours for a few seconds for example The Channel Errors test is a measurement of...

Page 26: ...e matrix is connected to the Pulse Eight Monitoring Portal Alexa This matrix can be controlled by Alexa voice control set this up by clicking on the Setup Voice Services but ton See next section for f...

Page 27: ...on to the internet and the rest of your control systems Network Connectivity This colour coded status will notify you if the system is connected to a network or if there is an issue Mode Dropdown menu...

Page 28: ...content when no sink device is watch ing a source device and resume playback when you switch back Remote Control Combo Keys Toggle switch to turn on this function If there are missing keys on the TV r...

Page 29: ...g systems or back wards compatibility Each output port can be configured to use a different IR profile if Default is set this is the profile used FRONT PANEL SETTINGS Under the Front Panel tab you wil...

Page 30: ...ll find manufacturing information about your product you may be asked for this information if you request help or support Please Note The design and features of the Web Interface is ever evolving and...

Page 31: ...al at http monitoring pulse eight com this program will run on Windows 7 or newer only when run it will scan your network and detect the IP address of your matrix If you have multiple neo systems on t...

Page 32: ...ashboard will display your details including your Installer ID If you don t have an installer ID please contact your Pulse Eight representative to get an account created MY INSTALLS Under the My Insta...

Page 33: ...Once created you will then be able to assign systems to the install by clicking the Add button in the Products sec tion This will then bring up a page with a dropdown menu to select a system...

Page 34: ...ler ID into the web interface of the system When you click on a system a system overview page will appear with details of the unit such as l Serial Number l Model Number l Status l System Temperature...

Page 35: ...ils any updates available for the system There is also a toggle switch to turn on Hotfix Updates whereby updates are delivered automatically to the system Installation Report displays all crucial info...

Page 36: ...equired by the source e g media box game console etc to identify what is the capability of the output screen The neo video matrix contains EDID presets to ease the setup configuration Here are some of...

Page 37: ...lease look over the Web Interface Setup section to access Video Routing Admin section If you do not have the password to access the Admin please check with your installer or your support representativ...

Page 38: ...on Denominator It will set the EDID to only support the resolutions supported by all the displays connected to the outputs Clone Display X Copies the same EDID as TV attached to the output X HDR Ultra...

Page 39: ...llustrate how EDID management would work in a setup Dynamic Settings In this scenario HDMI Input 1 will limit the resolution of the source to 1080p in accordance with the settings selected This means...

Page 40: ...s scenario HDMI Input 1 will set the resolution to a maximum of 4K This means all displays will receive a 4K video signal Note that the last display which has the maximum resolution of 1080p and will...

Page 41: ...ler In this scenario HDMI Input 1 will set the resolution to a maximum of 4K This means all displays will receive a 4K video signal Note that the last display is using a 4K Downscaler SKU HDMI2 4KDS t...

Page 42: ...Concept Wiring Guideline...

Page 43: ...he first step is to download the necessary driver 1 Go to monitoring pulse eight com and login with your Installer ID If you do not have an Installer ID please get in touch with your sales representat...

Page 44: ...ome control system l Control4 l Creston Home CONTROL4 Note This is an example for the neo 4 Pro driver Use the appropriate driver to control the intended hardware 1 Add the drivers by clicking on Driv...

Page 45: ...2 Click the Search tab on the right hand side and search for the driver by the name drag the driver from the Search window into the correct Room location 3 Click the Action tab in the matrix driver...

Page 46: ...u complete your installation you must set your Installer Id This value is used to register this system to your mon itoring account so you can monitor and support the system remotely On the properties...

Page 47: ...ntrol AV tab 7 Setting the connections is no different that any other driver however ensure that the Inputs and Outputs match the physical wiring as per the matrix 8 Setup is now complete You may need...

Page 48: ...se eight com CRESTON HOME Note This is an example for the neo 8a driver Use the appropriate driver to control the intended hardware Before the Matrix can be configured as a device within Crestron Home...

Page 49: ...To attach the driver to your project please follow the steps below 1 Select Pair Devices...

Page 50: ...2 In the Pair Devices section of the Crestron Home configuration please select Drivers and then the device type...

Page 51: ...3 For the Pulse Eight Neo Matrix please select AV Switcher when choosing the appropriate device type...

Page 52: ...vice type Crestron Home will locate the Driver you loaded into Crestron Toolbox earlier and input it into the processor for you Please click on TCP Client and you will then be prompted to rename the m...

Page 53: ...e that is connected to the same network as your matrix and Creston Home On that browser navigate to gotomymatrix com this will bring up your neo matrix product The IP address will be present in the se...

Page 54: ...6 Your neo matrix is now linked to Creston Home Your final step will be configuring your inputs and outputs on Crestron Home...

Page 55: ...s l Picture snow HD noise signifies a failure to fully establish a signal and can often be caused by poorly ter minated RJ45 connectors or excess cable lengths Ensure your cable is correctly wired to...

Page 56: ...ANEL LED VALUES SYSTEM HEALTH LED Solid red Powering on or fault found Solid green System healthy CLOUD LED Solid red Not connected to the cloud Solid green Connected to our cloud NETWORK LED Solid re...

Page 57: ...Video Resolutions 720p 1080i 1080p 3D 4k 30Hz 4 4 4 4k 50 60Hz 4 2 0 Supported Audio Formats PCM 2 0 LPCM 2 0 LPCM 5 1 LPCM 6 1 LPCM 7 1 Dolby Digital 2 0 Dolby Digital 5 1 Dolby Digital EX 6 1 Dolby...

Page 58: ...th Textured Powder Coated Steel Product Dimensions 43 x 14 x 4 3 cm Matrix Product Weight 2 05 kg Matrix Operating Temp Range 0 to 35 C 32 to 95 F Operating Humidity Range 5 to 90 RH no condensation M...

Page 59: ...Additional FREQUENTLY ASKED QUESTIONS FAQ Please visit Pulse Eight Support page for a more updated FAQs...

Page 60: ...se instructed please do not open any of our products Doing so will invalidate your warranty As part of the troubleshooting procedure you may be instructed to open the device but you can only proceed w...

Page 61: ...t via phone or opening a support ticket Pulse Eight will try to help troubleshoot and resolve the issue remotely 2 If unable to resolve the fault remotely Pulse Eight will schedule a collection for th...

Page 62: ...air can be arranged at the dis cretion of Pulse Eight subject to availability Pulse Eight Current or Discontinued Product Out of Warranty 1 Contact support via phone or opening a support ticket Pulse...

Page 63: ...of Pulse Eight subject to availability Pulse Eight Discontinued Product Within first year of warranty 1 Contact support via phone opening a support ticket or emailing support pulse eight com Pulse Ei...

Page 64: ...2 If unable to resolve the fault remotely Pulse Eight can arrange for the unit to be repaired cost of the repair will be charged to the Distributor...

Page 65: ...The cost of renting a loan unit starts at 50 per week shipping Pulse Eight Discontinued Product Within first year of warranty Contact support via phone or opening a support ticket Pulse Eight will try...

Page 66: ...eight com Pulse Eight will try to help troubleshoot and resolve the issue remotely 2 If we are unable to resolve the issue remotely we will do what we can to rectify the issue and we will raise an RM...

Reviews: