background image

Item

Weekly

Monthly

Annually

Console Overlays

Clean

Bottle Holders / Accessory Trays

Clean

Inspect

Console Mounting Bolts

Inspect

Hardware

Inspect

Frames

Clean

Inspect

Plastic Covers

Clean

Inspect

Inspect

Handpulse Sensors

Clean/Inspect

Pedals

Clean

Foot Adjusters

Inspect / Adjust

Inspect

       Assembly, Operation & Parts Manual                   G-Range                         CV                              Pg

34


Cleaning & Maintenance 

(Continued)

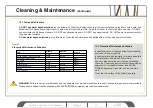
10.3 Compatible Cleaners

DO NOT use water based solutions

 (on the following): Clean the display console, all exterior surfaces and the frame with a mild, non-

abrasive silicon based household cleaner.  Apply via a soft micro fibre cloth.  Apply the cleaner to the cloth before cleaning.  DO NOT 
use ammonia or acid based cleaners.  DO NOT use abrasive cleaners.  DO NOT use paper towels.  DO NOT apply cleaners directly to 
the equipment surfaces.

DO use water based solutions

 (on the following): Clean the upholstery and handgrips with a mild soap and water solution.

WARNING:

 Failure to carry out maintenance on the equipment as per this manual could result in serious injury and void your warranty.  

Please ensure all publications supplied with PULSE FITNESS equipment are read and understood.

10.4 Preventive Maintenance Schedule

Inspect and vacuum the area directly surrounding 
and under the unit regularly.
Inspect exterior parts regularly for wear, particularly 
the Handlebars, Pedals and Power Cord.
Check to make sure the unit is properly levelled.
Clean the Console and all exterior surfaces with an 
approved or compatible cleaner (see PULSE 
FITNESS Approved Cleaners) and a micro fibre 
cloth.
Clean the top surface of the Pedals regularly.

Figure T

Preventive Maintenance Schedule

Summary of Contents for 220G

Page 1: ...220G Assembly Operation Reference Parts Manual EU US...

Page 2: ...ice Tel 44 0 1260 294600 Email global service pulsefitness com Corporate Website www pulsefitness com Regional Distributor Dealer Address es Current List of Distributors Dealers https www thepulsegrou...

Page 3: ...ning professional medical advice before using fitness equipment particularly if the user has a family history of high blood pressure or heart disease is over the age of 45 smokes has high cholesterol...

Page 4: ...rules These limits are designed to provide reasonable protection against harmful interference when the equipment is operated in a commercial environment This equipment generates uses and can radiate r...

Page 5: ...21 Fully Assembled 220G Step 22 Important Safety Instructions 23 7 1 Introduction 23 7 2 Set Up 25 7 3 Electrical Power Requirements 26 7 4 Battery Powered Series 1 2 26 7 5 Where to Place the 220G 27...

Page 6: ...bly Operation Parts Manual G Range CV Pg06 11 1 Specifications 36 11 2 Physical Dimensions L x H x W 37 11 3 Weight kg lbs 37 11 4 Console 37 Parts Lists Exploded Diagrams 40 12 1 Parts Lists Exploded...

Page 7: ...Sensor Drinks Bottle Pedal Scuff Guard Console Series 1 2 or 3 Book Rest Resistance Adjustor Storage Bucket iPod iPhone Dock Transport Wheels Levelling Foot A B C D E F G H I J K 220G Overview 1 Assem...

Page 8: ...Series 1 2 or 3 Book Holder Column iPhone Pod Dock Storage Buckets Handlebars Drinks Bottle Base Frame Pedals Upright Support Bars Scuff Guard Moulding Console Bolts Handlebar Bolts Feet Strut Bolts...

Page 9: ...Frame into the Main Body as indicated and then secure tightly with the base frame washers and bolts Note To aid installation undo the two cross head screws on either side of the body See Figure A Tool...

Page 10: ...2 Attaching the Scuff Guard Attach the Scuff Guard by placing over the frame joint and securing with 2 bolts See Figure B Tools Required Phillips Screwdriver Assembly of the 220G Continued Assembly Op...

Page 11: ...washers and circlips Then finally fix with grub screws washers and lock nuts and cover with caps See Figure C Note To aid installation insert a spacer between the Main Body and the Pedal Arm to hold d...

Page 12: ...and secure both mouldings with the appropriate bolts See Figure D Note Ensure that all bolts are tightened securely Tools Required 8mm Combination Spanner External Circlip Plyers Assembly of the 220G...

Page 13: ...trapped Next lift the assembled Column up and lean against its Mounting Bracket and secure the bolts into position by hand Once into position use an Allen Key to tighten up the bolts ensuring that th...

Page 14: ...Support Bars Place the Support Bars into the Base Frame bosses and tighten with a screw See Figure F Tools Required 3mm Allen Key M6 x 6 Grub Screw Figure F Assembly of the 220G Continued Assembly Op...

Page 15: ...rame using the handlebar bolts making sure that the Hand Pulse sensor wire passes through the large hole and appears at the top of the frame See Figure G NOTE Fasten Bolts securely Tools Required 8mm...

Page 16: ...positioned straight before tightening screws Insert the Storage Buckets into the metal loops and press down firmly See Figure H Tools Required 1 x Philips Head Screwdriver Refer to document 135 767 f...

Page 17: ...ling the Console Place the top half of the Console onto the bottom half and carefully connect all the Wires into the corresponding Connectors from the front of the Console to the back See Figure K Ref...

Page 18: ...ack 4 3 Wiring the Console Carefully pull the Electrical Connectors up from the Column Ensure that all the Electrical Connectors attach to the Circuit Board as shown See Figure L Refer to document 135...

Page 19: ...5 Securing the Book Holder Carefully line up and firmly push the Book Holder into the consoles allocated slots until it is solidly fixed into position See Figure N NOTE This may take some force Be car...

Page 20: ...of the Series 1 2 3 Consoles refer to documents 135 1379 Series 1 Console 3 5 CV 135 1299 Series 2 Console 5 0 CV 135 1300 Series 3 Console 6 0 CV Cirrus V1 135 1824 Series 3 Console 6 0 CV Cirrus V2...

Page 21: ...nt As a final check make sure that the Console Handlebars and Storage are correctly aligned and are not twisted Refer to document 135 767 for further alignment instructions 5 Alignment Checks on the 2...

Page 22: ...peration Parts Manual G Range CV Pg22 Your 220G Step Stepper is now ready to use please read the Technical and Console booklets to become familiar with all operational and safety features before use C...

Page 23: ...widest part of the Independent Stepper and other objects on either side Provide at least 1m 3 28ft between the front of the PULSE FITNESS Step Independent Stepper to any other objects WARNING To redu...

Page 24: ...sponsible for their safety Do not use this product outdoors near swimming pools or in areas of high humidity Never operate a PULSE FITNESS product with the air openings blocked Keep air openings free...

Page 25: ...maged please contact PULSE FITNESS immediately for replacement warning labels Warning labels are shipped with every product and should be installed before product is used PULSE FITNESS is not responsi...

Page 26: ...the plug does not fit into an available electrical outlet have a proper outlet installed by a qualified electrician 7 4 Battery Powered Series 1 2 Only Series 1 2 consoles are powered by a rechargeabl...

Page 27: ...ion in which it will be used See Section 11 titled Specifications for the dimensions of the footprint Allow a clearance of 1 0m 3 28ft in the direction the Independent Stepper is accessed from Allow a...

Page 28: ...le should begin its boot up cycle The Series 3 Consoles will show a message indicating it is initialising which takes approximately 2 minutes Note If any of the Consoles do not light up contact PULSE...

Page 29: ...DANGER Improper connection of the equipment grounding conductor can result in a risk of electric shock Check with a qualified electrician or serviceman if you are in doubt as to whether the product is...

Page 30: ...make it difficult to view the screen Note The Independent Stepper is not suitable for outdoor use If the chosen surface is carpet then the Independent Stepper can be pushed to the desired position on...

Page 31: ...st be levelled Check the front stabilising feet to determine which foot does not rest fully on the floor If necessary adjust the height of the feet to compensate Turn the feet to the left or right to...

Page 32: ...via the on off I O switch mounted at the front of the machine See Figure S The Console should begin its boot up cycle The Series 3 Consoles will show a message indicating it is initialising which take...

Page 33: ...on the Console 10 2 Cleaning the Equipment PULSE FITNESS Approved Cleaners United States Availability Only Two preferred cleaners have been approved by PULSE FITNESS reliability experts PureGreen 24 o...

Page 34: ...s DO NOT use paper towels DO NOT apply cleaners directly to the equipment surfaces DO use water based solutions on the following Clean the upholstery and handgrips with a mild soap and water solution...

Page 35: ...unit which is located on the front of the unit near the foot rail 3 Contact Pulse Fitness Global Services Team refer to page 02 10 6 Recycling the Battery When this PULSE FITNESS product is about to b...

Page 36: ...eries 1 2 3 Anti slip pedals Series 1 2 3 Independent pedals Series 1 2 3 Pedal arm drive Kevlar polychain Series 1 2 3 Twin removable storage buckets cup holders Series 1 2 3 Integrated device storag...

Page 37: ...ries 1 17 8cm 7 Integrated High Contrast Colour Display 16 9 Aspect Ratio 512x300 Resolution Series 2 25 7cm 10 1 8 Integrated High Contrast Colour Display 16 9 Aspect Ratio 512x300 Resolution Series...

Page 38: ...easy moderate advanced Heart rate control variable heart rate training modes Variable cool down with manual override Series 3 Quick Start E Scape virtual workouts road lake valley beach Goals Time Di...

Page 39: ...nding on program Distance elapsed remaining depending on program SPM Calories used Watts Heart rate METs Extendable workout goal User selectable management programmable units imperial metric User sele...

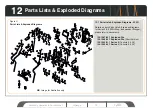
Page 40: ...1 Parts Lists Exploded Diagrams 220G Details on both Parts Lists Exploded Diagrams for Series 2 3 220G Step Independent Stepper please refer to documents 135 1087 02 Exploded Dia 135 1088 03 Exploded...

Page 41: ...Assembly Operation Parts Manual G Range CV Pg41 User Notes 13...

Page 42: ...Assembly Operation Parts Manual G Range CV Pg42 User Notes Continued...

Page 43: ...mail global service pulsefitness com 2018 Pulse Fitness Ltd All rights reserved Pulse Fitness is a registered trademark Any use of these trademarks without the express written consent of Pulse Fitness...

Reviews: