5
CAUTION:
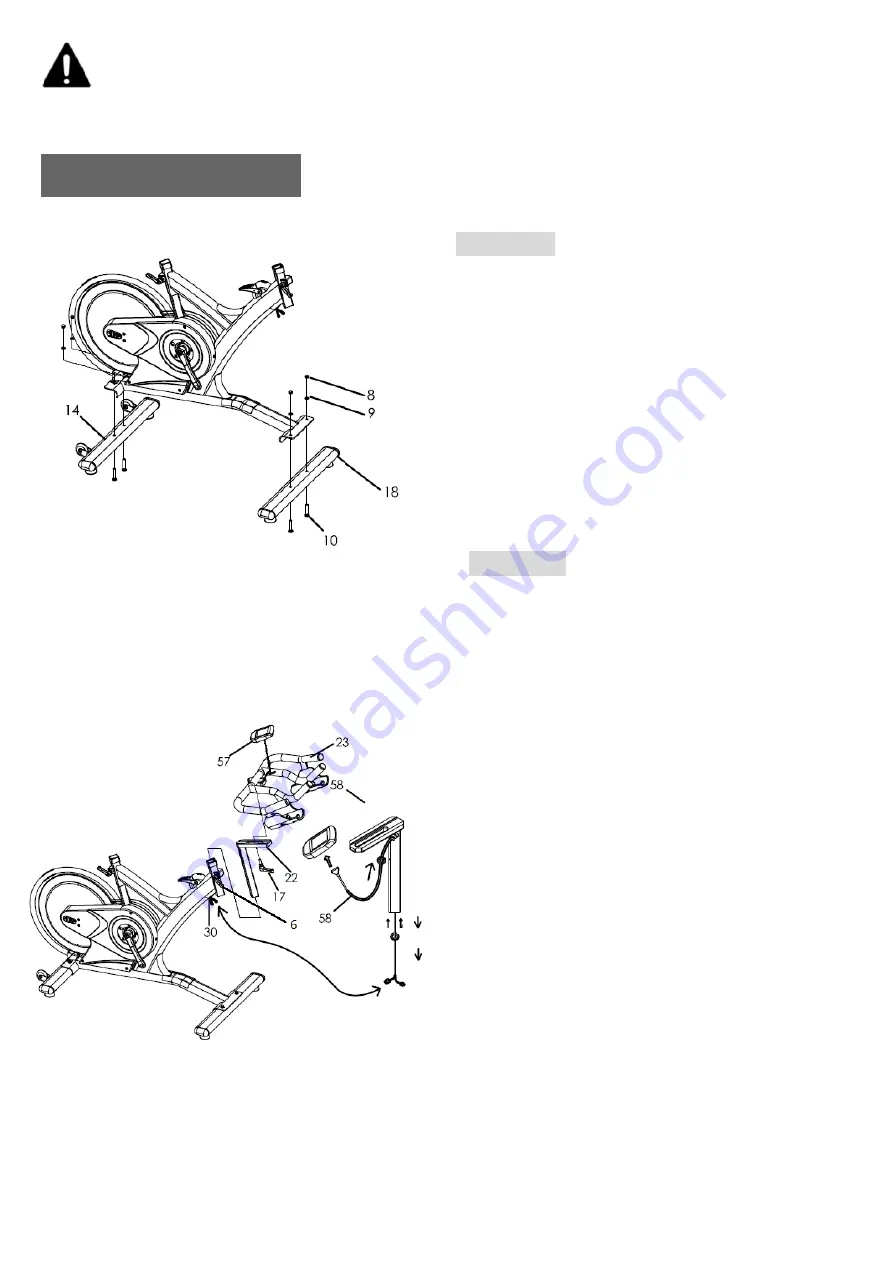
During assembly it is recommended that all bolts be tightened by hand,
upon completing assembly, bolts should then be properly secured using the wrench
provided. To avoid injury, check bolts carefully before use.
Assembly
Step one
Attach the rear foot tube (14) first by lifting
up the rear of the frame and sliding the
rear foot tub under the frame. Align the
holes of the tube and frame then insert
bolt (10) from below. Secure the bolt with
washer (9) and nut (8) use the wrench.
Use the same procedure to secure the
front foot tube (18).
Attach the top protect cover (68) to the frame
using the bolts (71) to fixed.
Step two
Attach the handlebar post (22) by
inserting it into the head tube of the
frame. Make sure the release lever (6) is
loose enough so the handlebar post can
slide down to the desired position.
Tighten the release lever (6) to secure.
Attach the handlebar slider (23) on the
top of handlebar post (22), make sure
secure by tighten the release lever (17)
from below.
Securely fixed the console (57) on the
Handlebar Bracket by screw which is
coming from the back of the console.
Connect the cable (58) to the back of the
console (57) and make sure the other
side of the console cable (58) is
connected securely to the cable coming
from the frame. Additionally, make sure
that the cable stopper (30) is plugged
into the hole that the lower cable
connections came through.
Summary of Contents for 224B-AAB
Page 1: ...224B AAB Group Cycle User Manual STUDIO CIRCUIT...
Page 2: ...2...
Page 9: ...9 Exploded Drawing...
Page 15: ...15...
Page 16: ...135 2044 1...


