


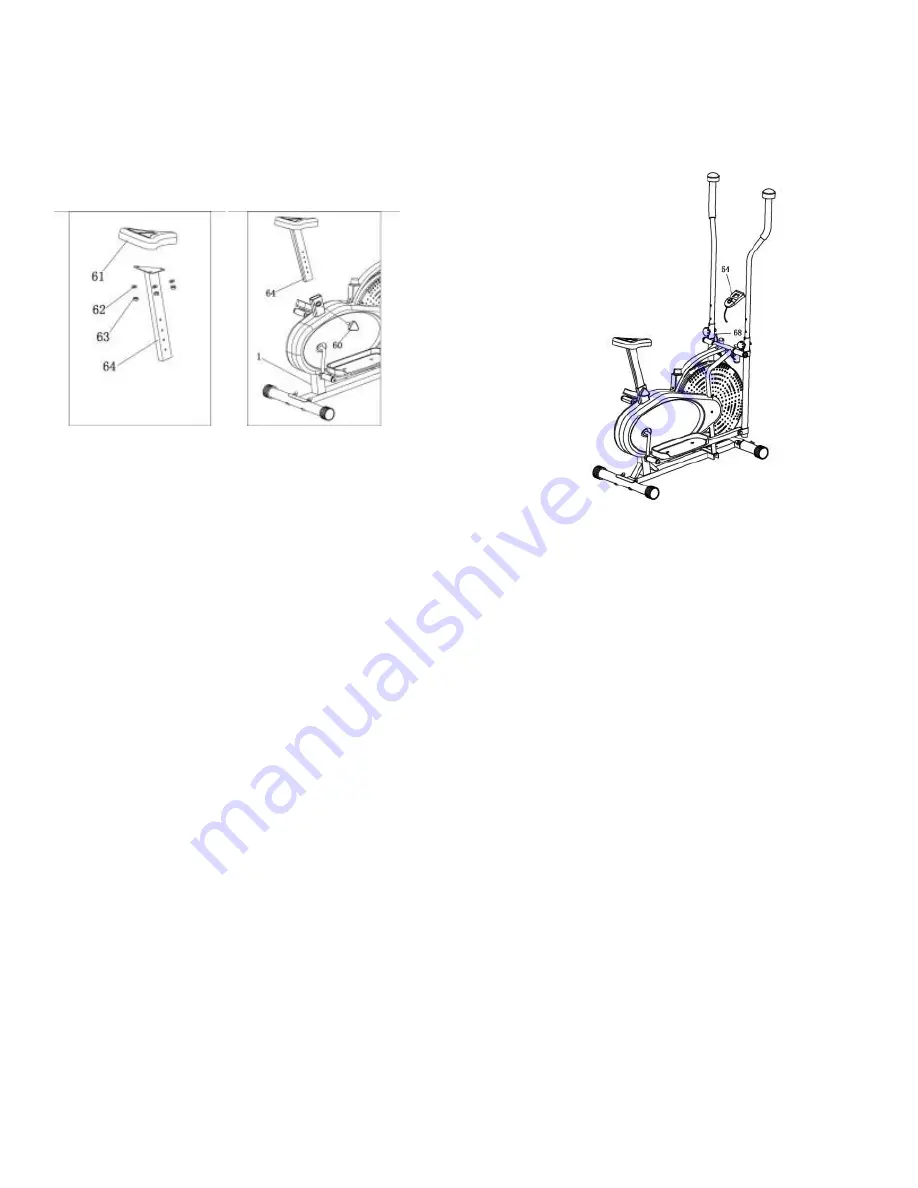
STEP 4: ASSEMBLE SEAT, MONITOR, AND PLACE DOME COVERS
Locate Seat Cushion (61), Seat Post (64), Seat Adjustment Knob (60) and the Monitor (54).
A.
Remove the Hex Nuts and Washers from underneath the Seat Cushion (61). Guide the exposed
bolts on the Seat Cushion underside through the 3 holes in the Seat Post (64). Place a washer
against the plate on the Seat Post and secure with the Hex Nuts.
B.
Place the assembled Seat Cushion/Seat Post into the rectangular hole in the top on the unit.
Carefully lower this assembly and secure with the Seat Adjustment Knob (60). Be sure to watch for
pinch points in case the seat suddenly drops. Before continuing, make sure that this assembly is
secure, and the knob is extended through one of the holes in the post.
D.
Connect the Sensor Wire (68) to the short wire which extends from the back of the Monitor (54).
Once this connection is secure, slide the Monitor onto the short metal tab in between the Handles
until it locks into place. Make sure that the wires are not contacting any moving parts, and ensure that
this wire will be kept away from the Fan Wheel and the Handle assembly at all times.
E.
Once assembly is complete, place a dome cap over in the following areas: The front handle hinges
on 6L, 6R, The welded front side of the Handle Lock Knobs array (17), and over the bolts holding the
rotation rod in place (12).
Summary of Contents for 8536DT
Page 6: ...8536DT EXPLODED VIEW ...


