background image

9

MODEL# 8640PC 

ASSEMBLY INSTRUCTIONS

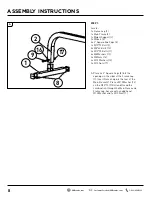
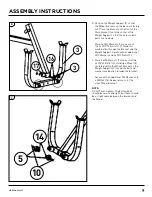
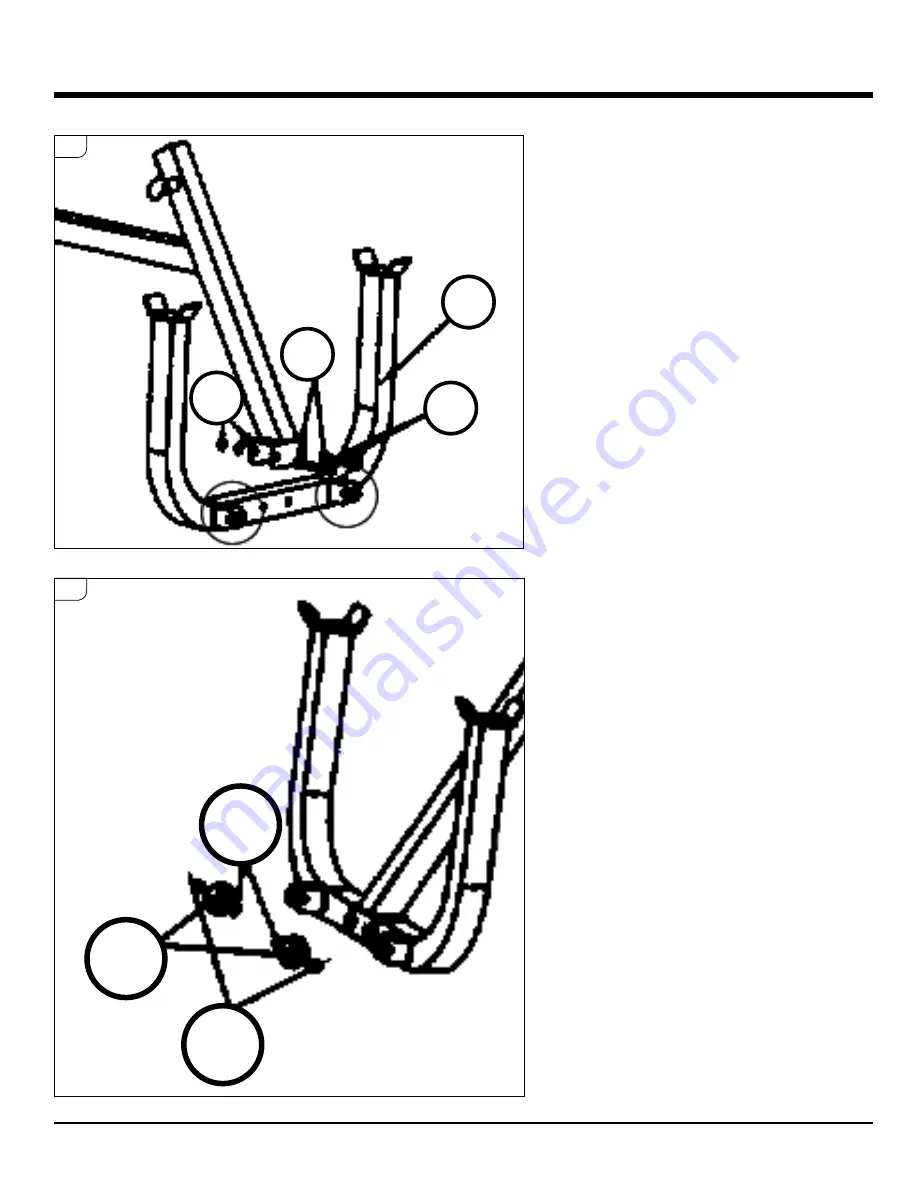
B. Position the Weight Support (3) so that 

the Wheel Brackets on the base are facing 

out. Place the bracket on the front of the 

Main Frame (1) onto the center of the 

Weight Support so that the holes in both 

parts are lined up. 


Place 2x M10 Washers (16) on each of 

the 2x M10*75 Bolts (11). Thread this 

combination through the bracket and the 

Weight Support. Secure with 2x additional 

M10 Washers and 2x M10 Nuts (17).

C: Place 2x M8 Washers (13) on each of the 

2x M8*40 Bolts (10). Holding a Wheel (5) 

centered within the Wheel Bracket on the 

Weight Support (3), thread the bolt and 

washer combination through the bracket.  


Secure with an additional M8 Washer and 

a M8 Nut (14). Repeat process for the 

other Wheel Bracket. 

NOTE:


DO NOT over-tighten. The bolt and nut 

should be secure and tight, but there should 

be a slight space between the bracket and 

the Wheel. 

B

C

3

3

16

14

5

10

17

Summary of Contents for 8640PC

Page 1: ...SERVICE Do not allow more than one person at any time Contains small parts which may cause choking Adult assembly required The contents of this package are not suitable for children under 3 years old...

Page 2: ...that all of the parts are included If you find that any parts are missing or damaged we will happily provide replacement parts at no charge within 30 days of purchase Please keep in mind that for sel...

Page 3: ...ater or ice weather damage damage caused by unauthorized repair work or damage caused by improper use of the products are not covered by the product warranty No other warranty beyond that specifically...

Page 4: ...ZARD Small Parts NOT for children under 3 years of age WARNING While every attempt is made to ensure the highest degree of protection in all equipment we cannot guarantee freedom from injury The user...

Page 5: ...ine the exercise program that is most appropriate for your particular age and or physical condition IF YOU EXPERIENCE any pain or tightness in your chest irregular heartbeats shortness of breath faint...

Page 6: ...6 CustomerService GQBrands com GQBrands com 1 866 498 5269 EXPLODED VIEW 7 4 15 6 2 1 9 8 16 17 11 3 13 10 5 14 16 12...

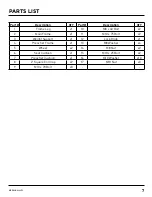
Page 7: ...10 M8 x 40 Bolt x2 2 Main Frame x1 11 M10 x 75 Bolt x2 3 Weight Support x1 12 Lock Knob x1 4 Preacher Frame x1 13 M8 Washer x4 5 Wheel x2 14 M8 Nut x2 6 Seat Cushion x1 15 M10 x 25 Bolt x2 7 Preacher...

Page 8: ...40 Bolts 10 2x M10 75 Bolts 11 4x M8 Washers 13 2x M8 Nuts 14 6x M10 Washers 16 3x M10 Nuts 17 A Place 2x 2 Square Caps 8 into the openings in the sides of the Frame Leg 1 Insert Frame Leg into the r...

Page 9: ...ugh the bracket and the Weight Support Secure with 2x additional M10 Washers and 2x M10 Nuts 17 C Place 2x M8 Washers 13 on each of the 2x M8 40 Bolts 10 Holding a Wheel 5 centered within the Wheel Br...

Page 10: ...he Seat Cushion 6 on the Main Frame 1 lining the cushion to the two holes near the rear of the frame Place 2x M10 Washers 16 on the 2x M10 70 Bolts 9 and secure the Seat to the Main Frame from the und...

Page 11: ...on Thread 2x M10 Washers 16 onto the 2x M10 25 Bolts and secure the Cushion to the Frame Once assembled slide the Preacher Frame down into the opening in the front of the Main Frame 1 Secure the Frame...

Page 12: ...ffice for review Weight bars weights dumbbells etc Are not included with this bench These must be purchased separately Question Is there any maintenance I need to do for my Bench Answer Before each us...

Reviews: