CONSTRUCTION
FITTING THE LAMP
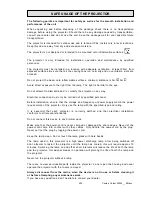
Position the projector-head in vertical position and lock it via the locking knobs.
Remove the projector-head cover by loosening the 4 retaining-clips.
Open the dichroic-colour-filter bracket by undoing the 2 M4 knurled-screws.
Insert the lamp in the lamp-holder, and ensure the little bubble on the lamp is at a right
angle (90°) to the beam path. Keep the lamp clean during installation.
Tighten the 2 M3 lamp fixing screws manually. Do not overtighten.
Close the dichroic-colour-filter bracket and reinstall the projector-head cover. Make sure
that all screws and retaining-clips are tightened.
Note:
The MSI series are high pressure lamps with external igniters (
). Care should
always be taken when handling these lamps. Always read the manufacturers "Instructions
for use" enclosed with the lamp.
POWER SUPPLY - MAINS
Use the plug provided to connect the mains power to the projector paying attention to the
voltage and frequency marked on the panel of the projector. It is recommended that each
projector is supplied separately so that they may be individually switched on and off. It is
recommended that the projector connect to the mains using a 3-pin 16A plug.
IMPORTANT
It is essential that each projector is correctly earthed and that electrical installation
conforms to all relevant standards. Power consumption of the Century Colour 2500L is
2800W at 220V.
4/14
Century Colour 2500L EN.doc


