1 0
Sani-Twist Filter Flushing: Detailed instructions
To access the filters please remove the right-side cabinet door by first
removing the 2 fastening screws. After removing the side panel, you will see
the familiar filter manifold setup including the full size PWT standard filters.
1. Upon accessing the filter area, on some production runs it will be necessary
to apply the leak stop. To do so please follow the following steps.
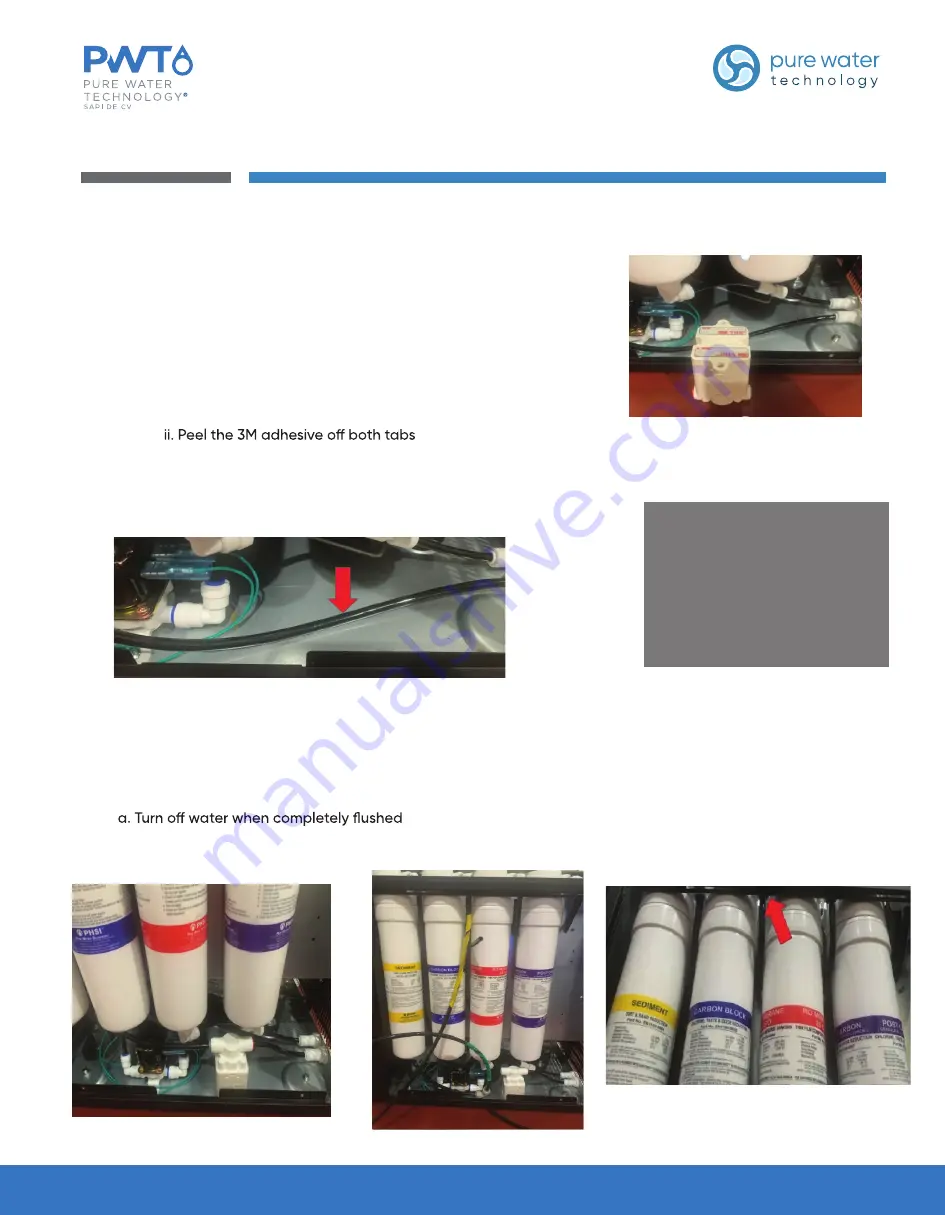
a. Locate the leak stop that is included with the system.
0 5
F i l t e r F l u s h i n g P r o c e d u r e s
To Flush pre filters:
1. Remove the tubing from the filter side of the leak stop (gray collet) and connect your source line directly to the tubing
with a union fitting.
2. Remove the tubing that connects to the “out” fitting on the carbon block filter head and connect a drain line to this
fitting.
3. Turn the water on and flush according to the instructions on the filter label
4. Remove the supply and drain lines and reconnect the tubing to their originally installed location.
i. Turn the leak stop upside down to locate the double sides 3M adhesive
iii. Locate the supply line – the closest tube connected to a bulkhead fitting
iv. Cut the tube and then insert ends into the leak stop and push the leak stop down against the metal
2. Look for arrow on the leak stop and ensure direction of flow goes toward the filters
3. Filter flushing procedures.
NOTE: In the following photos:
•The line wrapped in green tape will
represents the source line
The line wrapped in yellow tape line
will represent the drain line
Manual de Servicio PW90 CT Página 10 de 25
Pure Water Technology SAPI de C.V. (2022) Todos los derechos reservados
atencion@purewater.mx
purewater.mx
81-1642-7777


