6
[
EN
]
7.
EXPORT OF CONCENTRATIONS
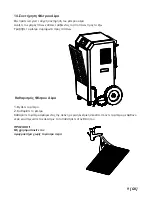
This dehumidifier is equipped with a water collection tank and with accessories for a 14mm pipe. If you work with the
water collection tank, the appliance will shut off automatically when it is full and the red light on the control panel will
light up.
Γ
To use the pipe to drain the condensate, you should proceed as follows:
R
emove the plug from the bottom of the water tank
Attach the 14mm fitting to the bottom of the water tank
Connect the pipe provided with the dehumidifier to the fitting.
The end of the pipe must always be at a lower level than at the top of the water tank and direct it to a
larger tank or directly to a drain.
The pipe must go down, as it uses gravity to drain.
.
STARTING THE DEVICE
1.
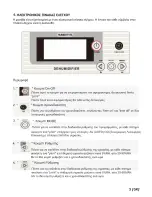
Plug in the machine and you will hear a "beep"
.
2.
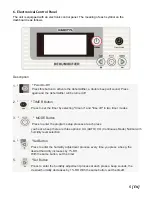
Press the "Power" button once and the LCD will open
.
When all the indications are normal, the room humidity will appear on the screen
.
3.
oisture settings. Press the "+" and "-" buttons to select the desired humidity
of the space. When the moisture selection is at least 3% more than room humidity, the
dehumidifier starts its operation. When the moisture selection is at least 3% less than room
humidity, the dehumidifier stops operating.
4.
When the relative humidity levels we select are less than 30% RH the
dehumidifier starts continuous dehumidification
.
5.
Setting a preset time: Press the "Time" button and the "hour" button on
the control panel will light up, press "+" and "-" to set the operating time.
6.
Disable: Press the "Power" button as the machine runs, the dehumidifier
will shut down and all the lights will go off.
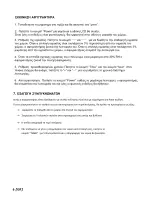
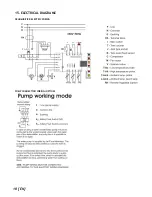
1.
The pump absorbs water automatically.
2.
If you want the water to be absorbed by your choice, press it
button "TIMER" for 5 seconds and the water absorption will start
.
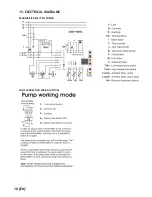
Water waste pump
Summary of Contents for DESIGN SERIES PD 130LA
Page 1: ...DESIGN PD 130LA...
Page 2: ......
Page 3: ......
Page 4: ...4 GR...
Page 5: ......
Page 6: ......
Page 8: ......
Page 9: ...9 GR 1 2 14...
Page 10: ...15 ELECTRICAL DIAGRAME DEHUMIDIFIER ELECTRIC WIRING PUMP CONNECTION WIRING OPTION 10 EN...
Page 11: ......
Page 12: ...INDUSTRIAL DEHUMIDIFIER DESIGN SERIES PD 130LA...
Page 21: ...15 ELECTRICAL DIAGRAME DEHUMIDIFIER ELECTRIC WIRING PUMP CONNECTION WIRING OPTION 10 EN...
Page 22: ......

