


7
IMPORTANT INSTRUCTIONS
When using electrical appliances, basic precautions should always be followed to
reduce the risk of fire, electric shock, and injury to persons, including the following:
•
Read all instructions before using this heater.
•
This heater is hot when in use. To avoid burns, do not let bare skin touch hot surfaces. If
provided, use handles when moving this heater. Keep combustible materials, such as
furniture, pillows, bedding, papers, clothes, and curtains at least 3 feet (0.9 m) from the
front of the heater and keep them away from the sides and rear.
•
Extreme caution is necessary when any heater is used by or near children or invalids and
whenever the heater is left operating and unattended.
•
Always unplug heater when not in use. (This item may be omitted if the heater is
provided with a clock-operated switch).
•
Do not operate any heater with a damaged cord or plug or after the heater
malfunctions, has been dropped or damaged in any manner. Discard heater, or return
to authorized service facility for examination and/or repair.
•
This heater is not intended for use in bathrooms, laundry areas and similar indoor
locations. Never locate heater where it may fall into a bathtub or other water container.
•
Do not run cord under carpeting. Do not cover cord with throw rugs, runners, or similar
coverings. Do not route cord under furniture or appliances. Arrange cord away from
traffic area and where it will not be tripped over.
•
To disconnect heater, turn controls to off, then remove plug from outlet.
•
Connect to properly grounded outlets only.
•
Do not insert or allow foreign objects to enter any ventilation or exhaust opening as this
may cause an electric shock or fire, or damage the heater.
•
To prevent a possible fire, do not block air intakes or exhaust in any manner. Do not use
on soft surfaces, like a bed, where openings may become blocked.
•
A heater has hot and arcing or sparking parts inside. Do not use it in areas where
gasoline, paint, or flammable liquids are used or stored.
•
Use this heater only as described in this manual. Any other use not recommended by the
manufacturer may cause fire, electric shock, or injury to persons.
•
Always plug heaters directly into a wall outlet/receptacle. Never use with an extension
cord or relocatable power tap (outlet/power strip).
•
This heater includes an audible alarm to warn that parts of the heater are getting
excessively hot. If the alarm sounds, immediately turn the heater off and inspect for
any objects on or adjacent to the heater that may cause high temperatures. DO NOT
OPERATE THE HEATER WITH THE ALARM SOUNDING.
•
SAVE THESE INSTRUCTIONS
•
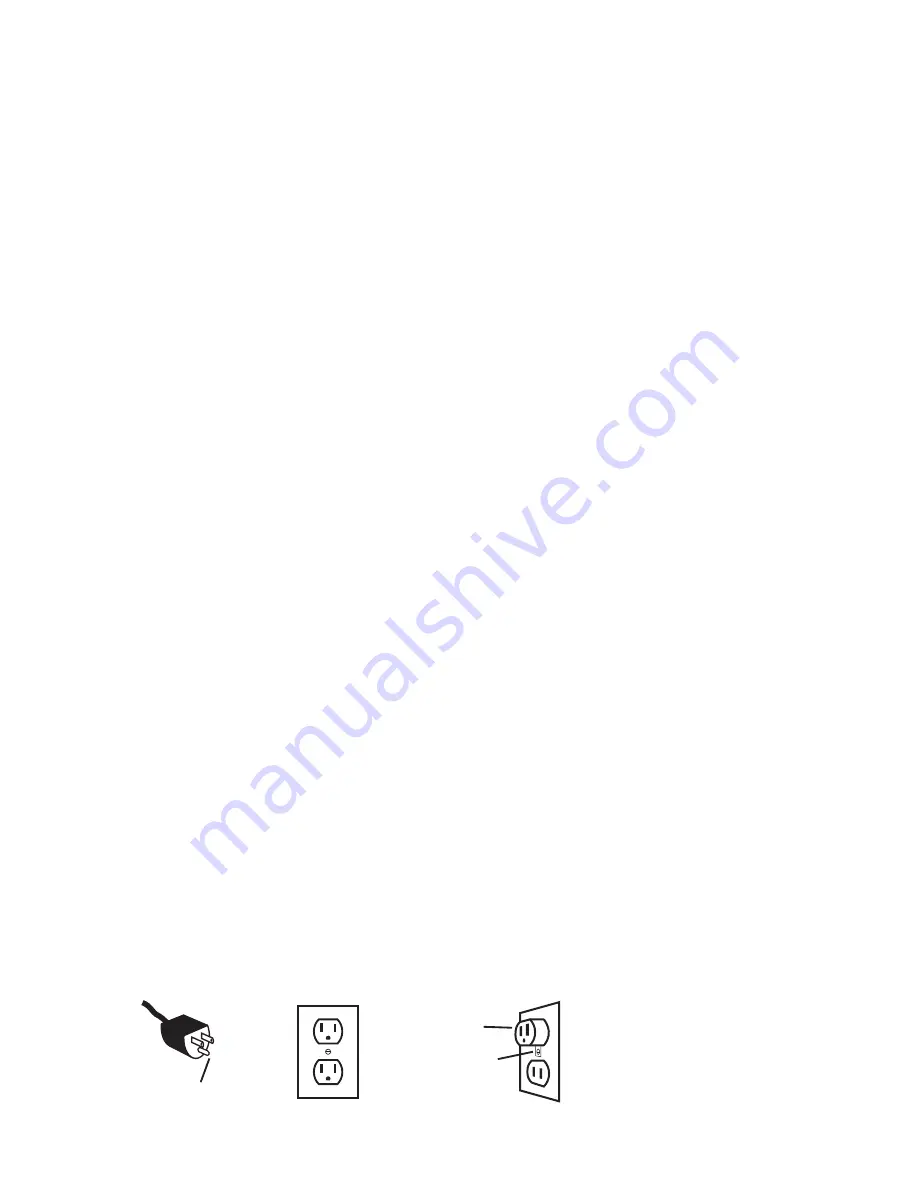
This heater is for use on 120 volts. The cord has a plug as shown at (A) in the figure below.
An adapter as shown at C is available for connecting three-blade grounding-type plugs
to two-slot receptacles. The green grounding lug extending from the adapter must
be connected to a permanent ground such as a properly grounded outlet box. The
adapter should not be used if a three-slot grounded receptacle is available.
Metal Screw
(Grounded)
Adapter
Grounding Pin
(A)
(B)
Summary of Contents for GARAGE&PATIO
Page 1: ...Owner s Manual...
Page 2: ...2...
Page 15: ...15...
Page 16: ...16 www GreenTechEnv com...


