11
PURE-PRO
R
EVERSE
O
SMOSIS
SYSTEM
04
PURE-PRO
R
EVERSE
O
SMOSIS
SYSTEM
6 Months
4 Years
1 Year
PRO
P
URE
DRINKING WATER SYSTEM
PRO
P
URE
DRINKING WATER SYSTEM
PRO
P
URE
DRINKING WATER SYSTEM
PRO
P
URE
DRINKING WATER SYSTEM
PRO
P
URE
DRINKING WATER SYSTEM
PRO
P
URE
DRINKING WATER SYSTEM
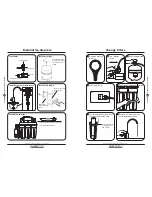
Cartridge Filters
Stage 1
Stage3
Stage 2
Block Carbon Filter
Stage 4
TFC Membrane
Stage 5
Post Carbon Filter
Cartridge Filters
Filter Description
6 Months
6 Months
This 5micron sediment filter is made of 100%
pure polypropylene fibers. High capacity filter
removes dusts, particles and rusts.
This block carbon filter is composed of high-
performance carbon that removes free chlorine,
odor, organic contaminants, pesticides and
chemicals that contributed to taste and odor.
This 1micron sediment filter is made of 100%
pure polypropylene fibers. High capacity filter
removes dusts, particles and rusts.
Made in USA. High rejection TFC type membrane
with the capacity of producing 80 gallons per day.
This membrane removes the following hard water
contaminants that may be present in your water:
lead, cooper, barium, chromium, mercury, sodium,
cadmium, fluoride, nitrite, nitrate, and selenium.
NSF approved. This post carbon filter is designed
to improve taste. It removes any residual
impurities and odors from the tank and provides a
finer conditioning of pure water.
5 Micron
Sediment Filter
1 Micron
Sediment Filter
PRO
P
URE
DRINKING WATER SYSTEM
A.With everything connected, turn on the water check for leaks.
B.Make sure the storage tank shut-off valve is "OFF". Open the sink
top faucet.
C.Within a few minutes (up to 15) the water will start to run from the
faucet slowly.
D.Let the water run for at least 30 minutes. This flushes the carbon
filters on first time use.
E.After initial flushing, open the shut-off valve on the tank and close
the sink top faucet.
F.Tank will now full of water (usually 2 to 3 hours) after the tank has
filled. Open the sink top faucet and drain all water until the storage
tank is empty and there is only a small flow from the sink top
faucet.*** DO NOT USE FIRST TANK OF WATER.***
G.Close the sink top faucet. The system is now ready for use.
H.Change filters regularly every 6 to 12 months and have the
membrane checked annually.
Caution
1.Do not use hot water (over 45 C)!
2.Do not freeze the machine!
3.Switch off electricity and water source if away for more than 5 days,
and drain out pure water.
0
Operation regulation
RO102 Manual Flushing Membrane System
RO102 Manual Flushing Membrane System
Service Life


