11
PURE-PRO
R
EVERSE
O
SMOSIS
SYSTEM
04
PURE-PRO
R
EVERSE
O
SMOSIS
SYSTEM
Shelf life
1 Year
PRO
P
URE
DRINKING WATER SYSTEM
PRO
P
URE
DRINKING WATER SYSTEM
PRO
P
URE
DRINKING WATER SYSTEM
PRO
P
URE
DRINKING WATER SYSTEM
PRO
P
URE
DRINKING WATER SYSTEM
PRO
P
URE
DRINKING WATER SYSTEM
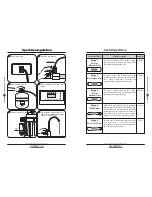
RO Computer Controller
T.D.S.(XI ppm)/Time(X 10m)
FULL
FLUSH
WORK
SOURCE MANUAL
T.D.S./Time
MANUAL
FLUSH
RESET
Micro
FUL
2
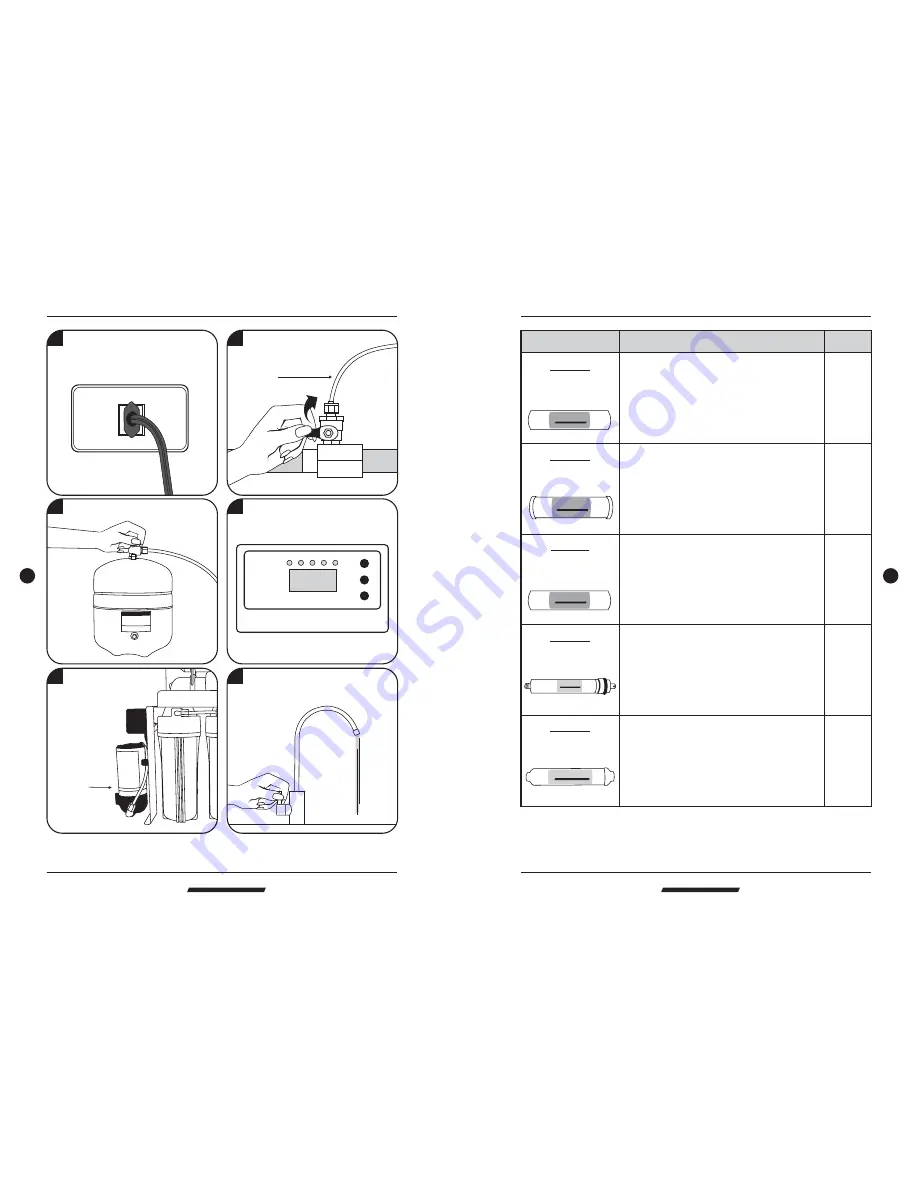
Turn on water source.
3
Switch on water tank.
PRO
P
URE
DRINKING WATER SYSTEM
6
Let the water run for at least 30
minutes. This flushes the carbon
filters on first time use.
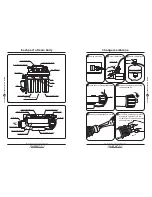
Cartridge Filters
Stage 1
Stage3
Stage 2
Block Carbon Filter
Stage 4
TFC Membrane
Stage 5
Post Carbon Filter
Cartridge Filters
Filter Description
This 5micron sediment filter is made of 100%
pure polypropylene fibers. High capacity filter
removes dusts, particles and rusts.
This block carbon filter is composed of high-
performance carbon that removes free chlorine,
odor, organic contaminants, pesticides and
chemicals that contributed to taste and odor.
This 1micron sediment filter is made of 100%
pure polypropylene fibers. High capacity filter
removes dusts, particles and rusts.
Made in USA. High rejection TFC type membrane
with the capacity of producing 80 gallons per day.
This membrane removes the following hard water
contaminants that may be present in your water:
lead, cooper, barium, chromium, mercury, sodium,
cadmium, fluoride, nitrite, nitrate, and selenium.
NSF approved. This post carbon filter is designed
to improve taste. It removes any residual
impurities and odors from the tank and provides a
finer conditioning of pure water.
5 Micron
Sediment Filter
1 Micron
Sediment Filter
Operation regulation
To RO system
Pump
RO103TDS Auto-Flush with TDS Display
RO103TDS Auto-Flush with TDS Display
6 Months
4 Years
6 Months
6 Months
5
Pump starts to function.
1
Plug in electricity.
Operation regulation
4
Micro computer controller signals
are on.

