


•
Steel
Pegs
•
Repair
Kit
•
Ladder
Bands
•
Support
Poles
•
Sail
Track
7.
Next
peg
the
annexe
starting
with
the
rear
corners
(nearest
the
caravan)
ensuring
that
you
pull
the
pegging
point
under
the
van
to
create
a
seal
whilst
ensuring
the
sidewall
is
as
vertical
as
possible.
Then
peg
the
front
corners,
ensuring
that
there
is
no
slack
material
between
the
four
corners.
Peg
the
remaining
pegging
points,
cross
pegging
the
doorways
andentrances.
Adjust
storm
straps
as
necessary.
1.
Ensure
that
the
ground
is
free
of
stones
and
other
sharp
objects.
You
may
wish
to
lay
a
sheet
of
polyethylene
on
the
ground
to
protect
your
annexe.
Unpack
and
spread
the
annexe
on
the
ground.
2.
Thread
the
annexe’s
beading
through
the
sail
track
on
the
caravan
to
the
desired
position.
The
annexe
should
be
positioned
on
the
caravan
so
the
beading
is
horizontal.
The
beading
should
not
slope.
3.
Locate
your
annexe
anchor
clips
which
are
sewn
into
the
bottom
of
the
flysheet.
4.
Attach
the
supplied
ladder
bands
onto
all
the
anchor
clips
by
simply
pushing
the
ladder
band
into
the
anchor
clip.
To
avoid
damage
to
your
annexe,
use
all
pegging
points.
The
ladder
bands
are
replaceable.
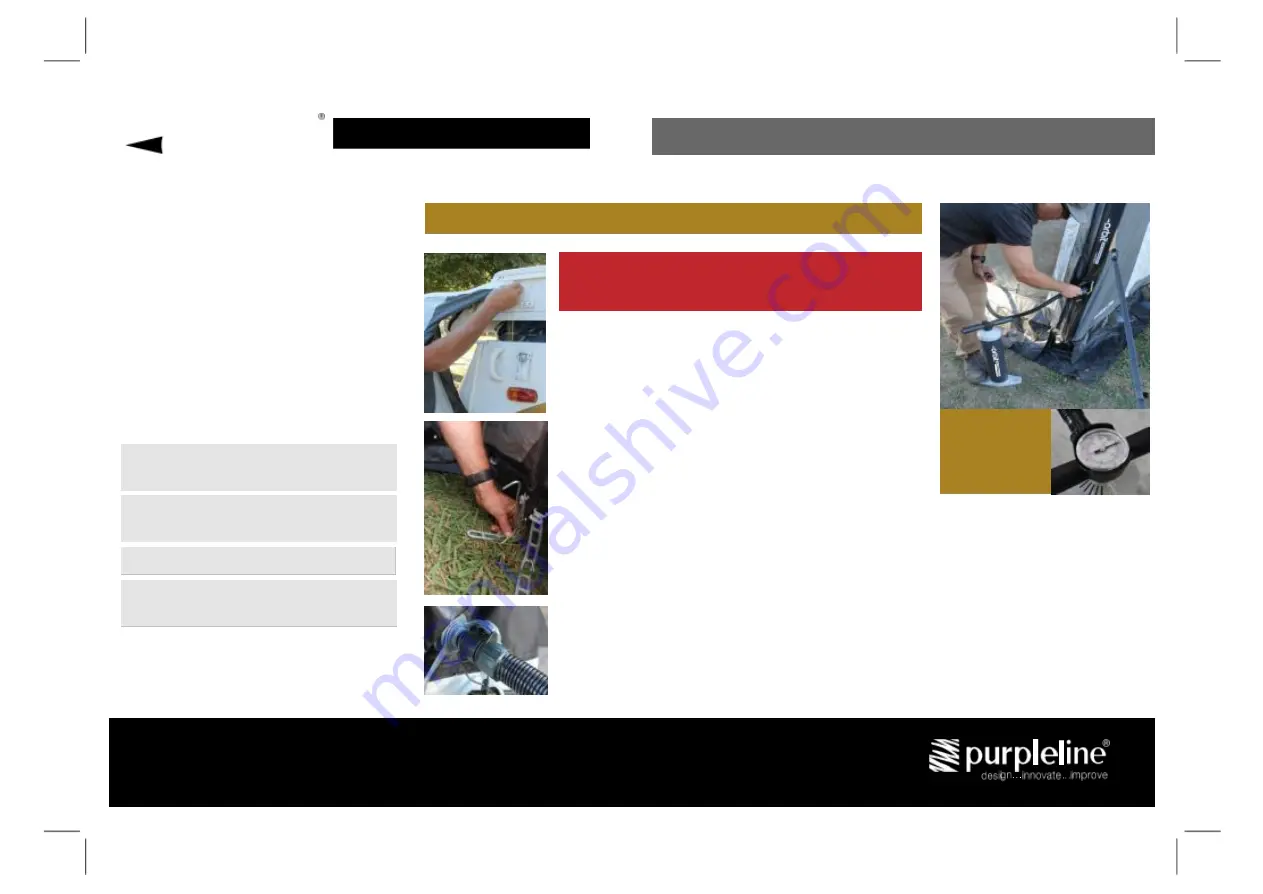
5.
Next
locate
the
inflation
valve
which
is
near
ground
level
on
the
main
air
beam.
The
valve
is
attached
by
a
retaining
strap
and
is
not
pre-fitted
therefore
you
will
need
to
carefully
screw
this
into
place.
Remove
the
main
valve
cap
and
insert
the
Orbit
®
Air
Pump’s
inflation
nozzle
and
operate
the
pump
accordingly.
It
may
be
necessary
to
elevate
the
tube
during
the
latter
stage
of
inflation.
Inflate
to
a
maximum
of
7
psi
and
then
screw
the
valve’s
cap
into
position.
6.
Close
all
zip
entrances
on
the
annexe
flysheet
and
peg
out
the
storm
straps.
PLEASE
READ
THESE
INSTRUCTIONS
BEFORE
ATTEMPTING
TO
PITCH
YOUR
ANNEXE
LOW
325
WIDTH
RANGE
DEVELOPED
SPECIFICALLY
FOR
THE
AUSTRALIAN
CLIMATE
From
the
Makers
of
the
Multi-Award
Winning
AirOPUS
®
Camper
Trailer
INFLATE
AIR
BEAMS
TO
A
MAXIMUM
OF
7
PSI
ORBIT
AIR
COMET
325
INFLATABLE
CARAVAN
ANNEXE
ANNEXE BAG CONTENTS
PITCHING
INSTRUCTIONS
•
Inflatable
Annexe
•
Wind
Skirt
•
Hand
Pump
•
Ground
Sheet
•
Storm
Straps
FEATURES
•
Plastic
LED
Sleeve
for
optional
LED
light
strip
•
Pre-attached
storm
buckles
&
webbing
straps
•
Removable
side
door
panels
•
3-layered
window
system
(mesh,
plastic
&
canvas)
•
Dirt
skirt
for
extra
protection
•
Superior
ventilation
orbitairtech.com.au


