background image

Nixie Tube Clock ‘Dink’ 


Issue 9 (10 November 2017)


www.pvelectronics.co.uk


- 1 -


Assembly Instructions 

And  

User Guide 


Nixie Clock Type  

‘Dink’ 


Summary of Contents for Dink

Page 1: ...Nixie Tube Clock Dink Issue 9 10 November 2017 www pvelectronics co uk 1 Assembly Instructions And User Guide Nixie Clock Type Dink ...

Page 2: ...ation to 5V Power Circuit 8 17 November 2013 WWVB no longer supported 7 19 June 2012 Different Inductor type added 6 30 May 2012 New Board revision 18 May 12 5 5 Feb 2012 Errors corrected 4 28 Jan 2012 Errors corrected new C4 value 3 24 Jan 2012 Revised for new PCB dated 1 Jan 12 2 08 July 2011 Errors in schematic corrected 1 29 May 2011 New document ...

Page 3: ...nooze period Programmable date display each minute Output for LED tube lighting Uses a Quartz Crystal Oscillator as the timebase Optional DCF MSF GPS synchronisation with status indicator LED Supercapacitor backup Keeps time during short power outages Simple time setting using two buttons Programmable leading zero blanking Five programmable neon colon settings Flashing AM PM indication illuminated...

Page 4: ...before proceeding The voltages generated by this circuit can give a potentially LETHAL ELECTRIC SHOCK DISCLAIMER This product is supplied as a kit of parts intended only for suitably qualified electronic engineers who are suitably qualified and experienced in electronics assembly and are familiar with safe procedures for working with high voltages The supplier his agents or associates accept no li...

Page 5: ... with Desoldering wick braid can be useful if you accidentally create solder bridges between adjacent solder joints 2 3 Other items you will need The clock kit does not include a power adapter This is because the kit is sold to many countries around the world each with very different household mains outlet socket types It is more efficient for the user to buy a suitable adapter locally This saves ...

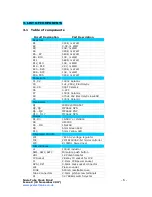
Page 6: ... Ceramic C8 470uF 16V Electrolytic low ESR C9 100nF Ceramic Transistors Q1 IRFD220 MOSFET Q2 Q3 MPSA42 NPN Q4 Q9 MPSA92 PNP Q10 Q17 MPSA42 NPN Diodes D1 D3 1N5817 or 1N5819 D4 UF4004 D5 D8 1N4148 D9 5mm Green LED D10 5mm Yellow LED Integrated Circuits IC1 7805 5V voltage regulator IC2 PIC16F1936 8 bit microcontroller IC3 K155ID1 Nixie driver Miscellaneous L1 100uH inductor SW1 SW2 SW3 Miniature pu...

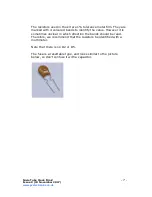
Page 7: ...e marked with 4 coloured bands to identify the value However it is sometimes unclear in which direction the bands should be read Therefore we recommend that the resistors be identified with a multimeter Note that there is no D2 or D5 The fuse is a resettable type and looks similar to the picture below so don t confuse it with a capacitor ...

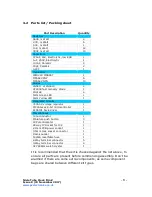
Page 8: ...D 1 5mm Yellow LED 1 Integrated Circuits 7805 5V voltage regulator 1 PIC16Fxxxx 8 bit microcontroller 1 K155ID1 Nixie driver 1 Miscellaneous 100uH inductor 1 Miniature push button 3 1K Potentiometer 1 28 way IC Socket for IC2 1 2 1mm PCB power socket 1 3 5mm Jack socket connector 1 Piezo sounder 1 500mA resettable fuse 1 2 Way terminal connector 5 3 Way terminal connector 4 32 768KHz watch crystal...

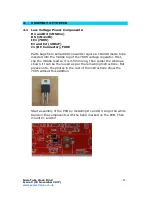
Page 9: ... 1N4148 diode to be inserted into the middle leg of the 7805 voltage regulator First clip the middle lead so it is 4 5mm long then solder the diode as shown It can be then used as per the remaining instructions But please note the photos in the rest of the instructions show the 7805 without this addition Start assembly of the PCB by installing D1 and D3 Align the white band on the components with ...

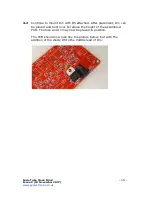
Page 10: ...tinue to mount IC1 with D5 attached After placement IC1 can be placed and bent over to reduce the height of the assembled PCB The fuse and J1 may now be placed in position The PCB should now look like the picture below but with the addition of the diode D5 to the middle lead of IC1 ...

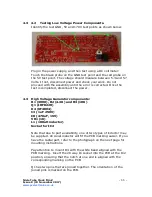
Page 11: ...connect the power 4 3 High Voltage Generator components R1 390K R2 4 3K and R3 10K Q1 IRFD220 D4 UF4004 C3 1uF 250V C8 470uF 16V VR1 1K L1 100uH inductor Socket for IC2 Note that due to part availability one of two types of inductor may be supplied An Axial inductor will fit the PCB marking easier If you have the radial part refer to the photograph on the next page for mounting instructions Pay at...

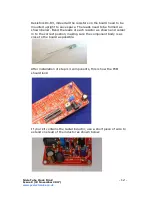
Page 12: ...leads need to be formed as shown below Bend the leads of each resistor as shown and solder in to the correct postion making sure the component body is as close to the board as possible After installation of step 4 3 components this is how the PCB should look If your kit contains the radial inductor use a short piece of wire to extend one lead of the inductor as shown below ...

Page 13: ...the notch on the IC socket and the PCB marking Power up the PCB and using the GND and 170V test points measure the high voltage generated It should be initially 150 190V Using the VR1 brass screw slowly adjust the screw until the voltage is between 168 and 172V Disconnect the power supply Finally remove IC2 from its socket and replace on its static protective foam It is best kept safe until later ...

Page 14: ...ep the processor powered for short periods in the event of a main power failure It is vital that it is placed in the correct orientation See below There are arrows on the component that need to be pointing the same way as the arrows on the PCB 4 6 C4 and C5 33pF X1 32 768 Khz Crystal These are the timekeeping components 32 768KHz crystal and two load capacitors ...

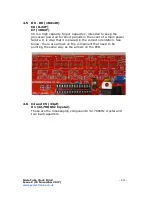
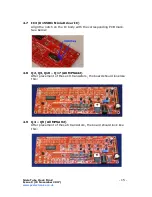
Page 15: ...5ID1 Nixie Driver IC Align the notch on the IC body with the corresponding PCB mark See below 4 8 Q2 Q3 Q10 Q17 All MPSA42 After placement of these 10 transistors the board should look like this 4 9 Q4 Q9 All MPSA92 After placement of these 6 transistors the board should look like this ...

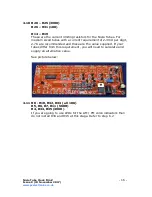
Page 16: ... a current requirement of 2 3mA per digit 2 7K are recommended and these are the value supplied If your tubes differ from this requirement you will need to calculate and supply an alternative value See picture below 4 11 R8 R10 R32 R33 all 10K R5 R6 R7 R11 560R R4 R34 R35 390K If you are going to use LEDs for the AM PM colon indicators then do not install R34 and R35 at this stage Refer to step 6 ...

Page 17: ... uk 17 4 12 ALARM ADJ SET Switches GPS RFT Connector C9 100nF LS1 Piezo buzzer 4 13 D9 5mm Green LED D10 5mm Yellow LED These two LEDs should be mounted with the longer lead in the hole marked You can choose to mount them facing sideways like the switches or vertically ...

Page 18: ... Terminal Connectors Note that the screw terminals may be omitted and the tube connections made either by direct solder connections or by using the subsidiary 0 1 spaced pin terminal headers Make up the screw terminal connectors into blocks by sliding together to attach as shown below ...

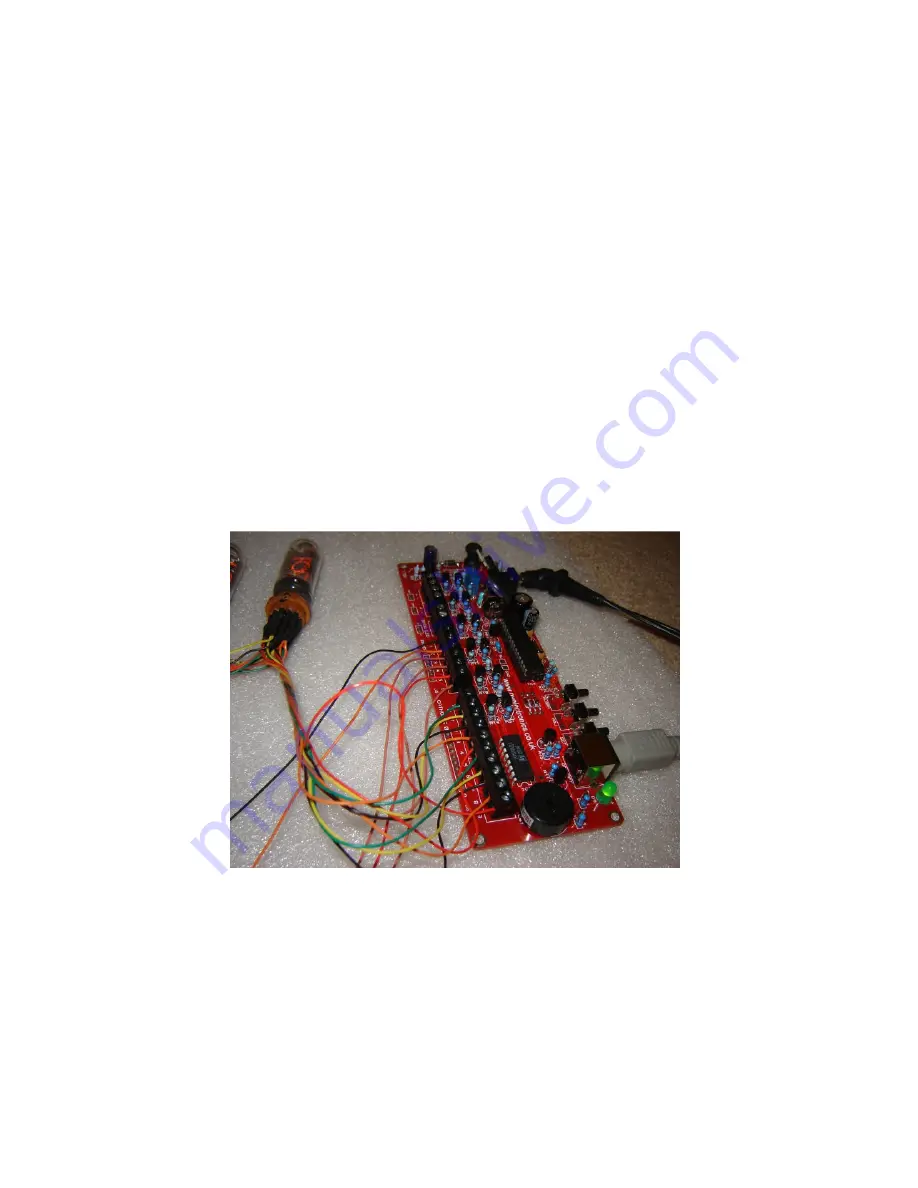
Page 19: ...se this is a multiplex design so all the cathodes for each digit are connected and each anode is energised in turn Only the first 3 tubes are shown however NX4 NX5 and NX6 are connected in exactly the same manner There will be just 16 wires from the tubes leading back to the PCB 10 for the cathodes and 6 for the anodes Connect to either the screw terminals or the pin headers via sockets pins if yo...

Page 20: ...int Now wire up small indicator neons to the AM and PM connection points If the brightness needs to be adjusted you can change the values of resistors R34 and R35 as appropriate 6 2 LEDs for the colon indicators Locate J8 it is adjacent to the 170V test point Make a small wire connection between J8 and the 5V test point Install suitable current limiting resistors for R34 and R35 Do not draw more t...

Page 21: ...on a further 3 seconds until the clock displays in this format 00 XX 99 The 99 in the seconds digits tells you that you are in the configuration menu In configuration mode the hours digits diplay the current parameter being adjusted and the minutes digits display the current value stored against the parameter For each parameter and referring to the table below scroll through the range of possible ...

Page 22: ... 0 AM PM Indication flashing 1 AM PM Indication illuminated 2 Both flash default 3 Both illuminated 4 Both off 11 Colon neons during night dimmed mode 2 0 AM PM Indication flashing 1 AM PM Indication illuminated 2 Both flash 3 Both illuminated default 4 Both off 12 Radio time signal source 0 No Radio Time source default 3 1 DCF 2 reserved 3 MSF 4 GPS 13 GPS Baud rate 0 4 8 Kbps default 1 9 6 Kbps ...

Page 23: ...MSF GPS synchronisation Set time manually 4 Enter your time zone offset from the synchronisation source Note that WWVB transmits UTC 5 In GPS Sync mode this parameter is used to set DST Set to 1 during DST 6 Date will be displayed each minute between 50 and 55 seconds past the minute 7 Use parameters 26 and 27 to tune the crystal timebase Each increment of parameter 26 makes an adjustment of appro...

Page 24: ...play Auto Date Display Setting parameter 18 to 1 will enable auto display of date between 50 and 55 seconds past each minute Night Blanking Override During programmed night blanking the blanking may be overridden to see the time by briefly pressing the SET button Tubes will remain lit for the period defined in parameter 8 Manual RFT Call In DCF MSF modes pressing ADJ briefly during time display wi...

Page 25: ...from the synchronisation source This is usually only whole hours Examples o UK is 1 hour offset from the time transmitted by the DCF transmitter o France has no offset from the time transmitted by the DCF transmitter Set parameter 16 to identify whether the offset is minus 0 or positive 1 of the time source Set parameter 23 to select between hourly seek and daily seek in DCF MSF modes If you have ...

Page 26: ...Anthorn UK Reception is possible within the UK Eire Northern France and Norway Please note 1 The long wave signals propagate further at night so the clock is configured by default to synchronize at 2am 2 Suitable Power Supplies If using a switching power supply it must have an earth connection Cheap Chinese switching adapters cause too much interference and will not work Alternatively use an old f...

Page 27: ...h regularly showing the one pulse per second data from the transmitter If your Module s red LED does not start to flash regularly go back and check 1 6 of this section If the red LED does not flash regularly you will not get synchronisation 7 At the start of the minute the clock should start collecting data and if so it will start flashing the green LED rapidly Look for any LED activity at the sta...

Page 28: ...ube Clock Dink Issue 9 10 November 2017 www pvelectronics co uk 28 8 4 Connecting a GPS receiver The clock has been designed for and tested with our Micro GPS Receiver available separately from PV Electronics ...

Page 29: ... hours and 24 hours ago and off if the last synchronisation is older than 24 hours If DCF or MSF mode is selected the indicator will flash rapidly whilst the clock is actually receiving and processing a valid time frame Additionally the indicator will flash very briefly each second whilst seeking a RFT frame The function of the RFT indicator LED may be summarised in the table below Radio Time Sour...

Page 30: ...Nixie Tube Clock Dink Issue 9 10 November 2017 www pvelectronics co uk 30 9 CIRCUIT DIAGRAM ...

Page 31: ...Nixie Tube Clock Dink Issue 9 10 November 2017 www pvelectronics co uk 31 ...

Reviews: