


Nixie Clock Kit ' Maestro’
ISSUE 5 (01 June 2018)
www.pvelectronics.co.uk
- 18 -
Setting the Time and Date:
Before setting the time, press 'DST' briefly to toggle between DST and
standard time modes. Set according to whether you are currently in DST
time or not. The adjacent DST LED will light or extinguish accordingly.
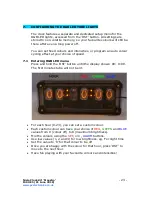
From time display mode, press and hold ‘SET’ button for 2 seconds until
the seconds digits are highlighted.
Press the ‘ADJ’ button to reset seconds to zero.
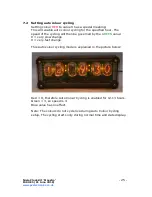
Briefly Press ‘SET’ again and the hours will be highlighted
Press the ‘ADJ’ button to set the minutes.
Briefly Press ‘SET’ again and the hours will be highlighted.
Press the ‘ADJ’ button to set the hours.
Proceed in this fashion to set the calendar: Year, Month and Day.
Finally, briefly Press ‘SET’ again to revert to normal clock operation.
Showing Date:
From time display mode, briefly press ‘SET’ button. Date will be shown
for 5 seconds, then revert to time display.
Auto Date Display:
Setting parameter 27 to 1 or 2 will enable auto display of date between
50 and 55 seconds past each minute.
Night Blanking Override:
During programmed night blanking, the blanking may be overridden to
see the time by briefly pressing the ‘SET’ button. Tubes will remain lit for
the period defined in parameter 28.
Setting Alarm:
Press the ‘ALARM’ Button. The seconds digits show the on / off status of
the alarm: 00 (off) or 01 (on).
Set on / off status, then minutes followed by hours by using the ‘ALARM’
and ‘ADJ’ buttons. When set, the alarm LED will also light.


