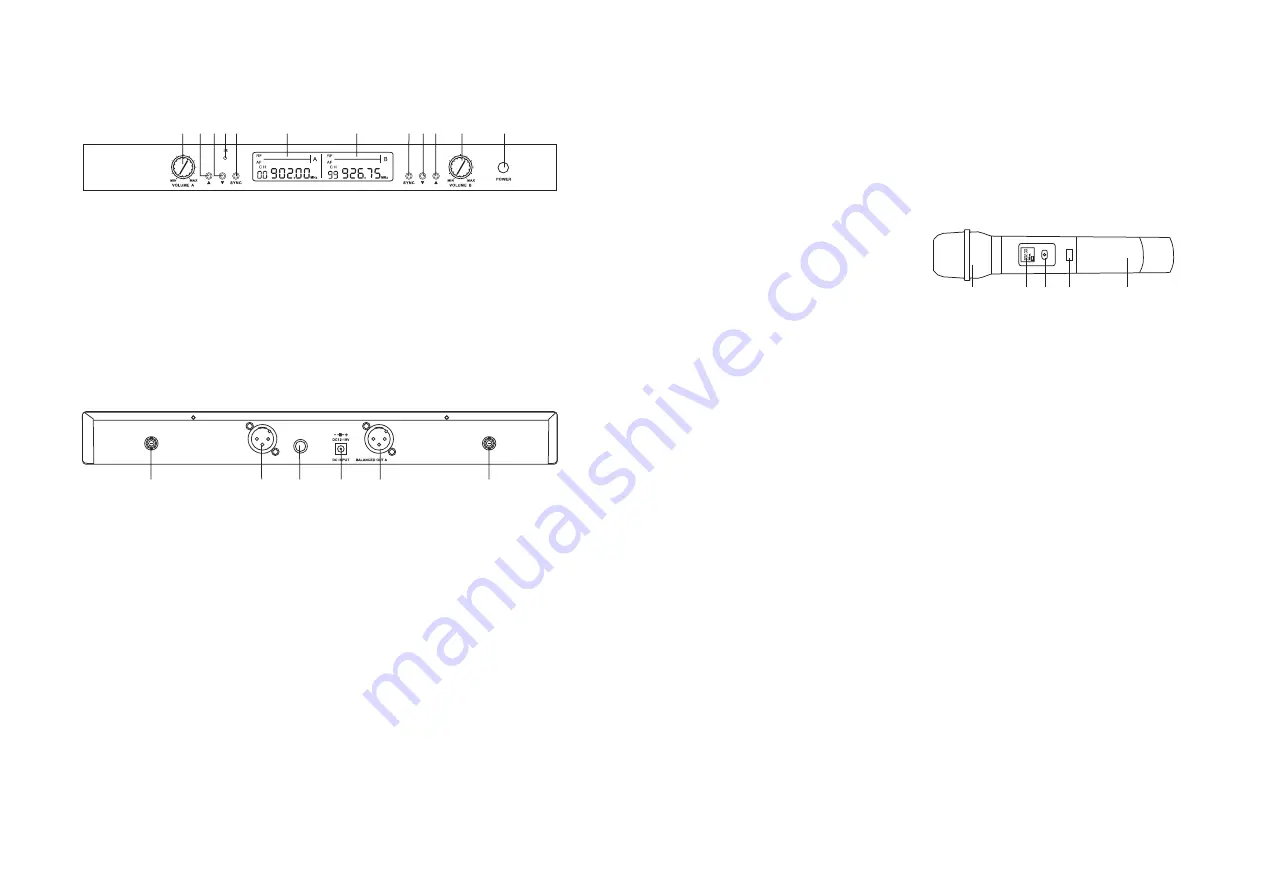
FRONT PANEL
1. CH- A Volume control
2. CH-A channel UP
3. CH-A channel DOWN
4. Infrared (IR) port
5. CH-A Sync Button
6. CH-A display
REAR PANEL
13. Antenna jack B
14. Balanced XLR output jack B
15. Mixed 1 / 4 " output jack
16. DC input jack
17. Balanced XLR output jack A
18. Antenna jack A
RECEIVER
ANT-B
ANT-A
BALANCED OUT B
MIXED OUT
13
14
15
16
17
18
1. Connect one end of supplied 6.35mm to 6.35mm plug audio cable
into MIXED OUT(15) on rear panel of the receiver. Connect the
other end of the audio cable into "MIC IN" or "AUX IN" of amplifier
or mixer.
2. Connect DC plug of supplied AC/DC adapter to DC INPUT(16) jack
on rear panel of the receiver. Connect AC plug of AC/DC adapter to
mains power socket.
3. Press POWER(12) button on front panel to turn on the receiver.
4. Press CH-A UP(2) or DOWN(3) buttons to set receiver CH-A
7. CH-B display
8. CH-B Sync Button
9. CH-B channel DOWN
10. CH-B channel UP
11. CH- B Volume control
12. Power On/Off switch
OPERATION
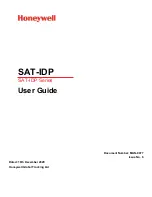
HANDHELD MIC
1. Mesh(capsule inside)
2. LCD display(IR port)
3. Power on/off switch
4. IR port
5. Battery cover/compartment
1
2
3
4
OPERATION
1. Open battery cover and install 2PCS AA batteries into battery
compartment with correct polarity(match + and - signs).
2. Press and hold power button to turn on microphone.
3. Point microphone IR port to receiver IR port and press CH-A SYNC
button to set first microphone frequency to be same as receiver CH-
A frequency. Press CH-B SYNC button to set second microphone
frequency to be same as receiver CH-B frequency.
4. Receiver RF indicator will display in receiver screen.
5. During operation if power LED indicator lights red, this indicates
the battery is Iow. Please replace new battery.
6. After use please press and hold power button to turn off
the microphone. If you are not going to use this system for a long
period of time please take out the batteries from
the microphone to avoid possible battery leakage which may
damage the microphone.
1
2 3 4 5
6
8 9 10
11
7
12
5
frequency. Then press CH-B
receiver CH-B frequency.
NOTE:
Please must set CH-A and CH-B in different frequencies.
5. Adjust receiver volume(1, 11) and your amplifier or mixer volume to
suitable level.
UP(10) or DOWN(9) buttons to set


