background image

www.PyleUSA.com

20

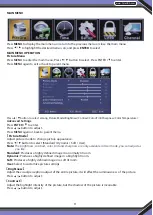
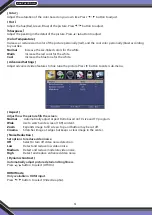
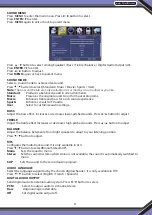
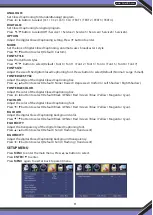
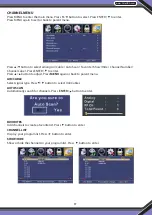
CHANNEL NUMBER

Show the channel number. Press           button to adjust.

CHANNEL LABEL

Create labels for channels ,up to 7 characters. Press           button to adjust.

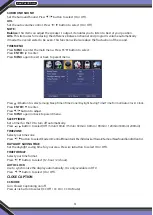
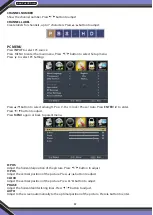
PC MENU

Press 

INPUT

 to select PC source.

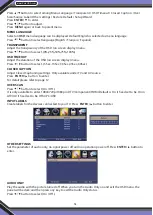
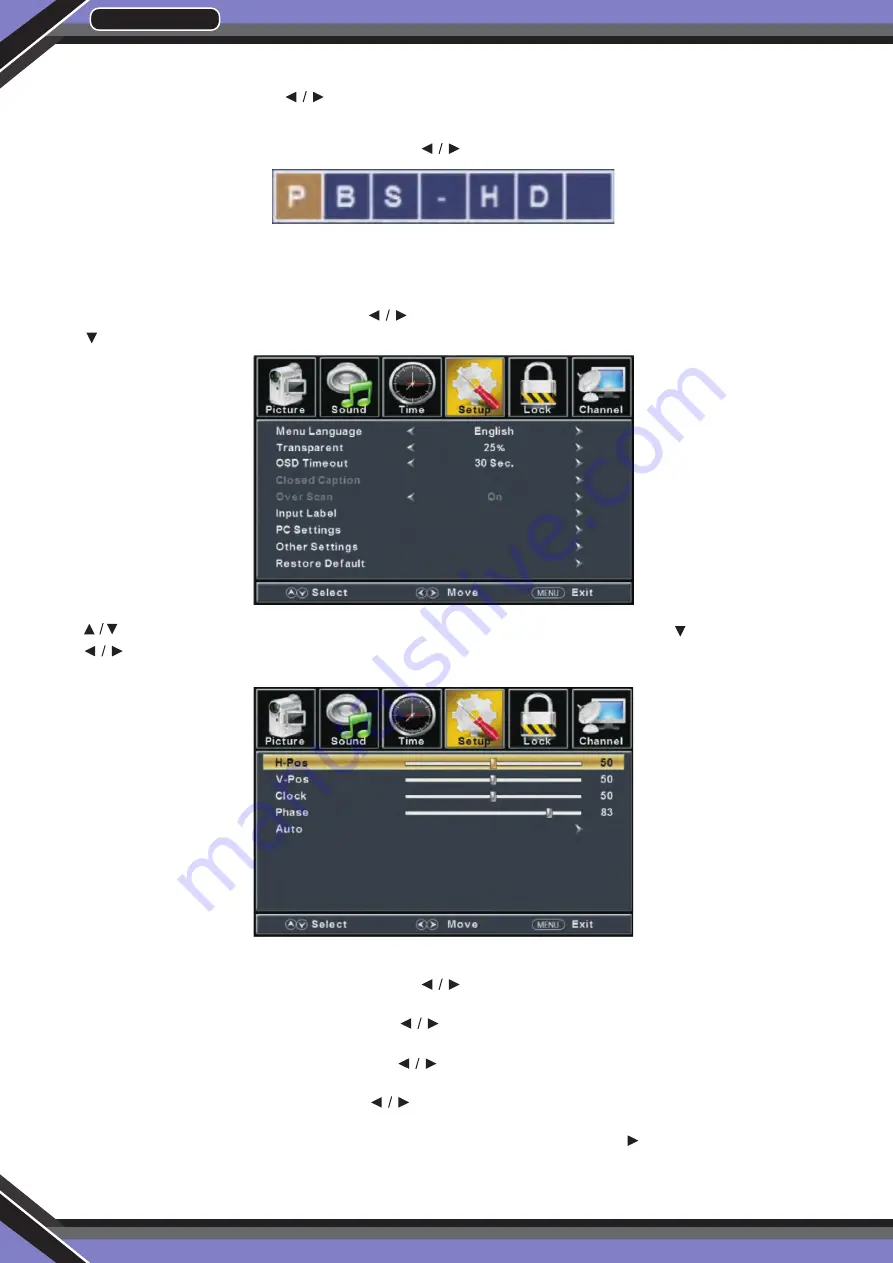
Press  MENU to enter the main menu, Press             button to select Setup menu.

Press       to select PC Settings.

Press           button to select among H-Pos / V-Pos / Clock / Phase / Auto. Press 

ENTER /

      to enter.

Press            button to adjust.

Press 

MENU

 again  or back to parent menu.

H-POS

Adjust the horizontal position of the picture. Press             button to adjust.

V-POS

Adjust the vertical position of the picture. Press 


button to adjust.

CLOCK

Adjust the vertical position of the picture. Press 


button to adjust.

PHASE

Adjust the horizontal interfering lines. Press 


button to adjust.

AUTO

Adjust to the screen automatically to the optimal position of the picture. Press


 button to enter.

Summary of Contents for PTLED15

Page 1: ...Note Keep this document for operation and performance reference Please visit us online for further reference and detailed product specifications ...

Page 2: ... INTRODUCTION 6 CONNECTIONS 7 REMOTE CONTROL 8 9 SETUP WIZARD 9 SELECT INPUT SOURCE 10 MAIN MENU 11 PICTURE MENU 11 12 SOUND MENU 13 14 TIME MENU 14 CLOSE CAPTION 14 SETUP MENU 15 LOCK MENU 17 CHANNEL MENU 19 PC MENU 20 DVD OPERATION 21 24 SPECIFICATION 25 26 ...

Page 3: ...enjoy biting into electric flexes Always hold the plug when pulling out the plug from the mains supply socket Do not pull on the flex the flex can become overloaded and cause short circuit Set up the unit so that no one is able to trip over the flex Do not place heavy items on the flex which may damage it Take note that the flex cannot be reached and pulled by young children avoiding injury Do not...

Page 4: ...tures can melt plastic and lead to fires To clean the TV use a soft dry cloth Do NOT use solvents or petrol based fluids For stubborn stains you may use a damp cloth with dilute detergent HEADPHONE WARNING Loud music can damage your hearing irreversibly therefore do not set the volume to a high level when listening through headphones particularly for lengthy listening periods WHERE TO INSTALL Loca...

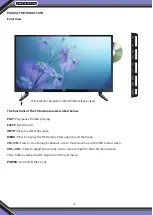
Page 5: ...o select the source MENU Press to display the OSD menu Press again to exit the menu CH CH Press to scan through channels Use to move down up in the OSD menu screen VOL VOL Press to adjust the volume Use to move lef right in the OSD menu screen VOL button can be used to skip forward to next menu POWER Turn on off the TV set LED Indicator Remote Control Window keep clear ...

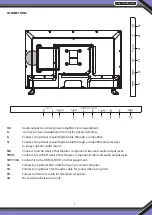
Page 6: ... superior audio sound 5 6 Connect to an AV device that features component video and audio output jacks 7 8 9 Connect to an YPbPr device that features component video and audio output jacks 10 11 12 Connect it to the HDMI of DVD or other equipment 13 Connect an optional VGA cable from your personal computer 14 Connect an optional 3 5mm audio cable for sound when using VGA 15 Connect antenna or cabl...

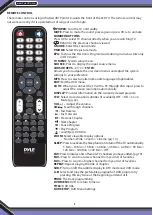
Page 7: ...tly viewed program CCD Select closed caption subtitles if available OFF ON CC on Mute pg 22 VOL Adjust the volume CH Scan through channels Fast Reverse Fast Forward Previous Chapter Next Chapter Pause Program Play Program Load Eject DVD Disc ZOOM Select viewable display options Normal Wide Zoom Cinema pg 12 SLEEP Press to activate the Sleep function to turn off theTV automatically 5 Min 10 Min 15 ...

Page 8: ...ress button to select go to next step and press ENTER button to start auto scan SELECT INPUT SOURCE Press INPUT button to display the input source list Press or INPUT button to select the input source Press ENTER button to enter the input source Press EXIT button to quit ...

Page 9: ...back to parent menu Picture Mode Adjust picture mode to change picture appearance Press button to select Standard Dynamic Soft User Note The brightness contrast color tint and sharpness are only available in User mode you can adjust as you like Standard Produces a highly defined image in a normally lit room Dynamic Produces a highly defined image in a brightly lit room Soft Produces a highly defin...

Page 10: ...d video features to fine tune the picture Press button to enter sub menu Aspect Adjust how the picture fills the screen Normal Automatically adjust Aspect Ratio based on TV size and TV program Wide Use to watch wide screen 16 9 content Zoom Expands image to fill screen Top and button maybe cut off Cinema Stretches image at edges but keeps a clear image in the center Noise Reduction Set options to ...

Page 11: ... audio settings BASS Adjust the bass effect Increases or decreases lower pitched sounds Press button to adjust TREBLE Adjust the treble effect Increases or decreases high pitched sounds Press button to adjust BALANCE Adjust the balance between left and right speakers to adapt to your listening position Press button to adjust MTS Configures the multi track sound It is only available in ATV Press butt...

Page 12: ...g Sleep Timer Time Zone Daylight Saving Time Time Format Auto Clock Clock Press ENTER to enter Press button to adjust Press MENU again or back to parent menu SLEEP TIMER Set a timer for the TV to turn off automatically Press button to select Off 5min 10min 15min 30min 60min 90min 120min 180min 240min TIME ZONE Select your time zone Press button to select Eastern Central Mountain Pacific Alaska Haw...

Page 13: ...e digital Closed Captioning box Press button to select Default None Raised Depressed Uniform Left Shadow Right Shadow FONT EDGE COLOR Adjust the color of the digital Closed Captioning box Press button to select Default Black White Red Green Blue Yellow Magenta Cyan FG COLOR Adjust the color of the digital Closed Captioning font Press button to select Default Black White Red Green Blue Yellow Magen...

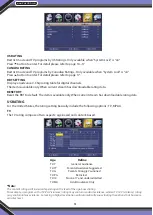
Page 14: ... to select 5 Sec 15Sec 30Sec 45Sec 60Sec CLOSED CAPTION Adjust Closed Captioning settings Only available under TV and AV source Press ENTER button to enter For detail please refer to page 12 OVER SCAN Press button to select On Off It is only available to enter 1080i 720p 1080p in DTV Component HDMI Default is On It fixed set to be On in ATV AV It fixed set to be Off in PC USB INPUT LABELS Create la...

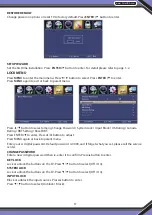
Page 15: ...Lock Input Block US Rating Canada Rating RRT Setting Reset RRT Press ENTER to enter Press button to adjust Press MENU again or back to parent menu Enter your 4 digital password Default password is 0000 and if forget what you set please call the service center CHANGE PASSWORD Enter a new 4 digital password then re enter it to confirm Press button to enter KEY LOCK Lock or unlock the buttons on the ...

Page 16: ...e only When current stream has downloadable rating data US RATING For the United States the rating setting basically include the following options TV MPAA TV The TV rating compose of two aspects age based and content based Note The content ratings will increase depending on the level of the age based rating For example a program with a TV PG V violence rating may contain moderate violence while a ...

Page 17: ...Channel Label Press ENTER to enter Press button to adjust Press MENU again or back to parent menu AIR CABLE Select signal type Press button to select Air Cable AUTO SCAN Automatically search for channels Press ENTER button to enter FAVORITES Add channels to create a favorite list Press button to enter CHANNEL LIST Display your program list Press button to enter SHOW HIDE Show or hide the channels ...

Page 18: ... select among H Pos V Pos Clock Phase Auto Press ENTER to enter Press button to adjust Press MENU again or back to parent menu H POS Adjust the horizontal position of the picture Press button to adjust V POS Adjust the vertical position of the picture Press button to adjust CLOCK Adjust the vertical position of the picture Press button to adjust PHASE Adjust the horizontal interfering lines Press ...

Page 19: ... draw the disc into the player To Eject the disc press the EJECT button on the TV or the button on the remote control DVD SETUP MODE Setup Mode provides the menu forthe configuration of General Setup Page Audio Setup Page Dolby Digital Setup Preference Page Item selection in the Setup Menu is done by using the Navigation Arrows SETUP button and the OK button Press the SETUP button first enter into...

Page 20: ... can keep the screen from being damaged ON Start the screen saver OFF Remove the screen saver LAST MEMORY Can set the items on the last memory ON and OFF option Select On the shutdown will shutdown the machine before the settings for memory re boot the machine settings Set near the same time Select Off every time the machine automatically switched back to the default settings On Start the memory O...

Page 21: ...TER or button play into the Speaker Setup Page DOWNMIX LT RT A disc recorded multi channel soundtrack the output signal will be incorporated to left and right channel STEREO A disc recorded multi channel soundtrack The output signal will be incorporated to stereo PREFERENCE SETUP You must press STOP twice to enter Preference Page or NO disc ...

Page 22: ...O If a language listed below is recorded on the disc you can play the sound in such language If not the language recorded will be used SUBTITLE If a language listed below is recorded on the disc you set the subtitle to be displayed in such language If not the language recorded will be used DISC MENU If a language listed below is recorded on the disc you can set the Menu to be displayed in such lan...

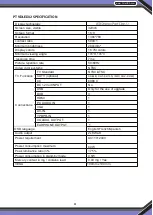
Page 23: ... H 176 V 7ms 50 60Hz NTSC NTSC ATSC TV Functions CATV optional CABLE CH1 CH135 AIR CH2 CH69 CC 608CC Connections DC 12 Volt INPUT USB DVD HDMI PC AUDIO IN VGA AV IN YPBPR IN COAXIAL OUTPUT No Only for the use of upgrade 3 1 1 1 1 1 1 EARPHONE OUTPUT OSD language Audio output Power requirement 1 English French Spanish 2x8 Watt AC110 240V Power consumption maximum Peak luminance ratio in 60W 75 Powe...

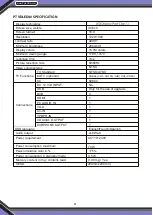
Page 24: ...6 H 176 V 7ms 50 60Hz NTSC NTSC ATSC TV Functions CATV optional CABLE CH1 CH135 AIR CH2 CH69 CC 608CC Connections DC 12 Volt INPUT USB DVD HDMI PC AUDIO IN VGA AV IN YPBPR IN COAXIAL OUTPUT No Only for the use of upgrade 3 1 1 1 1 1 1 EARPHONE OUTPUT OSD language Audio output Power requirement 1 English French Spanish 2x8 Watt AC110 240V Power consumption maximum Peak luminance ratio in 70W 75 Pow...

Page 25: ......

Page 26: ......

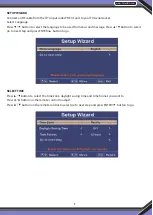
Page 27: ...ect the language to be used for menus and message Press button to select go to next step and press ENTER button to go SELECT TIME Press button to select the time zone daylight saving time and time format you want to Press button on the remote control to adjust Press button on the remote control to select go to next step and press ENTER button to go ...

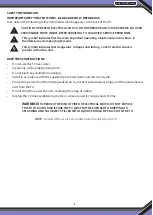
Page 28: ...dge of a table Unplug this TV during lightening storms or when unused for long periods of time NOTE No naked flames such as candles should be placed on the TV CAUTION TO PREVENT ELECTRICAL SHOCK DO NOT REMOVE ANY COVER SCREWS NO USER SERVICEABLE PARTS INSIDE REFER SERVICING TO QUALIFIED SERVICE PERSONNEL This symbol indicates that there are important operating maintenance instructions in the liter...

Reviews: