background image

2


SAFETY INSTRUCTIONS 

1.  Read these instructions - All the safety and operating instructions should be read 

before this product is operated. 

2.  Clean only with a dry cloth. 

3.  Do not block any ventilation openings. Keep at least 5 cm around the apparatus for 

sufficient ventilations. Ins

tall in accordance with the manufacturer’s instructions. 

4.  Do not install near any heat sources such as radiators, heat registers, stoves, or other 

apparatus (including amplifiers) that produce heat. 

5.  Protect the power cord from being walked on or pinched particularly at the plugs, 

convenience receptacles, and at the point where they exit from the apparatus. 

6.  Unplug the apparatus during lightning storms or when unused for long periods of time. 
7.  Refer all servicing to qualified personnel. Servicing is required when the apparatus has 

been damaged in any way, such as power supply cord or plug is damaged, liquid has 
been spilled or objects have fallen into the apparatus, the apparatus has been exposed 
to rain or moisture, does not operate normally, or has been dropped. 

8.  To reduce the risk of fire or electric shock, do not expose this apparatus to rain or 

moisture. The apparatus shall not be exposed to dripping or splashing and no objects 
filled with liquids, such as vases, shall not be placed on apparatus. 

9.  The main plug is used as disconnect device, the disconnected device shall remain   

readily operable. 

10.  Please keep the unit in a well ventilated environment. 
11.  Only use attachments/accessories specified or provided by the manufacturer. 


Summary of Contents for Vintage PVTTBT9BK

Page 1: ......

Page 2: ...2 SPECIFICATIONS 3 TURNTABLE LAYOUT 4 TURNTABLE OPERATION 5 POWER SUPPLY 5 BASIC OPERATION 5 TURNTABLE NEEDLE REPLACEMENT 6 LINE IN AUX IN OPERATION 7 BLUETOOTH 7 HEADPHONE OPERATION 7 AUX OUT OPERAT...

Page 3: ...ring lightning storms or when unused for long periods of time 7 Refer all servicing to qualified personnel Servicing is required when the apparatus has been damaged in any way such as power supply cor...

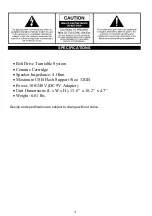
Page 4: ...tion are subject to change without notice Belt Drive Turntable System Ceramic Cartridge Speaker Impedance 4 Ohm Maximum USB Flash Support Size 32GB Power 100 240V DC 9V Adapter Unit Dimensions L x W x...

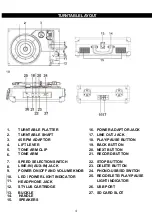
Page 5: ...TONE ARM CLIP 20 NEXT BUTTON 6 TONE ARM 21 RECORD BUTTON 7 SPEED SELECTION SWITCH 22 STOP BUTTON 8 LINE IN AUX IN JACK 23 DELETE BUTTON 9 POWER ON OFF AND VOLUME KNOB 24 PHONO USB SD SWITCH 10 11 LED...

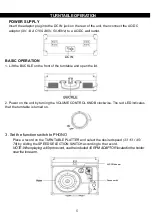
Page 6: ...open the lid 2 Power on the unit by turning the VOLUME CONTROL KNOB clockwise The red LED indicates that the turntable is turned on 3 Set the function switch to PHONO Place a record on the TURNTABLE P...

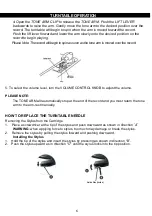
Page 7: ...UME CONTROL KNOB to adjust the volume PLEASE NOTE The TONE ARM will automatically stop at the end of the record and you must return the tone arm to the arm rest manually HOW TO REPLACE THE TURNTABLE N...

Page 8: ...ard then the Bluetooth indicator will be flashing 2 Turn on your Bluetooth device search for ClassicAudio and pair Pairing code is 0000 is needed 3 A short and delightful tone will indicate successful...

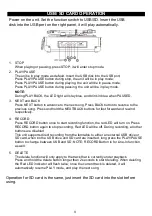
Page 9: ...old the NEXT BACK buttons for fast forward and rewind respectively 4 RECORD Press RECORD button once to start recording function the red LED will turn on Press RECORD button again to stop recording Re...

Reviews: