Sensor 3
Sensor 4
Sensor 2
POWER
READY
RUNNING
A.
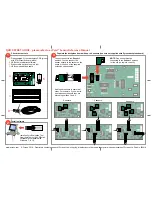
Preassembled Pyreos backplane PCB (green)
with STM32nucleo board (white)
B.
USB stick (evaluation software)
C.
Ribbon cable, optional use (up to 4)
D.
USB communications cable
Check the contents
Install ezPyro Evaluation Tool
from the folder on the USB stick.
Software is compatible with
Windows 7, 8, 10.
A
C
D
B
QUICK START GUIDE - please refer to ezPyro™ Sensor Reference Manual
1
Install software
2
Sensor 3
Sensor 1
Sensor 4
Sensor 2
POWER
READY
RUNNING
Sensor 3
Sensor 1
Sensor 4
Sensor 2
POWER
READY
RUNNING
Sensor 3
Sensor 1
Sensor 4
Sensor 2
POWER
READY
RUNNING
Connect sensor to the
Sensor 1
position. You can connect the
sensor directly to the socket on the
board or use one of the supplied
extension ribbon cables.
NOTE:
One sensor must be
connected to the
Sensor 1
position
for the ezPyro to work correctly.
Populate the backplane board with up to 4 sensors (
sensors not supplied with Pyreos backplane board)
2 sensors
3 sensors
4 sensors
3
Add further sensors in numerical
order. For example, if you want to
use two sensors ensure they are
placed in positions 1 and 2.
Sensor 3
Sensor 1
Sensor 4
Sensor 2
POWER
READY
RUNNING
Sensor 3
Sensor 1
Sensor 4
Sensor 2
POWER
READY
RUNNING
Sensor 3
Sensor 1
Sensor 4
Sensor 2
POWER
READY
RUNNING
Sensor 1
© Pyreos 2018. Proprietary content property of Pyreos Ltd. No copying, distribution or other use without prior written permission of Pyreos Ltd. Part No. 2256/8
www.pyreos.com


