background image

Connect any controller via 
low-level header 


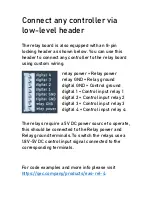
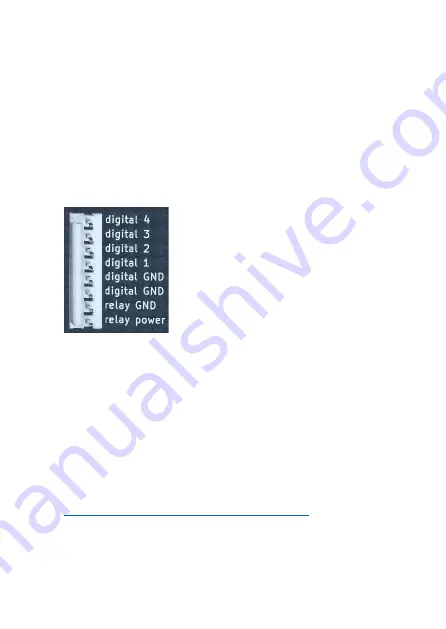
The relay board is also equipped with an 8-pin 
locking header as shown below. You can use this 
header to connect any controller to the relay board 
using custom wiring. 

relay power = Relay power 
relay GND = Relay ground 
digital GND = Control ground 
digital 1 = Control input relay 1 
digital 2 = Control input relay 2 
digital 3 = Control input relay 3 
digital 4 = Control input relay 4 


The relays require a 5V DC power source to operate, 
this should be connected to the Relay power and 
Relay ground terminals. To switch the relays use a 
1.8V-5V DC control input signal connected to the 
corresponding terminals. 


For code examples and more info please visit 

https://qec.company/products/eas-rel-4


Summary of Contents for EAS-REL-4

Page 1: ...https qec company EAS REL 4 4 CHANNEL RELAY MODULE USER MANUAL ...

Page 2: ...nly keep away from rain liquids and moisture of any kind To all residents of the European Union Important environmental information about this product This symbol on the device or package indicates that disposal of the product after its lifecycle could harm the environment Do not dispose of the unit as unsorted municipal waste it should be returned to your distributor or to a specialized local rec...

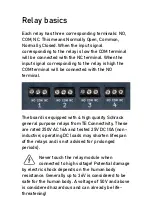
Page 3: ...nal The board is equipped with 4 high quality Schrack general purpose relays from TE Connectivity These are rated 250V AC 16A and tested 25V DC 10A non inductive operating DC loads may shorten lifespan of the relays and is not advised for prolonged periods Never touch the relay module when connected to high voltage Potential damage by electric shock depends on the human body resistance Generally u...

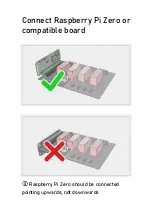
Page 4: ...Connect Raspberry Pi Zero or compatible board Raspberry Pi Zero should be connected pointing upwards not downwards ...

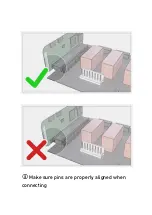
Page 5: ... Make sure pins are properly aligned when connecting ...

Page 6: ...he GPIO pin numbers corresponding to relays 1 4 are 16 17 22 23 You must configure these GPIO s for output in order to control the relays For code examples and more info please visit https qec company products eas rel 4 Raspberry Pi is a trademark of Raspberry Pi Trading ...

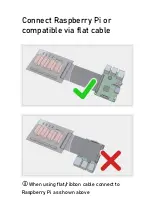
Page 7: ...Connect Raspberry Pi or compatible via flat cable When using flat ribbon cable connect to Raspberry Pi as shown above ...

Page 8: ...ble the GPIO pin numbers corresponding to relays 1 4 are 16 17 22 23 You must configure these GPIO s for output in order to control the relays For code examples and more info please visit https qec company products eas rel 4 Raspberry Pi is a trademark of Raspberry Pi Trading ...

Page 9: ...digital GND Control ground digital 1 Control input relay 1 digital 2 Control input relay 2 digital 3 Control input relay 3 digital 4 Control input relay 4 The relays require a 5V DC power source to operate this should be connected to the Relay power and Relay ground terminals To switch the relays use a 1 8V 5V DC control input signal connected to the corresponding terminals For code examples and m...

Page 10: ... compatible to turn into programmable wireless network relay module control input current 5 mA control input voltage 1 8 5 V DC relay rated 250V AC 16A tested 25V DC 10A relay coil voltage 5 V DC board dimensions 76 x 107 x 18 mm operating voltage 5 V manufactured in PRC Raspberry Pi is a trademark of Raspberry Pi Trading Handellaan 8 5251 HN Vlijmen Netherlands https qec company ...

Reviews: