18
Assembly and installation manual
QIM/QDB Mixer Series
QIM/QDB-M01
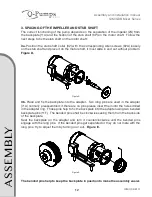
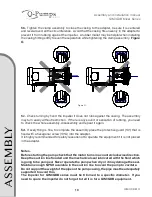
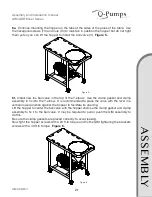
5b. Tighten the clamp assembly to close the casing to the adapter, be sure it is centered
and level around all the circumference. Avoid that the casing fits unevenly in the adapter to
prevent it from rubbing against the impeller. A rubber mallet may be helpful when installing
the casing hitting softly to even the separation while tightening the clamp assembly. Figure
O.
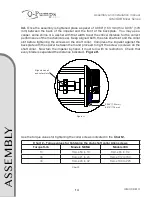
5c. Check turning by hand the impeller it does not rubs against the casing. The assembly
may turn easily without restriction. If there is any sound or sensation of rubbing, you need
to check the whole assembly, disassembly and repeat it again.
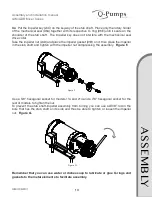
5d. If everything is fine, to complete the assembly place the protective guard (131) that is
fixed with a hexagonal screw (131A) into the adapter.
It is highly recommended for safety reasons not to operate the equipment if it is not placed
in the adapter.
Notes.
Before starting the pump check that the motor turns in a counterclockwise direction.
Keep the suction line flooded and the mechanical seal lubricated with the fluid which
is going to be pumped. Never operate the pump when dry or it may damage the seal.
Maintain enough NPSH available in the suction line to avoid the pump to cavitate.
Do not support the weight of the pipe on the pump casing, the pipe must be adequately
supported to avoid this.
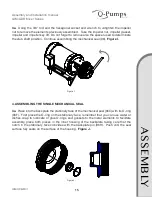
The impeller for QIM/QDB series must be trimmed to a specific diameter. If you
need to spare the impeller do not forget to tell it is for a QIM/QDB equipment.
Figure O.
A
SS
EM
B
LY

