background image

96

97

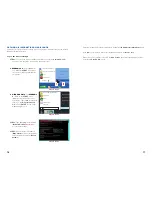
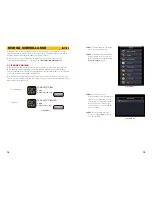
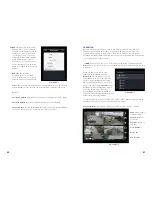
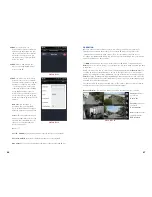
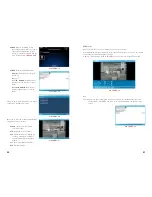
PICTURE 5-32

PICTURE 5-33

PICTURE 5-34

STEP 4

. After the program is installed, 

you can launch it from the 

Programs


menu.

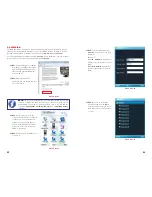
STEP 5.

 Upon launch, you will be 

presented with a login window. Enter 
the following details:


Address

: Enter the Server IP (your 

public IP )


Port

: 37777.


User ID

:  

admin

 (by default or use 

whatever user ID that you set in the 
NVR)

   Password

admin

 (by default or 

whatever password you set in the 
NVR)

STEP 7

. Once you’ve logged in, select 

which camera that you wish to view 
by double-clicking on that camera’s 
name or by clicking on it once and 
then selecting the 

Video

 button. You 

will now be in the 

Video Monitor 

interface

.

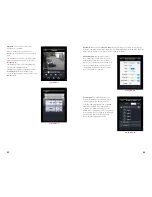
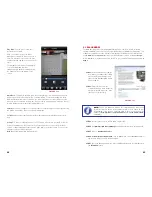
Camera

 - Go back to the camera 

selection window.

PTZ

 - Display/Hide PTZ controls

Full

 - Switch to full-screen display (no 

controls). You can also click on the 
video itself, or use the maximize icon 
in the upper right of the screen.

Video

 - Go to Video Monitor Interface.

PTZ Control

When selected, the PTZ controls appear 
below the video display. 
Use the directional button to control the 
movement of the camera and the other 
buttons to control the Zoom, Iris and Focus 
functions.

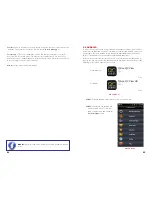
To exit DMSS, click the 

X

 at the top right 

corner of the screen.

PICTURE 5-35

Summary of Contents for QC-SERIES

Page 1: ...tup Guide QC SERIES NVR MODELS Android BlackBerry Select Models Apple Macintosh Computer iPhone Setup Guide for Remote Internet and Smartphone Monitoring MyQ See DDNS and Email Notification PC with Wi...

Page 2: ...t you in operating your new system in a safe and trouble free manner Please take the time to read and follow all instructions and pay attention to alerts as shown below NOTE Text in blue boxes with th...

Page 3: ...ll be able to do so using a conventional web address If you are using a router proceed with Section 1 1 If you are connecting directly to the Internet via a modem then begin with Section 1 4 CHAPTER 1...

Page 4: ...ioned in this guide Your router s password the default password should be in your router s manual OBTAINING AN IP ADDRESS Each device on a network both a LAN or the Internet has a specific IP address...

Page 5: ...e that UPnP is turned on in your NVR go to the Network window as described above and check that the UPNP option is checked in the Advanced Settings area in the lower part of the window If it is not ch...

Page 6: ...0 this time entering 37777 for the From and To ports STEP 12 Click on Back and then select NVR from the list of Applications Clicking on Add and then Save Leave your router control panel open as you w...

Page 7: ...Setting Save Cancel 1 4 PPPOE If you are going to attach the NVR directly to a DSL or cable modem instead of to a router then select the PPPOE option in the Network options Before you proceed you will...

Page 8: ...ETTINGS ADVANCED STATUS DEVICE INFORMATION All of your Internet and network connection details are displayed on this page WAN MAC Address IP Address Subnet Mask Default Gateway Primary DNS Server Seco...

Page 9: ...ble box and select MyQ See com in the DDNS server pull down menu STEP 6 Enter your account information including the user name and password that you used when creating your domain name STEP 7 Click th...

Page 10: ...is detected you will need to consult your router s manual SETTING UP DMZ IN ROUTER 2 STEP 1 Login into Router 1 by putting the IP of Router 1 into the Internet Explorer browser as in the example show...

Page 11: ...is 18 hours 65 535 seconds PICTURE 2 3 PICTURE 2 4 IP FILTER You can also improve security by controlling remote access to your NVR using the IP Filter This feature enables you to allow online users...

Page 12: ...pon your settings the system can generate a lot of e mail alerts For that reason we recommend setting up a dedicated e mail address specifically for the system to send alert notices If you do not have...

Page 13: ...to adjust your settings in the Record Setting and Account windows to ensure trouble free remote monitoring Complete instructions on their use can be found in Chapter 5 of the User Manual RECORD SETTI...

Page 14: ...ving and exiting the window REMOTE MONITORING CHAPTER 3 3 1 ACCESSING YOUR NVR REMOTELY FROM A COMPUTER You can access your NVR remotely using a computer on the same network as your system or from any...

Page 15: ...es when asked Are you sure you want to change the setting for this zone STEP 15 Click OK STEP 16 Click Apply STEP 17 Click OK STEP 18 Close Internet Explorer Open a browser window in Internet Explorer...

Page 16: ...ct Turn User Account Control on or off PICTURE 3 8 PICTURE 3 9 PICTURE 3 11 PICTURE 3 10 Microsoft O ce Outlook 2007 Sticky Notes All Programs Devices and Printers Default Programs Help and Support Sh...

Page 17: ...d to download an extraction program UnrarX to be able to use the application It is available for free at http www unrarx com PSS will automatically launch and run inside of XQuartz and will show up as...

Page 18: ...rer window You will see the Login screen shown in Picture 3 20 STEP 2 Enter the User Name and Password in the appropriate fields The default user name and password are admin and admin When you log int...

Page 19: ...with someone near a camera and play back a recorded video that has been saved on your computer PICTURE 3 25 Cameras Clicking on one of the camera icons will open the corresponding channel Cameras will...

Page 20: ...ab PICTURE 3 28 PICTURE 3 29 PICTURE 3 30 The color controls will only affect the screen view that is highlighted in green in the Real Time Monitor window They are in order Brightness Contrast Hue and...

Page 21: ...nship to the computer s audio Close Video Ends the video display for that channel 20 2 3 78 1 585Kbps S2 Image View Options This row of buttons along the bottom of the Real Time Monitor area allow you...

Page 22: ...as in live view If you return to the Search window after playback it will still retain your previous search results You may select another file for playback or enter new search parameters PICTURE 3 34...

Page 23: ...ng the NVR 3 3 USING PRO SURVEILLANCE SOFTWARE PSS The included Pro Surveillance Software allows Mac and PC users a method to remotely monitor their NVR that is not browser dependent PSS is compatible...

Page 24: ...ue Full Menu icon to the right of the Setting Manage button in the Tool Bar on the right side of the display STEP 2 Select Device Manage to open the Device Manage window STEP 3 Click the Add button an...

Page 25: ...it to its place in the multi view display At the top of each channel s video display there is a set of data and a set of six function buttons PICTURE 3 49 PICTURE 3 50 QC DVR 280 Kbps 30 Fps S The dat...

Page 26: ...dragged to another location This is useful in those modes where one or two screens are larger than the others The channel being replaced will move to the old location of the one that was moved Double...

Page 27: ...d menus on the NVR You can make changes or add new settings in the same manner as if you were at the NVR itself These operations are covered in Chapters 3 4 and 5 of the User Manual PTZ Direction This...

Page 28: ...e and you can import or export those settings for use on other computers running PSS through User Configuration PICTURE 3 57 PICTURE 3 58 Function Buttons The five function buttons Task Alarm Playback...

Page 29: ...deo feed in the Real Time Viewer Right clicking on a camera s icon will allow you to view a camera s name and the name of the device it is connected to You can also open that camera s video feed in a...

Page 30: ...ock In the case of the latter the POE block will then connect to the router or network Once you have connected the IP camera to a network you will need to run the ConfigTool software on a computer con...

Page 31: ...s Internet Explorer Fine 100 Open Port Check Tool Page Safety Tools http canyouseeme org Protected Mode On Your IP 81 919 622 24 What Port CanYouSeeMe org Open Port Check Tool Check This page will ser...

Page 32: ...to be removed from this list Removable This device may be deleted from the list by checking the box next to it and clicking on the Delete button below Device Status OK The connected device is operatin...

Page 33: ...llows the camera to compensate for sunlight versus moon light This is done by adjusting the red and blue light levels This can be done automatically or is fully customizable by the user The mode can a...

Page 34: ...nect to this camera remotely This process is covered in Section 1 6 DDNS IP Filter Using this window you can create a white list of trusted IP addresses for users who are allowed access to this camera...

Page 35: ...imize false alarms caused by environmental factors such as insects Record Delay This is the amount of time beyond the event that the camera will continue to record In addition to triggering recording...

Page 36: ...e There are both free and commercial sources for FTP hosting available through the web Some camera models allow the installation of a Micro SD card within the camera Due to the nature of security came...

Page 37: ...rride this and synchronize the time with itself as described in Section 4 3 of the User Manual Account This window shows all the available user accounts There are three pre configured accounts availab...

Page 38: ...re but some users disable this feature and manually assign IP addresses to the devices on their network The first step in resolving a connectivity issue is to ensure that DHCP is active on your router...

Page 39: ...Microsoft Internet Explorer All Programs Devices and Printers Default Programs Help and Support iTunes Adobe Acrobat Inbox Microsof iTunes start start Shut Down Log O Run B WINDOWS VISTA and WINDOWS...

Page 40: ...ailable for free through the Apple AppStore by searching for Q See Install either one as you would any other AppStore application Both versions have identical functionality The HD version for the iPad...

Page 41: ...Once you have selected the device you wish to monitor you are able to perform most operations on your mobile device that you can on the NVR itself or using either of the computer based remote monitori...

Page 42: ...triggered at the NVR itself QC View will keep a log of these events which can be reviewed in this list Channel Config You are able to adjust the configuration of each video channel to optimize the pe...

Page 43: ...our system using your Android smartphone or tablet you will need to install either the Q See QC View app for smartphones or Q See QC View HD app if you re using a tablet These are available for free t...

Page 44: ...elected the device you wish to monitor you are able to perform most operations on your mobile device that you can on the NVR itself or using either of the computer based remote monitoring options The...

Page 45: ...Zoom in or out using the controls or with your fingers Help Opens the internal help documentation 5 3 BLACKBERRY The QC NVRs support phones running Blackberry Version 5 0 You will need to install a pr...

Page 46: ...splay along with a list of selections Camera Go back to the camera selection window PTZ Display Hide PTZ controls Full Switch to full screen display no controls Clicking on the phone s scroll ball wil...

Page 47: ...is format to compress the file to the smallest possible size to speed up your downloading If you need an extraction utility to open it you can find free software at http rarlabs com download htm PC or...

Page 48: ...DMSS software included on the disk that came with your NVR or available via download from www Q See com Support If you are downloading the software begin with Step 1 below Otherwise copy the software...

Page 49: ...uble clicking on that camera s name or by clicking on it once and then selecting the Video button You will now be in the Video Monitor interface Camera Go back to the camera selection window PTZ Displ...

Page 50: ...98 Digital Peripheral Solutions Inc 8015 E Crystal Drive Anaheim CA 92807...

Reviews: