VIDEO IN
1
3
5
7
2
4
6
8
PRECAUTIONS:
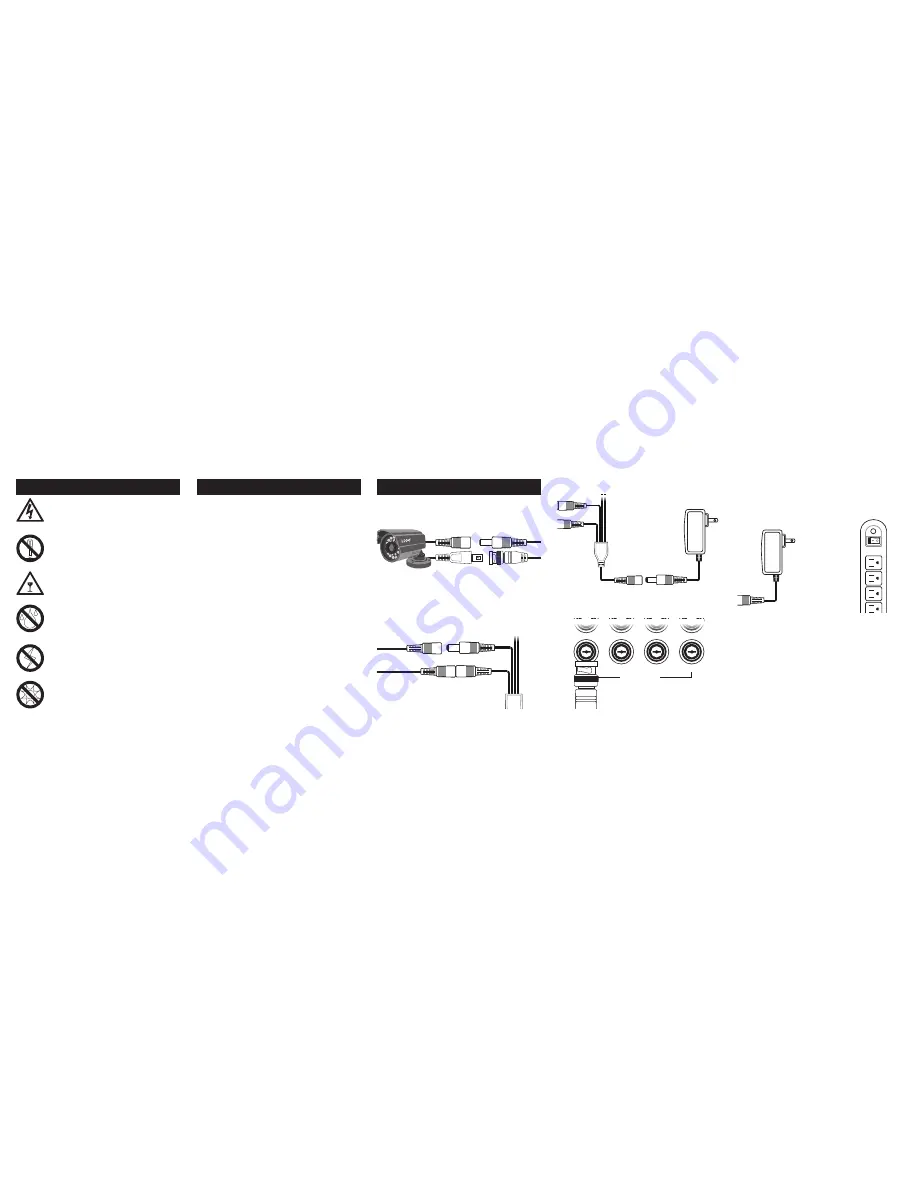
CAUTION! Risk of electrical shock.
To prevent electric
shock, do not remove screws or cover.
Handle camera with care.
Do not hit, shake, puncture
or drop the camera as this could damage it and prevent
proper operation.
Do not attempt to disassemble camera.
There are
no user serviceable parts inside. Service should be
performed by a qualified Q-See technician only.
Avoid excessive moisture within camera or
adapters.
Do not use strong or abrasive detergents
when cleaning camera body. Clean with dry cloth or mild
detergent, wiping gently.
Do not use camera beyond prescribed voltage range.
Only use included power supply. Ensure power input
source conforms to local voltage. Voltage outside of
range could cause damage or abnormal performance.
Avoid strong light.
Do not aim camera at sun or aim
strong light directly into the lens as it will degrade image
quality and could cause damage.
FEATURES:
This CCTV Color Camera introduces advanced CCD
technology offering you better quality and better resolution
images day or night.
• The automatic white balance function enables the camera
to produce realistic and natural colors indoors or outdoors
under a variety of lighting conditions.
• 27 Infrared LEDs surrounding the lens provide up to 40
feet of black and white night vision.
• Rust-proof aluminum alloy housing and stand.
• Shutter speed of 1/60-1/100,000 sec NTSC (1/50-
1/100,00 PAL)
• Suitable for indoor and outdoor use including wet weather.
• 1/4” Sony CCD image sensor delivers 420 TV lines
horizontal image resolution.
• Improved power savings.
• The flexible 3-axis stand is designed to enhance camera
positioning while protecting the cable from vandalism.
• One-year product warranty, free lifetime technical support.
TO CONNECT:
IMPORTANT!
When connecting the 60’ cable between the
camera and the DVR, the “male” power end (red plug) connects to
the matching power cable on the camera.
STEP 1
STEP 2
Connect the BNC and power connectors on
one end of the 60-foot cable to the
Connect the power connector on the other
end of the 60-foot cable to the 4-way
power splitter.
matching connectors leading from the camera.
STEP 3
STEP 4
Plug the power splitter cable into the
camera power adapter.
Connect the BNC connector on the other
end of the 60-foot cable to a
Video In
port
on the back of the DVR.
Plug the power adapter into a surge
protector *
*When selecting a surge protector, it is STRONGLY
recommended to use one that is UL-1449 rated, for a
clamping voltage of 330 or lower, a Joule rating of at least
400 and a response time of 10 nanoseconds or less.
Repeat Steps 1 through 4 for each camera before
continuing.
STEP 5


