3
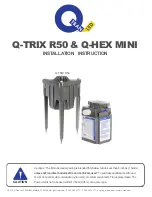
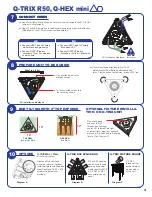
Q-TRIX R50, Q-HEX mini
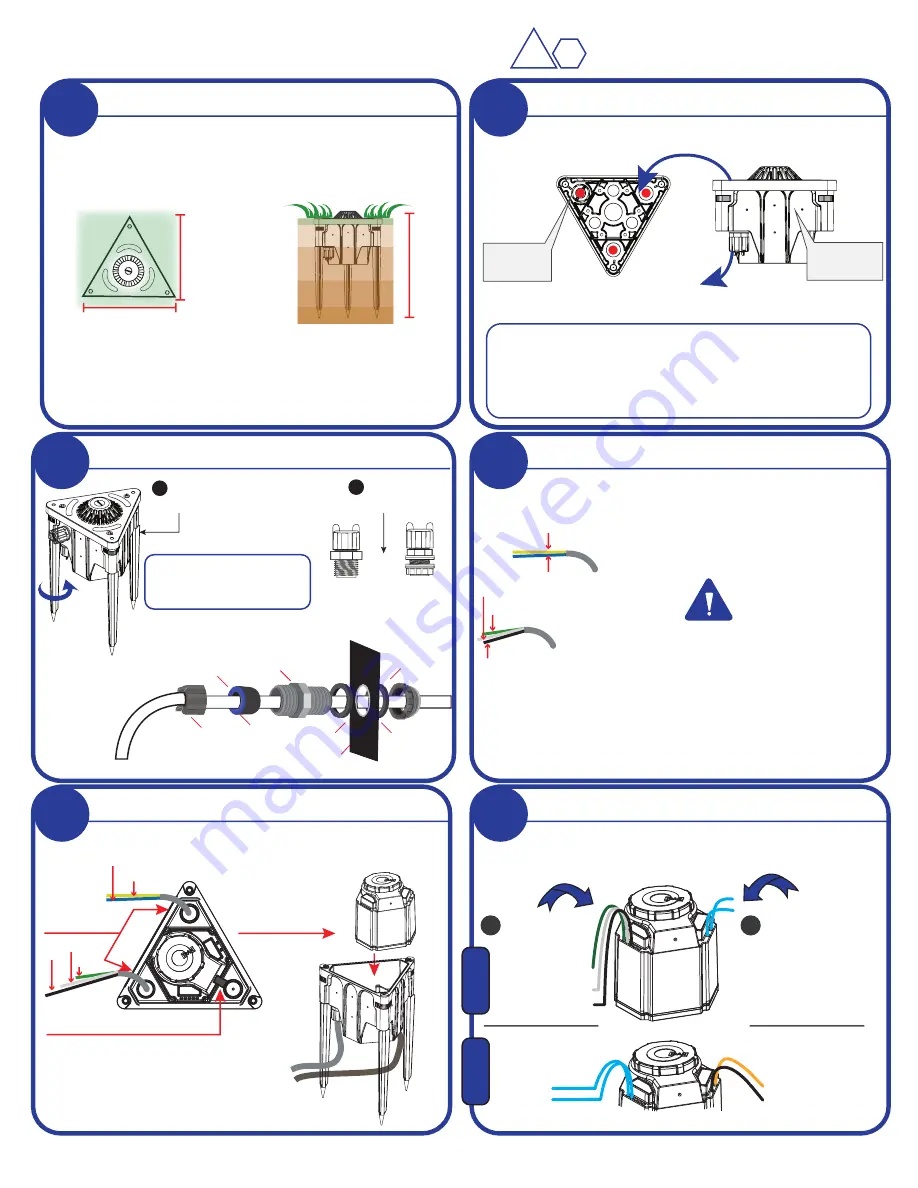
1
Q-Clik
MST
Q-Clik
NPT
Bottom
Sides
or
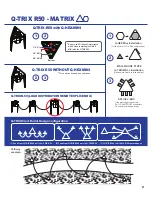
A
Install
SStakes (3X)
B
Install
connectors
Q-Hex Mini install orientation:
X
X
X
X
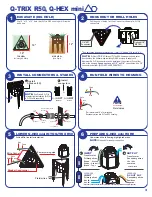
EXCAVATE (DIG HOLE)
INSTALL CONNECTORS & STAKES
LOWER Q-HEX mini INTO Q-TRIX R50
Dig 10" x 10" x 12" hole that Q-Trix R50 housing will fit inside
as shown.
2
KNOCKOUT OR DRILL HOLES
RUN FIELD WIRES TO HOUSING
PREPARE Q-HEX mini WIRE
Drill knock out holes for Wire Connectors.Example: Q-Clik
connectors.
Optional 1/2"
MST KO
3/4" NPT
Connector
*
Use only these Drill sizes for side Holes: 7/8 for 1/2” KO and 1 1/8 for 3/4” KO
NOTE:
Drill only
TOP
KO holes of Q-Trix R50 housing,or useonly outer
Knockouts on the bottom when installing Q-HEX mini power supply unit.
Maximum
3x
Q-Clik connectors can be installed at the bottom or 3x on either
side or the Housing.
3xconnectors of 1/2” or 3/4”
on each side. Use 3/4”
connector on bottom. (Q-CLIK SOLD SEPARATELY)
3
4
6
5
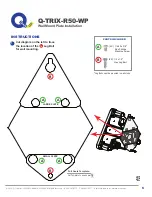
NOTE:
Use Q-wire & Q-Clik
for water tight installation (Q-Wire
& Q-Clik sold seperately)
6"
6"
Field wires
*
Pull maximum of 6” of primary and
Secondary wires into Q-Trix R50 housing.
CAUTION
See Front Page
6"
6"
Wire Corner
Breaker head corner
Field wires
Primary wiring side
Yellow
Blue
Green
White
Black
Yellow
Blue
Green
White
Black
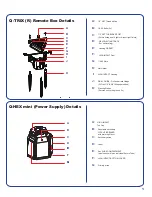
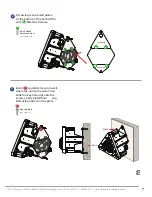
Understand the following highlighted wires
NOTE:
Strip ends for wire nut connection
INPUT
OUTPUT
Transformer
Primary wires
Green
- Ground
White
- Neutral
Black
- Tap 1
LED DRIVER
INPUT
Primary wires
Vac IN
Vac IN
LED DRIVER
DC OUT PUT
Secondary wires
Po
Negative -
AC
DC
A
B
Transformer
Secondary wires
12 v / 24v
common
*
Circuit breaker
*
Secondary Circuit breaker factory installed is optional requested when placeing order
12"
SIDE VIEW
(Hole Depth)
10"
10"
TOP VIEW
(Hole Length & Width)
HOUSING WALL
RUBBER
INSERT
CLIK
RING
MACHINE SCREW THREAD
(MST) BASE
WASHER 1
WASHER 2
WING NUT
NUT


