background image

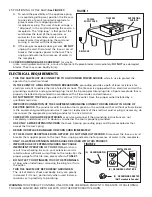
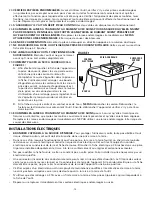
29. POSITIONING OF TILE SAW (

See FIGURE 1

)

A. To avoid the possibility of the appliance plug 

or receptacle getting wet, position the tile saw 
to one side of a wall-mounted receptacle to 
prevent water from dripping onto the 
receptacle or plug. The user should arrange a 
“drip loop” in the cord connecting the saw to a
receptacle. The “drip loop” is that part of the 
cord below the level of the receptacle, or 
connector if an extension cord is used, to 
prevent water traveling along the cord and 
coming in contact with the receptacle.

B.

If the plug or receptacle does get wet, 

DO NOT

unplug the cord. Disconnect the fuse or circuit 
breaker that supplies power to the tool. Then, 
unplug and examine for presence of water in 
the receptacle.

30.

CHECK DIAMOND BLADES CAREFULLY

for cracks, 

nicks, missing diamond matrix, or out-of alignment. Replace blades immmediately. 

DO NOT

use damaged

blades. They may cause bodily injury.

ELECTRICAL REQUIREMENTS

THIS TILE SAW MUST BE CONNECTED TO A GROUNDED POWER SOURCE

while in use to protect the

operator from electrical shock.

IN THE EVENT OF A MALFUNCTION OR BREAKDOWN, 

grounding provides a path of least resistance for

electrical current to reduce the risk of electrical shock. The tile saw is equipped with an electrical cord with a
grounding conductor and a grounding plug. Insert the 3-prong electrical plug into a 3-pole receptacle that is
properly installed and grounded in accordance with all local codes and ordinances.

DO NOT MODIFY THE PLUG

provided if it will not fit the outlet. Have the proper outlet installed by a

qualified electrician.

IMPROPER CONNECTION OF THE EQUIPMENT-GROUNDING CONDUCTOR CAN RESULT IN A RISK OF
ELECTRIC SHOCK.

The conductor with insulation that is green on the outside (with or without yellow stripes)

is the equipment-grounding conductor. If repair or replacement of the electrical cord or plug is necessary, do
not connect the equipment-grounding conductor to a live terminal.

CHECK WITH A QUALIFIED ELECTRICIAN

or service personnel if the grounding instructions are not

completely understood, or if in doubt as to whether the tool is properly grounded.

USE ONLY 3-WIRE EXTENSION CORDS

that have 3-prong grounding plugs and 3-pole receptacles that

accept the tile saw’s plug.

REPAIR OR REPLACE DAMAGED OR WORN CORD IMMEDIATELY.

IF THE PLUG OR RECEPTACLE DOES GET WET, DO NOT UNPLUG THE CORD.

Disconnect the fuse or circuit

breaker that supplies power to the tool. Then, unplug and examine for presence of water in the receptacle.

ONLY UL-LISTED EXTENSION CORDS SHOULD BE USED WITH THIS PRODUCT.

IMPROPER USE OF EXTENSION CORDS MAY CAUSE
INEFFICIENT OPERATION OF YOUR TOOL,

which can

result in overheating. Be sure  your extension cord is
rated to allow sufficient current flow to the motor. For the
proper gauge for this tile saw, please refer to 

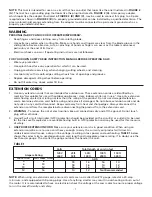
TABLE 1

.

DO NOT LET YOUR FINGERS TOUCH THE TERMINALS

of plug when installing or removing the plug to or from
the outlet.

THIS TILE SAW MUST BE PROPERLY GROUNDED.

The risk of electric shock and bodily injury are greatly
increased if it is not,  particularly when used in damp
locations or in proximity to plumbing.

WARNING: 

THIS PRODUCT CONTAINS ONE OR MORE CHEMICALS KNOWN TO THE STATE OF CALIFORNIA 

TO CAUSE CANCER AND BIRTH DEFECTS OR OTHER REPRODUCTIVE HARM.

FIGURE 2

FIGURE 1

(C) GROUNDING ADAPTER

(A) GROUNDING PIN

(B) GROUNDED OUTLET BOX

METAL SCREW

(Not Permitted In Canada)

DRIP LOOP

POWER

SUPPLY CORD

TILE SAW

SUPPORTING

SURFACE

Summary of Contents for 60088

Page 1: ...d operating instructions before using this saw AVISO Lea y siga todas las instrucciones de funcionamiento y seguridad antes de usar esta sierra STK 60088 OWNER S MANUAL MANUEL D UTILISATION MANUAL DE...

Page 2: ...2...

Page 3: ...mante 27 Qu Hacer y Qu No Hacer con el Disco de Diamante 27 Mantenimiento de la Sierra 28 Localizaci n de Aver as 28 Accesorios Incluidos con la Sierra 29 Caracter sticas de Avanzada de esta Sierra 29...

Page 4: ...4...

Page 5: ...sses only have impact resistant lenses they are NOT safety glasses 14 SECURE WORK Use clamps or a vise instead of your hand to hold work when practical This safety precaution allows for proper tool op...

Page 6: ...UNDING CONDUCTOR CAN RESULT IN A RISK OF ELECTRIC SHOCK The conductor with insulation that is green on the outside with or without yellow stripes is the equipment grounding conductor If repair or repl...

Page 7: ...y extension cords having an electrical rating not less than the rating of the product Do not use damaged extension cords Examine extension cord before using and replace if damaged Do not abuse extensi...

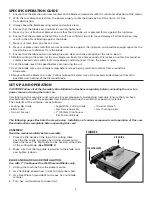
Page 8: ...ade to run dry Failure to keep the water tray at the recommended level will result in possible over heating of the diamond blade SET UP AND OPERATION CAUTION Follow all of the Assembly Installation In...

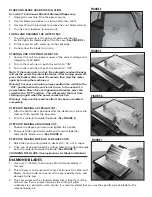
Page 9: ...press the switch to the OFF position This will prevent the tool from starting up again when the power comes back on Warning Only use this machine after it has been assembled completely STEPS FOR MAKIN...

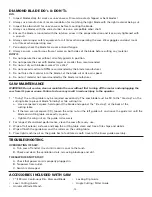
Page 10: ...clean or maintain the saw without first turning off the motor and unplugging the saw from it s power source Failure to do so may result in serious injury to the operator 1 Truing the cutting table may...

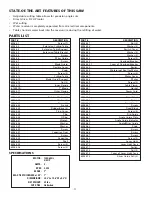
Page 11: ...60088 65 Screw 60088 66 Screw 60088 67 Screw 60088 68 Screw 2 60088 69 Laser Light 60088 70 Laser Light Case 60088 71 Switch 60088 72 Nut 2 60088 73 Cover of Laser Light Case 60088 74 Silver Oxide Ce...

Page 12: ...12 EXPLODED PARTS...

Page 13: ...de risques s il est utilis selon ses normes 11 NE PAS FORCER LE MAT RIAU COUPER Toujours laisser la lame couper son propre rythme 12 PORTER LES V TEMENTS APPROPRI S vitez de porter des v tements ample...

Page 14: ...a fiche ou la prise entrent en contact avec de l eau NE PAS d brancher le cordon D brancher le fusible ou le disjoncteur qui alimentent l outil Ensuite d brancher l appareil et v rifier s il y a de l...

Page 15: ...ements amples loin de la lame rotative Faire extr mement attention lors de la coupe de carreaux S assurer de bien loigner les mains et les doigts de l encoche de fixation de la lame dans la table coul...

Page 16: ...couper main lev e Assurez vous toujours que le carreau couper soit press fermement contre la but e 6 Assurez vous que la pi ce couper ait suffisamment d espace pour bouger de c t Dans le cas contraire...

Page 17: ...uctions avant d utiliser la scie ASSEMBLAGE Lisez le manuel en d tail avant l assemblage 1 Installez le guide de coupe sur le dessus de la table de coupe Verrouillez le guide de coupe en place en tour...

Page 18: ...tre utilis e uniquement avec des lames diamant es bords continus L utilisation d autres types de lames peut causer des blessures graves et endommager la scie 3 Cette scie vient avec une lame standard...

Page 19: ...e boulon t te hexagonale situ sur la glissi re gauche et d placer celle ci jusqu ce que le disque et la table de coupe soient exactement perpendiculaires c Serrer le boulon oreilles qui se trouve sur...

Page 20: ...oupe en Angle 60088 64 Bouton 60088 65 Vis 60088 66 Vis 60088 67 Vis 60088 68 Vis 2 60088 69 Lumi re Laser 60088 70 Caisse pour Lumi re Laser 60088 71 Interrupteur 60088 72 Ecrou 2 60088 73 Couverture...

Page 21: ...21 PI CES CLAT ES...

Page 22: ...menor sea el n mero del indicador m s pesado ser el cable 10 NO FUERCE LA HERRAMIENTA Ha sido dise ada para funcionar a niveles de m xima seguridad y rendimiento 11 NO FUERCE EL MATERIAL QUE DEBE CORT...

Page 23: ...e utiliza un cable de extensi n que evita que el agua se deslice por el cable y entre en contacto con el tomacorriente B Si el enchufe o el tomacorriente se humedecieren no desenchufe el cable Descone...

Page 24: ...mienta est dise ada para ser usada en un circuito que tiene un toma igual al que aparece en la FIGURA 2 A La herramienta tiene un enchufe de conexi n a tierra igual al enchufe que aparece en la FIGURA...

Page 25: ...Cuando utilice un cable de extensi n aseg rese de que todos los cables no tengan un calibre menor al 12 con una potencia de 20 amperios como m nimo y est n equipados con enchufes de 3 puntas El uso d...

Page 26: ...el funcionamiento de la sierra Lea detalladamente las instrucciones antes de usar esta sierra ENSAMBLAJE Lea cuidadosamente el manual antes de ensamblar 1 Posicione la gu a para corte lineal sobre la...

Page 27: ...e corte Ver la FIGURA 5 PASOS PARA HACER UN CORTE DIAGONAL 1 Escoja el grado deseado y apriete la manija 2 Despu s empuje la gu a para corte a inglete y el material hacia el disco para hacer el corte...

Page 28: ...nchufar la sierra de la fuente de energ a Si esto no se hiciere el operador podr a resultar gravemente herido 1 En ocasiones puede ser necesario alinear la Mesa de Corte La cuchilla de la sierra debe...

Page 29: ...u a para Cortes en ngulo CARACTER STICAS DE AVANZADA DE ESTA SIERRA Mesa de corte ajustable permite hacer cortes angulares con precisi n Motor de Mando Directo de 1 HP caballos de fuerza Cortes en H m...

Page 30: ...a Inglete 60088 64 Perilla 60088 65 Tornillo 60088 66 Tornillo 60088 67 Tornillo 60088 68 Tornillo 2 60088 69 Gu a L ser 60088 70 Caja para la Gu a L ser 60088 71 Interruptor 60088 72 Tuerca 2 60088...

Page 31: ...31 DESPIEZADO...

Page 32: ...32 Made in China Fabriqu en Chine Hecho en China Q E P Co Inc Boca Raton FL 33487 O115...

Reviews: