01
02
Tel: +44 (0) 1253 789180
Tel: +44 (0) 1253 789180
POWER MIXER STAND
SPECIFICATIONS
ASSEMBLY INSTRUCTIONS
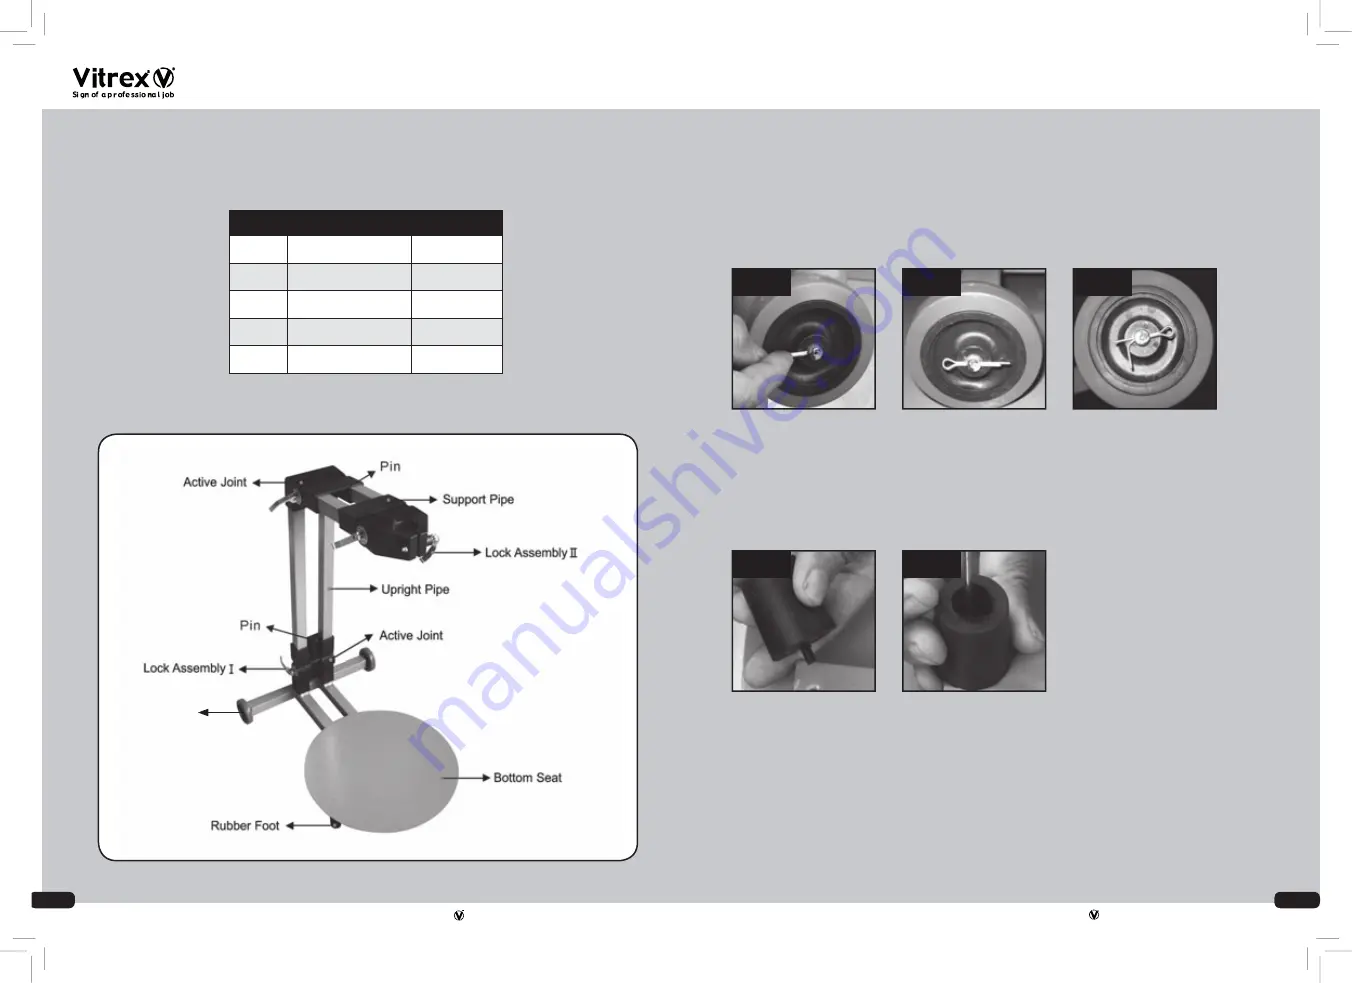
KNOW YOUR MIXING STAND:
Unpack the Mixer Stand and ensure none of the components have been damaged during transit.
Components are listed in the table below:
ASSEMBLING ThE WhEELS
NOTE:
Place the wheels on the axles and insert the wheel rotating pins. Bend one leg of the pins to secure
See Figure 1, Figure 2 & Figure 3
ASSEMBLING ThE RUBBER FEET
• Use a Phillips screwdriver to screw each rubber foot to the bottom of the seat. See Figure 4 &
Figure 5
NOTE
1. Check if the active joints are locked in place tightly before use.
2. Loosen the lock assembly II before affixing the mixing paddle (not included). Tighten the lock
assembly for maximum efficiency. Make sure the Power Mixer rests securely on the stand.
3. Use the pins to tighten the stand at vertical positions. You must pull out the pins before
adjusting the stands angle, to avoid unnecessary damages.
4. Use the mixer on level, even ground.
5. Make sure all lock assemblies are securely fastened.
Item#
Description
Qty
1
Mixer stand
1
2
Rubber feet
3
3
Screws
3
4
Wheels
2
5
Wheel Pins
2
FIG.1
FIG.4
FIG.2
FIG.5
FIG.3
Wheel


