14
– 12|2017 – Subject to change.
Sportrex 2018
f
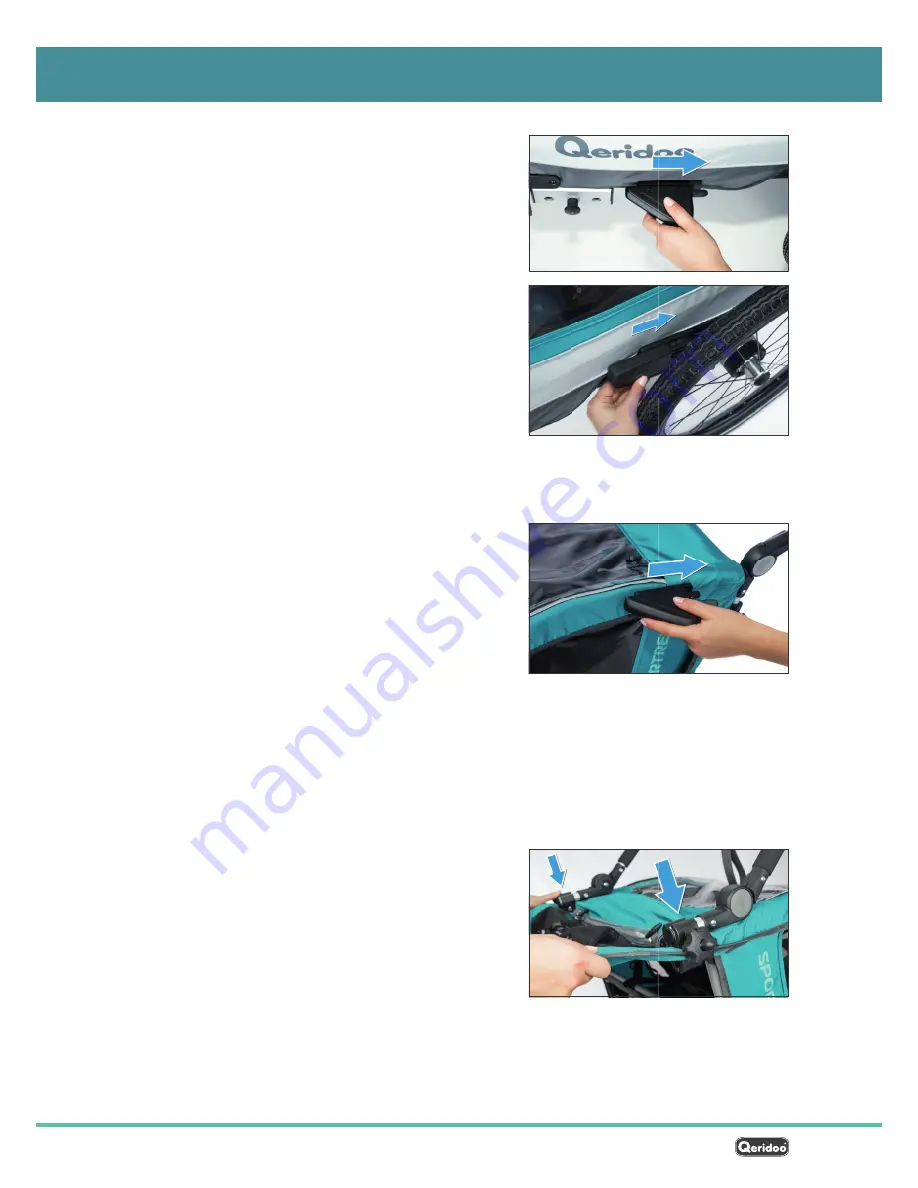
Slide the wheel guard onto the slide holder as shown
in the picture.
f
Be sure that the fixing mechanism locks audibly.
f
Repeat the procedure on the other side of the trailer.
f
Slide the leaf spring cover onto the slide holder as
shown in the picture.
f
Be sure that the fixing mechanism locks audibly.
f
Repeat the procedure on the other side of the trailer.
Installing the head protector (Sportrex2)
The head protector serves as additional side protection when transporting two children.
f
Be sure that the slide covers for the head protector are fixed and tightened on both sides.
f
Slide the head protector onto the slide holder as shown
in the picture.
f
Be sure that the fixing mechanism locks audibly.
f
Repeat the procedure on the other side of the trailer.
Mounting the push handle
The push handle is secured to the top of the cabin frame with two robust tube clamps. It has
multiple height settings and is used for pushing, pulling and manoeuvring your
Sportrex
.
f
Prepare the push handle by fully unfolding it. To do this, keep the light grey pushbuttons
pressed on both sides, see
„Adjusting the push handle“ on page 19
.
f
Position yourself behind the upright cabin.
f
Open the cover of the storage compartment.
f
Lay the push handle on the roof and insert the pipe
clamps through the both slots in the cover.
f
Loosen the two star grip screws at the bottom end of
the push handle to enable the tube clamps to be easily
pushed onto the tubes of the cabin frame.
f
With both tube clamps, hold the push handle on the
tubes of the upper cabin frame.
Assembly


