background image

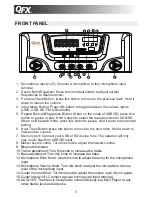
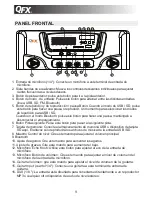
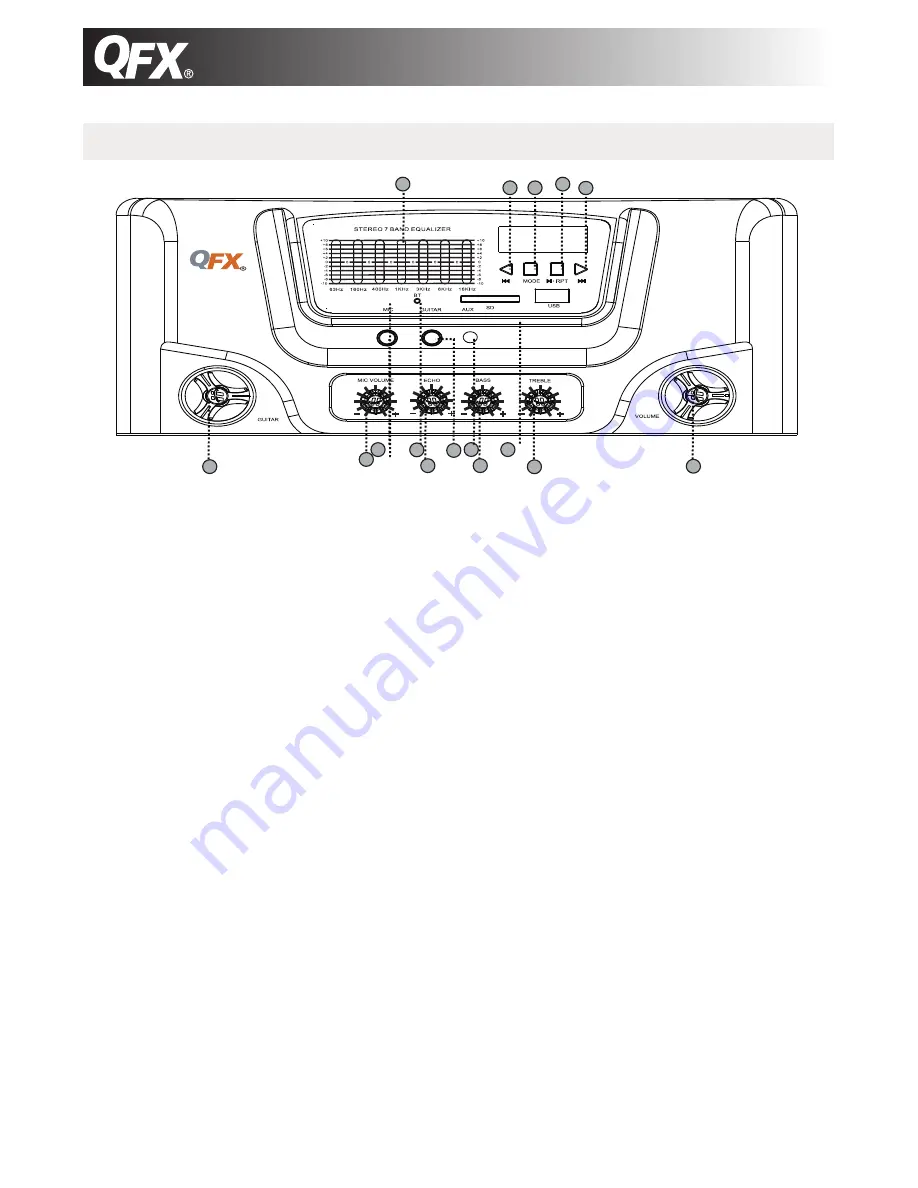
FRONT PANEL

3

1.   Microphone Input(1/4"): Connect a microphone to this microphone input 

terminal.

2.   Seven Band Equalizer: Move the individual sliders to adjust certain 

frequencies to desires levels.

3.   Previous Track Button: press this button to move to the previous track. Hold it 

down to reduce the volume.

4.   Input Mode Button: Press this button to toggle between the various inputs 

(LINE, USB, SD ,FM & Bluetooth).

5.   Repeat Button&Play/pause Button: When on the mode of USB/SD, press this 

button to pause or play. Hold it down to select the repeat modes for USB/SD. 

      When on Bluetooth mode, press this button to pause, hold it down to disconnect 

pairing. 

6.   Next Track Button:press this button to move to the next track. Hold it down to 

increase the volume.

7.   Memory port: Connect your USB or SD device here. The speaker will only 

play music files from USB/SD input. 

8.  Master Level Control: Turn this knob to adjust the master volume.

9.  Bluetooth Indicator.
10. Treble adjustment: Turn this knob to increase the treble.
11. Bass adjustment: Turn this knob to increase the bass.
12. Microphone Echo Knob: Use this knob to adjust the echo for the microphone 

input.

13. Microphone Volume Knob: Turn this knob to adjust the microphone volume 

level of the microphone input.

14. Guitar Volume Knob: Turn this knob to adjust the volume level of your guitar.
15. Guitar Input(1/4"): Connect a guitar to this guitar input terminal.
16. AUX(1/8"): The Input is designed to connect directly to a Mp3 Player or any 

other stereo level audio device. 

16

13

12

11

15

14

14

1

8

10

7

9

2

6

5

4

3

Summary of Contents for SBX-1121010

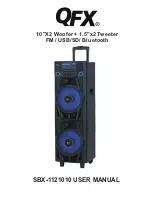
Page 1: ...SBX 1121010 USER MANUAL 10 X2 Woofer 1 5 x2 Tweeter FM USB SD Bluetooth...

Page 2: ...WARNING 1 or has been dropped...

Page 3: ...l not occur in a particular installation If this equipment does cause harmful interference to radio or television reception which can be determined by turning the equipment off and on the user is enco...

Page 4: ...H Hz z 4 4 T Th hi is s d de ev vi ic ce e c co om mp pl li ie es s w wi it th h P Pa ar rt t 1 15 5 o of f t th he e F FC CC C R Ru ul le es s O Op pe er ra at ti io on n i is s s su ub bj je ec ct t...

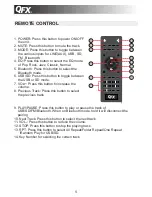
Page 5: ...button to move to the next track Hold it down to increase the volume 7 Memory port Connect your USB or SD device here The speaker will only play music files from USB SD input 8 Master Level Control T...

Page 6: ...between the USB or SD mode 7 VOL Press this button to increase the volume 8 Previous Track Press this button to select the previous track 5 9 PLAY PAUSE Press this button to play or pause the track o...

Page 7: ...39 5cm W x 106 0cm H 1 1 1 2 2 1 Turn on you Bluetooth device 2 Turn on the speaker Bluetooth the unit will automatically go into pairing mode to search for Bluetooth device You will know you are in p...

Page 8: ...a garantizar la seguridad Si el enchufe suministrado no encaja en su toma consulte con un electricista para reemplazar la toma de corriente 9 Asegure todos los cables conectados a esta unidad para qu...

Page 9: ...0V V 2 24 40 0V V 5 50 0H Hz z 6 60 0H Hz z 4 4 T Th hi is s d de ev vi ic ce e c co om mp pl li ie es s w wi it th h P Pa ar rt t 1 15 5 o of f t th he e F FC CC C R Ru ul le es s O Op pe er ra at ti...

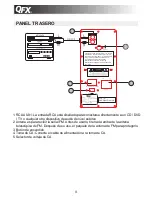
Page 10: ...asar a la siguiente pista 7 Tarjeta de memoria Conecte el almacenamiento de memoria USB o dispositivo de tarjeta SD aqu El altavoz s lo reproducir los archivos de m sica de la entrada USB SD 8 Maestro...

Page 11: ...bot n para aumentar el volumen 8 Pista anterior Pulse brevemente este bot n para seleccionar la pista anterior Presione este bot n para encender 11 9 PLAY PAUSE pulse este bot n para reproducir o pau...

Page 12: ...TH 1 Encienda el dispositivo Bluetooth 2 Encienda el altavoz Bluetooth La unidad buscar y sincronizar autom ticamente con el dispositivo Bluetooth Cuando la sincronizaci n se realiza correctamente el...

Page 13: ......

Reviews: