background image

简体中文

2

使用钢琴灯

基本操作

切换个别单元键

一般保养与故障诊断

钢琴灯本体外观的保养

请先拔下插头、关闭钢琴灯开关,再使用软质干布轻轻擦拭钢琴灯的外部零件、单元体表面。请勿使
用任何化学溶剂

如:煤油、松香油…


)

,以免上述溶剂损害钢琴灯外观。

钢琴灯电线的保养

• 

请使用软质干布轻轻擦拭钢琴灯的电线,切勿以湿布擦拭,以免造成导电意外。

• 

严禁使用水或任何液体直接冲洗钢琴灯本体及任一部份。

故障诊断

如果并非产品操作使用不正常,请确认问题是否因下列原因造成。

(1) 

检查电源变压器是否完全插入位于钢琴灯底座上的电源接座与墙上的电源插座。

(2) 

检查电源启动开关,是否正确切换至有开启标记 「

-

」的位置。

(3) 

检查各个单元键是否都在启动位置。

如果采取指示的方法,仍然无法解决问题,请停止使用并洽询本公司。

规格

www.QisDesign.com

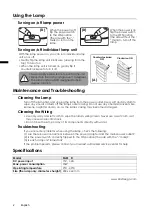
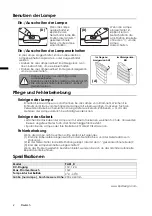
当钢琴灯在关闭状态
下,按压钢琴灯的启动
开关切换至有开启标记

」的位置,使钢琴灯

进入开启状态。

当钢琴灯在开启状态时,
如果想关闭电源,只要
再次按压启动开关切换
至无开启标记处,即可
关闭钢琴灯

熄灭

)

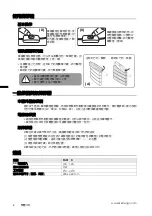
当钢琴灯在开启状态,以手指轻触任一个单元键,即可切换单
元键的启动与关闭效果 (亮

/

暗)。

• 

从钢琴灯的上方俯视,逆时针方向碰触单元键,即可关闭单

元键。

• 

顺时针方向碰触单元键,即可启动单元键。

(D)

(D)

• 

严禁持续施压单元键,以免损坏。

• 

单元键的启动角度大约

 10 

度。

• 

单元键无法

360

度旋转。

逆时针:关闭

顺时针:启动

(A)

型号

PA01 _D

DC

电源输入

15V, 1.2A

最大消耗功率

15W

工作温度

0 C  -  40 C

灯具本体尺寸

宽度

高度

)

200 x 460 mm

Summary of Contents for PA01 D

Page 1: ...English Deutsch Fran ais Italiano P N 4J 0TH01 002 Piano LED Lamp Table Lamp PA01 _D User Guide...

Page 2: ...C B A D...

Page 3: ...00 240V AC 50 60 Hz Otherwise the lamp will fail to work normally or result in fire Be aware of the total loading when using extension cords or multiple outlet power boards In order to prevent any dam...

Page 4: ...itch correctly flipped to the ON position the side with the mark 3 Is each lamp unit turned on If the problem persists please contact your nearest authorized service center for help Specifications www...

Page 5: ...iert die Lampe nicht normal und es besteht Brandgefahr Achten Sie bei der Verwendung von Steckerleisten darauf dass die zul ssige Gesamtlast nicht berschritten wird Um Sch den an der Lampe zu vermeide...

Page 6: ...ichnete Seite 3 Sind alle Lampeneinheiten eingeschaltet Wenn das Problem weiterhin bestehen bleibt wenden Sie sich an das n chste autorisierte Reparaturunternehmen Spezifikationen www QisDesign com We...

Page 7: ...ent une prise de courant adapt e 100 240V AC 50 60 Hz Autrement la lampe risque de ne pas fonctionner normalement ou de provoquer un incendie Faites attention la charge totale lorsque vous utilisez de...

Page 8: ...Est ce que chaque lampe est allum e Si le probl me persiste veuillez contacter votre service de r paration le plus proche Sp cifications www QisDesign com Quand l alimentation est coup e basculez l i...

Page 9: ...5 1518GPCU e collegare quest ultimo unicamente a una presa di corrente di rete adatta 100 240 Vc a 50 60 Hz In caso contrario la lampada non funzioner correttamente o potrebbe addirittura incendiarsi...

Page 10: ...enti o non saldi 2 L interruttore di alimentazione correttamente orientato nella posizione ACCESA il lato con il simbolo 3 Tutte le unit della lampada sono accese Se il problema persiste rivolgersi al...

Page 11: ...1 LED LED A 1 B 1 C 1 ADS 18C 15 1518GPCU 100 240V AC 50 60 Hz 1 2...

Page 12: ...2 1 2 3 D D 10 360 A PA01 _D DC 15V 1 2A 15W 0 C 40 C x 200 x 460 mm www QisDesign com...

Page 13: ...1 LED LED A 1 B 1 C 1 ADS 18C 15 1518GPCU 100 240V AC 50 60 Hz 1 2...

Page 14: ...2 1 2 3 www QisDesign com D D 10 360 A PA01 _D DC 15V 1 2A 15W 0 C 40 C x 200 x 460 mm...

Page 15: ...1 LED LED A x 1 B x 1 C x 1 ADS 18C 15 1518GPCU 100 240V AC 50 60 Hz 1 2...

Page 16: ...2 1 2 ON 3 www QisDesign com ON OFF D D 10 360 A PA01 _D DC 15V 1 2A 15W 0 C 40 C x 200 x 460 mm...

Reviews: