English
1
Introduction
Thank you for purchasing the Seagull LED (Light-Emitting Diode) Table Lamp. To ensure your
safety against any potential hazards and to optimize your lighting experience, please read
this guide carefully prior to use, and keep it in a safe place for future reference.
Package Contents
Check the packaging for the following items. If any is missing or damaged, please contact
the place of purchase immediately.
For Your Safety
This lamp has been tested and certified under strict regulations and standards for illuminating
devices. To ensure your safety, please pay attention to the warnings and cautions below,
and follow the instructions in this guide when using the lamp.
• To prevent electric shock, do not disassemble the lamp for any reasons.
• Do not attempt to modify the lamp. Doing so may cause the lamp to malfunction or result
in irrecoverable damages.
• Do not replace the light source of the lamp by yourself. Contact your place of purchase if
the light source needs replacement.
• Use only the supplied power adapter (WA-24E 12FU), and connect only to a suitable outlet
power (100-240V AC/50-60 Hz). Otherwise the lamp will fail to work normally or result in a
fire.
• Be aware of the total loading when using extension cords or multiple outlet power boards.
• Do not hang any objects on the lamp, or use the lamp for other purposes. Place the lamp
only on a flat and stable surface. Otherwise the lamp may topple over and result in
damages.
Installation
Insert one end of the lamp pole (
(B)
, the end with
yellow insulation tape) all the way into the lamp pole
installation hole on the lamp base. Make sure that the
pole is inserted at an angle, and the insulation tape
on the lamp pole is not seen after it is inserted.
Secure the lamp pole on the lamp base by turning
the thumb screw on the bottom side of the lamp
base clockwise using a screwdriver or coin. Do not
over-tighten the screw.
• Seagull lamp body x 1
• Hex L-Key x 1
• User guide x 1
• Lamp base x 1
• Power adapter x 1
• Lamp pole x 1
• Quick start guide x 1
In case of the following situations, unplug the lamp from the power outlet
immediately and contact the place of purchase for inspection or repair:
• When the outer casing of the lamp is broken
• When there are strange odors coming from the lamp
• When the lamp flickers
• When the insulation of the lamp's wiring is damaged or frayed, and the
metal strings inside can be seen
• When unknown chemical liquids are spilled on the lamp
• Do not use the lamp in a humid environment (like in a bathroom or outdoors).
Otherwise the components inside may short-circuit and result in accidents.
• This lamp is designed for indoor use only. Do not use it outdoors.
• Never disassemble the lamp or remove any components from it, as doing so
may result in accidents and will void the product warranty.
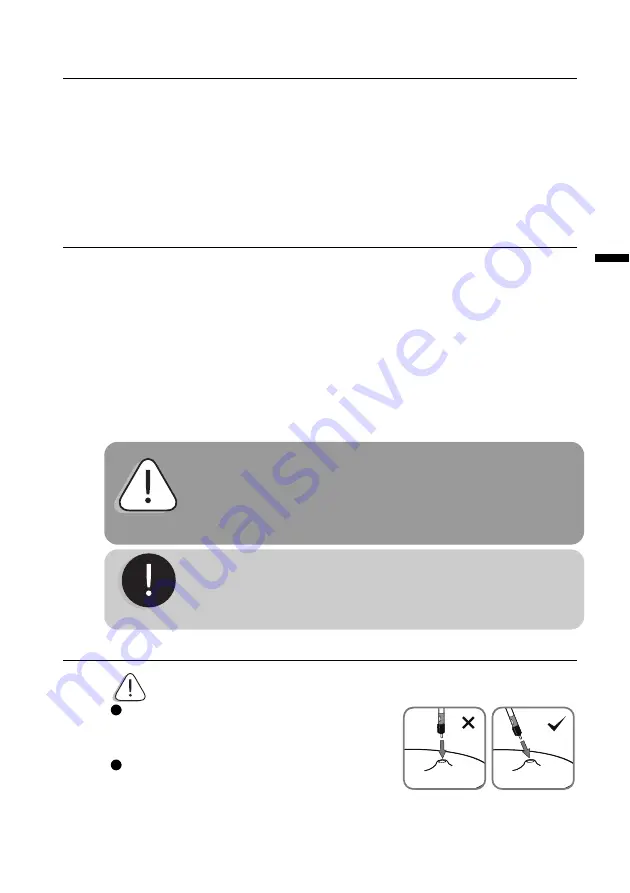
WARNING
CAUTION
When installing the lamp, hold the fuselage of the lamp body. Do not just grab the
wings of the lamp.
1
2
Summary of Contents for Seagull Light
Page 1: ...English Deutsch Fran ais Italiano Seagull Light LED Table Lamp BD10 _D User Guide...
Page 2: ......
Page 15: ...1 LED LED WA 24E 12FU 100 240V AC 50 60 Hz B 1 L 1 1 1 1 1 1 1 2...
Page 16: ...2 2 A L L 3 4 5 6 30 20...
Page 18: ...1 LED LED WA 24E 12FU 100 240V AC 50 60 Hz B 1 L 1 1 1 1 1 1 1 2...
Page 19: ...2 A L L 3 4 5 6 30 20...
Page 21: ...1 LED WA 24E 12FU 100 240V AC 50 60 Hz B x 1 L x 1 x 1 x 1 x 1 x 1 x 1 1 2...
Page 22: ...2 A L L 3 4 5 6 30 20...
Page 24: ...Memo P N 4J 16K01 001...


