8–Using QLogic Control Suite
Configuring Teaming
145
83840-546-00 D
11.
Repeat steps
through
to define additional teams. As teams are defined,
they can be selected from the team list, but they have not yet been created.
Click the
Preview
tab to view the team structure before applying the
changes.
12.
Click
Apply/Exit
to create all the teams you have defined and exit the
Manage Teams window.
13.
Click
Yes
when the message is displayed indicating that the network
connection will be temporarily interrupted.
14.
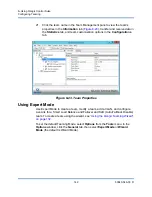
Configure the team IP address.
a.
From
Control Panel
, double-click
Network Connections
.
b.
Right-click the name of the team to be configured, and then click
Properties
.
NOTE
The team name cannot exceed 39 characters, cannot begin with
spaces, and cannot contain any of the following characters: & \ / : *
? < > |
Team names must be unique. If you attempt to use a team name
more than once, an error message is displayed indicating that the
name already exists.
The maximum number of team members is 8.
When team configuration has been correctly performed, a virtual
team adapter driver is created for each configured team.
If you disable a virtual team and later want to reenable it, you must
first disable and reenable all team members before you reenable
the virtual team.
When you create generic trunking and link aggregation teams, you
cannot designate a standby member. Standby members work only
with smart load balancing and failover and SLB (auto-fallback
disable) types of teams.
For an SLB (auto-fallback disable) team, to restore traffic to the
load balance members from the standby member, click the
Fallback button on the Team Properties tab.
When configuring an SLB team, although connecting team
members to a hub is supported for testing, it is recommended to
connect team members to a switch.
Not all network adapters made by others are supported or fully
certified for teaming.
Summary of Contents for 8400 Series
Page 390: ......


