P
reli
mi
na
ry
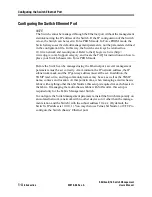
Configuring the Switch Ethernet Port
SANbox-8/16 Switch Management
User’s Manual
59010-06 Rev. A
Introduction
1-5
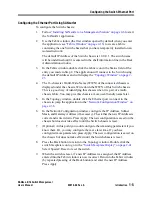
Configuring the Ethernet Port Using SANsurfer
To configure the Switch chassis:
1.
Follow
“Installing SANsurfer on a Management Station” on page 2-6
to start
the SANsurfer application.
2.
Use the Fabric window (the first window opened by default when you enter
the application, see
“Fabric Window” on page 2-16
) to create a fabric
containing the one Switch chassis that you have temporarily installed on an
isolated network.
The default IP Address of the Switch chassis is 10.0.0.1. The switch name
will be undefined until it is entered in the shelf information line in the Rack
Administration window.
3.
In the Fabric window, double click the fabric icon in the Status field of the
entry you made in Step 2. The application will connect to the Switch using
the default IP Address and will display the
“Topology Window” on page 2-
23
.
4.
The 16-character World-Wide-Name (WWN) of the connected chassis is
displayed under the chassis. Write down the WWN of this Switch chassis.
This is a good way of identifying this chassis when it is part of a multi-
chassis fabric. You may give this chassis a more user-friendly name later.
5.
In the Topology window, double click the Ethernet port icon next to the
chassis to jump the application to the
“Network Configuration Window” on
page 2-36
.
6.
In the Network Configuration window, configure the IP Address, Subnet
Mask, and Gateway Address (if necessary). Check that the new IP Address is
correct and write it down. Press Apply. The new configuration is saved on the
chassis but does not take effect until the Switch chassis is reset.
7.
(Optional) At this point you could configure the remaining parameters if you
know them. Or, you may configure them at a later time. If you have
configured more parameters, press Apply. The new configuration is saved on
the chassis but does not take effect until the Switch chassis is reset.
8.
Press the Back button to return to the Topology window. Double click the
switch faceplate icon to go to the
“Switch Faceplate Display” on page 2-41
.
Select Special>Reset to reset the switch.
9.
When the switch is reset, if a new IP Address was assigned, the IP Address
entered into the Fabric window is now incorrect. Return to the Fabric window
(by repeated pressing of the Back button) and enter the new IP Address.
Press Apply.
Summary of Contents for SANbox-16
Page 1: ...P r e l i m i n a r y SANbox 8 16 SwitchManagement User sManual Publication No 59010 06 Rev A...
Page 16: ...SANbox 8 16 Switch Management List of Tables 59010 06 Rev A User s Manual Notes...
Page 148: ...show command type SANbox 8 16 Switch Management Telnet 59010 06 Rev A User s Manual Notes...
Page 160: ...Configuring SNMP SANbox 8 16 Switch Management SNMP 59010 06 Rev A User s Manual Notes...
Page 180: ...SANbox 8 16 Switch Management Index 59010 06 Rev A User s Manual Notes...


