
3 – Managing Fabrics
RADIUS Servers
3-2
59056-03 C
A
3.1.1
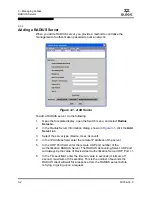
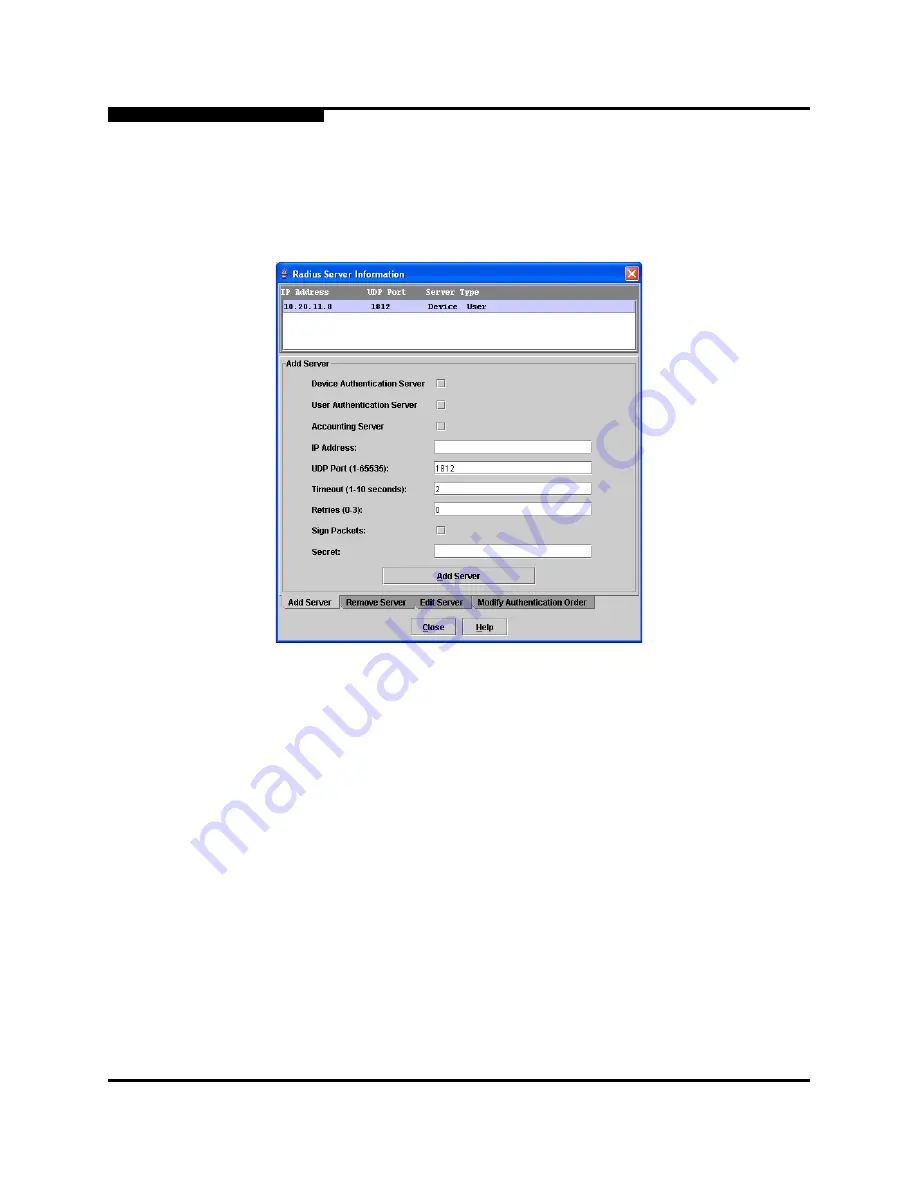
Adding a RADIUS Server
When you add a RADIUS server, you provide a method to centralize the
management of authentication passwords over a network.
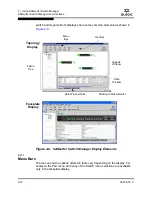
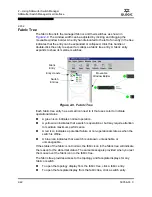
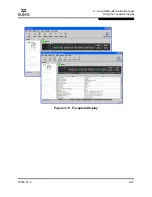
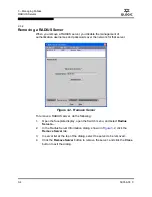
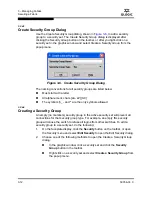
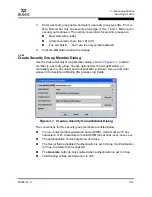
Figure 3-1. Add Server
To add a RADIUS server, do the following:
1.
Open the faceplate display, open the Switch menu, and select
Radius
Servers...
.
2.
In the Radius Server Information dialog, shown in
Figure 3-1
, click the
Add
Server
tab.
3.
Select the server type (Device, User, Account).
4.
In the IP Address field, enter the remote IP address of the server.
5.
In the UDP Port field, enter the remote UDP port number of the
Authentication RADIUS Server. The RADIUS Accounting Server UDP port
will always be the value of Device/User Authentication Server UDP Port + 1.
6.
In the Timeout field, enter the timeout value in seconds (minimum of 1
second, maximum of 30 seconds). This is the number of seconds the
RADIUS client will wait for a response from the RADIUS server before
retrying, or giving up on a request.
Summary of Contents for SANbox 5200 Series
Page 48: ...2 Using SANsurfer Switch Manager Using the Faceplate Display 2 30 59056 03 C A Notes...
Page 152: ...4 Managing Switches Displaying Hardware Status 4 46 59056 03 C A Notes...
Page 180: ...5 Managing Ports Graphing Port Performance 5 28 59056 03 C A...
Page 318: ...A Command Line Interface Zoning Command A 138 59056 03 C A Notes...


