background image

59235-03  A

SANbox 5600 Series

QuickTools Switch Management

User Guide

Firmware Version 7.4

Summary of Contents for SANbox 5600 Series

Page 1: ...59235 03 A SANbox 5600 Series QuickTools Switch Management User Guide Firmware Version 7 4...

Page 2: ...testing or modification QLogic Corporation assumes no responsibility for any errors that may appear in this document This product is covered by one or more of the following patents 6697359 other paten...

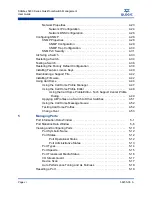
Page 3: ...ace 2 3 Alerts Panel 2 4 Fabric Tree 2 5 Graphic Window 2 5 Data Windows and Tabs 2 5 Menu Bar 2 6 Popup Menus 2 7 Shortcut Keys 2 8 Selecting Switches 2 8 Selecting Ports 2 8 Setting QuickTools Prefe...

Page 4: ...Active Zone Set Data Window 3 14 Configured Zonesets Data Window 3 15 Zoning Concepts 3 16 Zones 3 16 Aliases 3 17 Zone Sets 3 17 Zoning Database 3 18 Viewing Zoning Limits and Properties 3 18 Managi...

Page 5: ...ailure Recovery 3 35 4 Managing Switches Using the Switch Data Window 4 1 Managing User Accounts 4 8 Creating User Accounts 4 9 Removing a User Account 4 10 Changing a User Account Password 4 11 Modif...

Page 6: ...l Home 4 44 Using the Call Home Profile Manager 4 47 Using the Call Home Profile Editor 4 48 Using the Call Home Profile Editor Tech Support Center Profile Dialog 4 49 Applying All Profiles on a Switc...

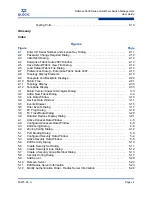
Page 7: ...hot Analysis Dialog 3 3 3 2 Add a New Fabric Dialog 3 4 3 3 Link Data Window 3 10 3 4 Devices Data Window 3 11 3 5 Events Browser 3 15 3 6 Filter Events Dialog 3 17 3 7 FC Ping Dialog 3 18 3 8 FC Trac...

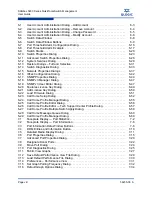
Page 8: ...20 Features License Key Dialog 6 49 6 21 Add License Key Dialog 6 50 6 22 Load Firmware Dialog 6 51 6 23 Call Home Setup Dialog 6 52 6 24 Call Home Profile Manager Dialog 6 55 6 25 Call Home Profile...

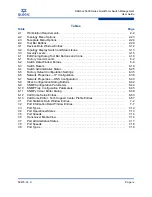
Page 9: ...trative States 6 25 6 5 Factory Default Configuration Settings 6 35 6 6 Network Properties IP Configuration 6 38 6 7 Network Properties DNS Configuration 6 40 6 8 IPsec Configuration Dialog Buttons 6...

Page 10: ...Page x 59235 03 A SANbox 5600 Series QuickTools Switch Management User Guide S Notes...

Page 11: ...Section 5 describes port and device management tasks A glossary of terms and an index are also provided Intended Audience This manual introduces the switch management products and explains their inst...

Page 12: ...lude in the end user documentation provided with the redistribution and or in the software itself an acknowledgement equivalent to the following This product includes software developed by the JDOM Pr...

Page 13: ...ble from 7 00 AM to 7 00 PM Central Standard Time Monday through Friday excluding QLogic observed holidays Training QLogic offers certification training for the technical professional for all QLogic p...

Page 14: ...952 932 4040 Fax 1 952 974 4910 Europe Middle East and Africa Region Email emeasupport qlogic com Phone Numbers by Language 353 1 6924960 English 353 1 6924961 Fran ais 353 1 6924962 Deutsch 353 1 692...

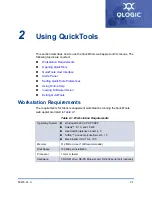
Page 15: ...g QuickTools Workstation Requirements The requirements for fabric management workstations running the QuickTools web applet are listed in Table 2 1 Table 2 1 Workstation Requirements Operating System...

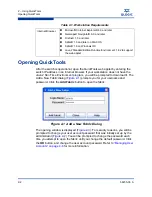
Page 16: ...is displayed Figure 2 3 For security reasons you will be prompted to change your user account password that was initially set up by the administrator Figure 2 2 You will be prompted to change the pass...

Page 17: ...ta window tabs The switch faceplate is displayed in the graphic window and shows the front of a single switch and its ports While there is no topology display the fabric name is displayed for referenc...

Page 18: ...between the Alerts Panel entries and data windows enable you to move the divider bar up or down With the faceplate image and data windows displayed click the up arrow on left to move the divider up to...

Page 19: ...mouse on the fabric icon in the fabric tree Graphic Window The graphic window shows the switch faceplate Figure 2 3 or backplate display The window height can be adjusted by clicking and dragging the...

Page 20: ...ding zones and their member ports Refer to Active Zone Set Data Window on page 3 14 for more information about this data window Refer to Zoning on page 3 13 for information about zone sets and zones M...

Page 21: ...Port Properties Advanced Port Properties Reset Port Port Diagnostics Online Offline Zoning Edit Zoning Resolve Zoning Capture Active Zoning Restore Configured Zoning Capture Merged Zoning View Merged...

Page 22: ...Managing Ports for detailed port information Selected ports in the faceplate display are outlined in light blue You can select ports the following ways To select a port click the port To select all p...

Page 23: ...nnot open a fabric with a non secure connection Enable default or disable the Event Browser Refer to Event Browser on page 3 4 If the Event Browser is enabled using the Preferences dialog Figure 2 5 t...

Page 24: ...ton to save the changes Using Online Help The browser based online help system can be accessed from the QuickTools web applet several ways Online help is also context sensitive that is the online help...

Page 25: ...Software Version 59235 03 A 2 11 A Viewing Software Version To view the QuickTools software version information open the Help menu and select About Exiting QuickTools To exit a QuickTools web applet...

Page 26: ...2 Using QuickTools Exiting QuickTools 2 12 59235 03 A S Notes...

Page 27: ...ing private are set at the factory to these well known defaults and should be changed if SNMP is enabled using the System Services or SNMP Properties dialogs If SNMP is enabled default and the read an...

Page 28: ...information being displayed and rediscovers all switch information To rediscover a fabric open the Fabric menu and select Rediscover Fabric The rediscover function is more comprehensive than the refr...

Page 29: ...Restore menu item is not available for the in band switches You can only restore a switch out of band the fabric management switch There are certain parameters that are not archived and these are not...

Page 30: ...ser Figure 3 1 are formatted by severity time stamp source type and description The maximum number of entries allowed in the Event Browser is 10 000 The maximum number of entries allowed on a switch i...

Page 31: ...al event an event that indicates a potential failure Critical log messages are events that warrant notice by the user By default these log messages will be posted to the screen Critical log messages d...

Page 32: ...t one or both of the From and To options Enter the bounding timestamps MM DD YY HH MM AA to display only those events that fall within those times AA indicates AM or PM The current year YY can be ente...

Page 33: ...r By Description Successive sort operations of the same type alternate between ascending and descending order Saving the Event Browser to a File You can save the displayed Event Browser entries to a f...

Page 34: ...in place of the World Wide Name This sub section describes how to view and manage device information and nicknames Devices Data Window Displaying Detailed Device Information Managing Device Port Nickn...

Page 35: ...me in the Edit Nickname dialog Refer to Managing Device Port Nicknames on page 3 10 for more information Details Click the i to display additional information about the device Refer to Displaying Deta...

Page 36: ...o a world wide name of a device Assigning a nickname makes it easier to recognize device ports when zoning your fabric or when viewing the Devices data window You can add edit delete import and export...

Page 37: ...dialog 4 Click the Save button to save the changes Editing a Nickname To edit a device port nickname do the following 1 Open the Fabric menu and select Nicknames to open the Nicknames dialog The devi...

Page 38: ...XML file do the following 1 Open the Fabric menu and select Nicknames to open the Nicknames dialog 2 Open the File menu and select Export 3 Enter a name for the XML nickname file in the Save dialog a...

Page 39: ...bric into zones for more efficient and secure communication among functionally grouped nodes This section addresses the following topics Active Zone Set Data Window Configured Zonesets Data Window Zon...

Page 40: ...ndow The Active Zoneset data window uses display conventions for expanding and collapsing entries that are similar to the fabric tree An entry handle located to the left of an entry in the tree indica...

Page 41: ...ay conventions for expanding and collapsing entries that are similar to the fabric tree An entry handle located to the left of an entry in the tree indicates that the entry can be expanded Click this...

Page 42: ...han one zone set Several zone sets can be defined for a fabric but only one zone set can be active at one time The active zone set determines the current fabric zoning Membership in a zone can be defi...

Page 43: ...ntaining one or more zone sets This zoning database resides in non volatile or permanent memory and is therefore retained after a reset Refer to Configured Zonesets Data Window on page 3 15 for inform...

Page 44: ...ets that can be configured on the switch MaxZones is 2000 The maximum number of zones that can be configured on the switch including orphan zones MaxAliases is 2500 The maximum number of aliases that...

Page 45: ...select Properties 3 View the zoning properties information in the Properties dialog 4 Click the OK button to close the Properties dialog Managing the Zoning Database Managing the zoning database cons...

Page 46: ...activate a zone set the switch distributes that zone set and its zones excluding aliases to every switch in the fabric This zone set is known as the active zone set You cannot edit an active zone set...

Page 47: ...operations Use the Edit Zoning dialog to define zoning changes and click the Apply button to open the Error Check dialog Click the Error Check button to have QuickTools check for zoning conflicts such...

Page 48: ...a zone Copy button copies selected zoning items to clipboard Paste button pastes clipboard items to selected zoning item where applicable Switch port icon not logged in Switch port icon logged in NL_...

Page 49: ...Configured Zoning option reverts back to the previously saved configured zone set Capture Merged Zoning The Capture Merged Zoning option saves the merged zone set into the configured zone set View Mer...

Page 50: ...e saves changes to the active zone set in temporary memory and to the zoning database If Merge Auto Save is disabled changes to the active zone set are stored only in temporary memory which is cleared...

Page 51: ...to save the zoning file Restoring the Zoning Database from a File Do the following to restore the zoning database from a file to a switch 1 Open the Zoning menu and select Edit Zoning to open the Edi...

Page 52: ...tree and select Clear Zoning from the popup menu Click the Yes button to confirm that you want to delete all zone sets and zones Managing Zone Sets Zoning a fabric involves creating a zone set creati...

Page 53: ...to Copying a Zone to a Zone Set on page 3 30 5 Click the Apply button to save changes to the zoning database Activating and Deactivating a Zone Set You must activate a zone set to apply its zoning de...

Page 54: ...members of other zone sets are not affected Zones that are currently not in a zone set are considered to be part of the orphan zone set The orphan zone set is not an actual zone set but rather a way o...

Page 55: ...in the Zone Sets dialog A zone name must begin with a letter and be no longer than 64 characters Valid characters are 0 9 A Z a z _ and 5 To add switch ports or attached devices to the zone choose on...

Page 56: ...sets 6 Click the Save Zoning button to implement the changes 7 Click the Close button to close the Error Check dialog Adding Zone Members You can zone a port device by switch domain ID and port number...

Page 57: ...he Edit Zoning dialog click the Close button to close the Edit Zoning dialog Renaming a Zone To rename a zone do the following 1 In the Zone Sets tree of the Edit Zoning dialog click the zone to be re...

Page 58: ...rom all zone sets do the following 1 In the Edit Zoning dialog select the zone to be removed 2 Open the Edit menu and select Delete Zone 3 Click the Yes button in the Remove dialog to save the change...

Page 59: ...port device Select a port device in the Port Device tree and drag it into the alias To select multiple ports devices press the Control key while selecting Select a port device in the Port Device tree...

Page 60: ...formation only affects the active zone set not the configured zone sets unless Merge Auto Save is turned on Zone Merge Failure If a zone merge is unsuccessful the inter switch links between the fabric...

Page 61: ...accurately defines your zoning needs If not you must edit the zone memberships and reactivate the zone sets After correcting the zone membership reset the isolated ports to allow the fabrics to join...

Page 62: ...3 Managing Fabrics Zoning 3 36 59235 03 A S Notes...

Page 63: ...a Switch Configuring the Network Configuring SNMP Archiving a Switch Restoring a Switch Testing a Switch Restoring the Factory Default Configuration Installing Feature License Keys Downloading a Supp...

Page 64: ...he Switch data window is grouped and accessed by the Summary Status Network User Login Firmware Services Zones Security and Advanced buttons Click a button to display the grouped information in the da...

Page 65: ...n ID lock status Prevents True or permits False dynamic domain ID reassignment Number of Ports Number of ports activated on the switch Operational State Switch operational state Online Offline Diagnos...

Page 66: ...he most recent Power On Self Test Test Status The current diagnostic test status of switch Test Fault Code The code value for the last recorded diagnostic test sta tus recorded on the switch Network G...

Page 67: ...addresses assigned by DHCPv6 NDP or the switch administrator User Login Group User Name Account name Login Level Authority level Super User Super user privileges enabled disabled UserAuthentication En...

Page 68: ...s If disabled the switch cannot be man aged using the web applet Telnet Enabled Telnet client status SSH Enabled Secure Shell status If enabled an encrypted data path is provided for command line inte...

Page 69: ...rted zone member types will have hardware enforcement Security Auto Save N A does not apply to this switch Security Fabric Binding Enable N A does not apply to this switch Advanced Group R_A_TOV Resou...

Page 70: ...e remove or modify user accounts and change account passwords The Admin account can also view and modify the switch and its configuration with QuickTools The Admin account can not be removed Users wit...

Page 71: ...age 3 Enter an account name in the New Account Login field Account names are limited to 15 characters The first character must be alphanumeric 4 If the account is to have the ability to modify switch...

Page 72: ...n the Switch menu and select User Accounts Click the Remove Account tab in the User Account Administration dialog to present the display Figure 4 4 Select the account login name from the list of accou...

Page 73: ...gin name from the list of accounts at the top of the dialog then enter the old password the new password and verify the new password in the corresponding fields Click the Change Password button Any us...

Page 74: ...ct the account login name from the list of accounts at the top of the dialog Select the Admin Authority Enabled option to grant admin authority to the account name Select an Account Expiration Date op...

Page 75: ...ted the Date and Time areas becomes inactive thus preventing you from manually setting the date and time on the switch The NTP Server Discovery and NTP Server IP Address fields become active and allow...

Page 76: ...erations that change the fabric include Zoning modifications Adding moving or removing devices attached to the switch fabric This includes powering up or powering down attached devices Adding moving o...

Page 77: ...ation Wizard The Configuration Wizard is a series of dialogs that guide you through the steps to configure new or replacement switches Using the Configuration Wizard The Configuration Wizard is a seri...

Page 78: ...h Administrative States Broadcast Support In band Management Fabric Device Management Interface To open the Switch Properties dialog choose one of the following Open the faceplate display for the swit...

Page 79: ...ill isolate as a separate fabric However you can remedy this by resetting the new switch or taking it offline then back online The principal switch will reassign the domain ID and the switch will join...

Page 80: ...Current administrative state the state that is applied to the switch for temporary purposes and is not retained across switch resets The current administrative state is set using the Set Switch comma...

Page 81: ...ric to device interface enables a device s management information to be registered The application to fabric interface provides the framework by which an application obtains device information from th...

Page 82: ...ck the OK button to put the new values into effect Figure 4 8 Advanced Switch Properties Dialog Timeout Values The switch timeout values determine the timeout values for all ports on the switch The ti...

Page 83: ...IM and Call Home To display the System Services dialog open the Switch menu and select Services Figure 4 9 System Services Dialog NOTE System services requiring you to enter an IP address are dependan...

Page 84: ...ts time and date settings from an NTP server Configuring all of your switches and your workstations to utilize NTP will keep their date time settings in sync and will prevent difficulties with SSL cer...

Page 85: ...IP dialog Click the DNS tab to open the Network Properties DNS dialog After making changes click the OK button to put the new values into effect To open the Network Properties dialog choose one of the...

Page 86: ...address An IPv6 address is 128 bits and consists of eight blocks of hexadecimal numbers with each block separated by a colon The maximum number of numerals in each block is four One or more blocks wi...

Page 87: ...Resolution Protocol acquires the IP address from a RARP server A RARP request is broadcast with up to three retries each at 5 second intervals If no IP address is obtained the switch reverts to the pr...

Page 88: ...ost Configuration Protocol version 6 acquires the IP configuration from a DHCP server If no satisfactory lease is obtained the DHCP client attempts to use the previously configured lease If the previo...

Page 89: ...tch in order to avoid an IP address conflict DNS Server Addresses The IP address of the DNS server DNS Search List Search List Discovery Choose one of the following methods by which to assign the IP a...

Page 90: ...change SNMP configuration parameters To open the SNMP Properties dialog select a switch in the topology display or open the faceplate backplate display open the Switch menu select SNMP and select SNM...

Page 91: ...ined Read Commu nity Read community password up to 32 characters that authorizes an SNMP agent to read information from the switch This is a write only field The value on the switch and the SNMP manag...

Page 92: ...st be unique For example if trap 1 and trap 2 have the same address then they must have different port values Similarly if trap 1 and 2 have the same port value they must have different addresses Spec...

Page 93: ...revent it from being seen by an unauthorized source The SNMP v3 Manager dialog allows you to add remove and edit an SNMP v3 user To display the SNMP v3 Manager dialog Figure 4 12 open the Switch menu...

Page 94: ...y SNMP v3 user settings Read Write permits user to view and change SNMP v3 user settings Authentication Type None MD5 SHA If None no authentication phrase is required MD5 and SHA require authenticatio...

Page 95: ...archive and must be re configured using the CLI after a restore To archive a switch do the following 1 Open the Switch menu and select Archive 2 In the Save dialog enter a file name 3 Click the Save...

Page 96: ...SANbox 9000 Series switch Refer to Archiving a Switch on page 4 33 for more information To restore a switch do the following 1 Log in to the fabric through the switch you want to restore You cannot r...

Page 97: ...P address in addition to the other network properties Port Properties restores all settings presented in the Port properties dialog Refer to Port Symbolic Name on page 5 12 Switch Properties restores...

Page 98: ...agnostic tests are Online a non disruptive test that exercises port to device connections for all ports on a switch that are online Offline a disruptive test that exercises all port connections for a...

Page 99: ...8 Click the Start Test button to begin the next test Observe the results in the Test Results area If the Test Status field in the Test Results area indicates Failed note the Test Fault Code displayed...

Page 100: ...re user accounts you must select the Reset User Accounts to Default option in the maintenance menu Refer to Recovering a Switch in the Installation Guide for your switch for information about maintena...

Page 101: ...n Undefined Trap Enabled False Trap Port 162 Trap Address Trap 1 10 0 0 254 Traps 2 5 0 0 0 0 Trap Community Public Read Community Public Write Community Private Port State Online Port Speed Auto dete...

Page 102: ...utilizing the FC Ping and FC TraceRoute dialogs to time and track frames from specified targets and destinations Extended Credit license key enables the Extended Credit Wizard to donate port credits m...

Page 103: ...4 17 enter the license key in the Key field Figure 4 17 Add License Key Dialog 5 Click the Get Description button The license key description is retrieved and displayed in the Description area you to...

Page 104: ...talling Firmware Installing firmware involves loading unpacking and activating the firmware image on the switch QuickTools does this in one operation To provide consistent performance throughout the f...

Page 105: ...search for firmware image files is the user s working directory To change the path click the Browse button and select a new path Click the Rescan button to search the folder displayed in the Firmware...

Page 106: ...display the Call Home Setup dialog open the Switch menu select Call Home and select Setup Figure 4 19 Call Home Setup Dialog Table 4 11 lists the entries in the Call Home Setup dialog Table 4 11 Call...

Page 107: ...e secondary second SMTP server Secondary SMTP Server Port The service port number that the secondary SMTP server is listening on to accept connection from SMTP sending agents Contact Email Address The...

Page 108: ...From address ReplyTo Email Address The Email address used by mail reading programs to determine the address that an Email should be addressed to for a reply to a received message This value will over...

Page 109: ...dialog open the Switch menu select Call Home and select Profile Manager The Profiles list shows all profiles on the switch The Email List shows all Email addresses associated with the selected profile...

Page 110: ...format type for the message text being sent short full tsc1 enter the size of the message being sent enter the subject of the Email and enter the Email address es of the recipients Click the Add butto...

Page 111: ...bar in the Call Home Profile Manager dialog or open the Edit menu and select Create Tech Support Center Profile The name in the title bar changes to reflect the Tech Support profile function create o...

Page 112: ...ytes allowed for a Email mes sage compiled for the profile Most Email messages are relatively small under 2KB However Emails that are pro duced by a capture operation can be as large as 1MB due to the...

Page 113: ...iles The Selected Switches list shows the switch names that you selected to receive all profiles from the switch In the Available Switches list select the switches in the fabric to receive all profile...

Page 114: ...ormation Click the Clear Queue button to clear the current statistics Figure 4 24 Call Home Message Queue Dialog Testing Call Home Profiles Use the Call Home Test Profile dialog Figure 4 25 to test th...

Page 115: ...A 4 53 A Change Over Changes the inactive SMTP server to become the active SMTP server To make the inactive SMTP become the active SMTP open the Switch menu select Call Home and select Change Over Cl...

Page 116: ...4 Managing Switches Using Call Home 4 54 59235 03 A S Notes...

Page 117: ...d devices Port Information Data Window Port Statistics Data Window Viewing and Configuring Ports Resetting a Port Testing Ports Port Information Data Window The Port Information data window Figure 5 1...

Page 118: ...e administrative port type G GL F FL or Donor This value is persistent it will be maintained during a switch reset Dur ing port auto configuration it will be used to determine which operational port s...

Page 119: ...t is isolated Administrative Port Speed The speed requested by the user Operational Port Speed The speed actually being used by the port Port Speed Supported The speeds supported by the port Symbolic...

Page 120: ...Downstream ISL The ISL over which the switch has received requests intended for the princi pal switch Extended Credits Group Extended Credits Requested Number of requested credits Max Credits Availab...

Page 121: ...lectrical Media Distance The maximum transceiver transmission distance Media Vendor The company that manufactured the SFP Media Vendor ID The IEEE registered company ID Media Part Number The part numb...

Page 122: ...w and provides different ways to view detailed port information Click the down arrow to open the drop down list Open the drop down list and select Absolute to view the total count of statistics since...

Page 123: ...ber of times more frames were lost during a credit recovery period than the recovery process could resolve This causes a Link Reset to recover the credits BB_CreditRecoveryR RDYFailure Number of times...

Page 124: ...AL_PA equals non zero AL_PA found on F_Port Link Failures Number of optical link failures detected by this port A link fail ure is a loss of synchronization or by loss of signal while not in the offl...

Page 125: ...d non primitive port link errors Total Link Resets Number of link reset primitives transmitted and received by the port Total LIPs Received Number of loop initialization primitive frames received Tota...

Page 126: ...lick a port icon in the faceplate display Use the drop down lists in the Port Properties dialog to change the following parameters Port Symbolic Name Port States Port Types Port Speeds Port Transceive...

Page 127: ...t type that is currently active Configured Type The port type saved in the switch configuration To change click in the field and select an option from the drop down list I O Stream Guard The I O Strea...

Page 128: ...formation Port administrative states have two forms the configured administrative state and the current administrative state Refer Port Administrative States on page 5 13 to for more information Port...

Page 129: ...th the Set Port command using the command line interface Table 5 5 describes the port administrative states To change port administrative state do the following 1 Select one or more ports in the facep...

Page 130: ...t Type option from the drop down list 4 Click the OK button to write the new port type to the switch Table 5 6 Port Types State Description F_Port Fabric port supports a single public device N_Port FL...

Page 131: ...Speeds To change the port transmission speed do the following 1 Select one or more SFP ports in the faceplate display 2 Open the Port menu and select Port Properties to open the Port Properties dialog...

Page 132: ...lack logged in active and ready to send data Optical SFP offline gray black not logged in active can receive sig nal but cannot accept a device login Optical SFP unlicensed dark gray black Optical SFP...

Page 133: ...ect the option that corresponds to one of the following options Enable suppresses the reception of RSCN messages from other ports for which I O Stream Guard is enabled Disable allows free transmission...

Page 134: ...s only affects ports running in loop FL mode To open the Advanced Port Properties dialog select one or more ports open the Port menu and select Advanced Port Properties Figure 5 5 Advanced Port Proper...

Page 135: ...ore disrupts communication External a disruptive test that verifies port circuitry The SFP level test sends a test frame from the ASIC through the SerDes chip through the SFP transceiver fitted with a...

Page 136: ...c state Click the OK button and you will be prompted to change the port state 4 Enter the frame count frame size and select a test pattern option You may use the default pattern or enter an 8 digit pa...

Page 137: ...Physical Address Arbitrated Loop A Fibre Channel topology where ports use arbitration to establish a point to point circuit Arbitrated Loop Physical Address AL_PA A unique one byte value assigned duri...

Page 138: ...sion Fan Fail LED An LED that indicates that a cooling fan in the switch is operating below standard FCID Fibre Channel Identifier The value that identifies a device on the fabric Flash Memory Memory...

Page 139: ...ach other chassis in the fabric MIB Management Information Base Multistage Topology A fabric in which two or more edge switches connect to one or more core switches NL_Port Node Loop Port A Fibre Chan...

Page 140: ...switch that consists of an account name password authority level and expiration date VCCI Voluntary Control Council for Interference World Wide Name WWN A unique 64 bit address assigned to a device by...

Page 141: ...9 C Call Home 4 22 Common Interface Model service 4 22 configuration archive 4 33 restore 4 34 wizard 4 15 configured administrative state 4 18 Configured Zonesets data window 3 15 contact 4 29 curre...

Page 142: ...Device Management Interface 4 19 factory defaults 4 38 FC 4 descriptor 5 17 FDMI See Fabric Device Management Interface feature license key 4 40 File Transfer Protocol service 4 22 FL_Port 5 14 G gate...

Page 143: ...ansceiver 5 16 type 5 14 view 2 9 5 10 Port Information data window 5 1 Port Statistics data window 5 6 port device tree 3 21 principal switch 4 17 processor 2 1 properties network 4 28 Q QuickTools v...

Page 144: ...stem services 4 21 T Telnet service 4 22 testing ports 5 19 The 3 27 time 4 13 timeout values 4 20 tool bar zoning 3 21 transceiver status 5 16 trap authentication 4 29 community 4 30 configuration 4...

Page 145: ...34 failure recovery 3 35 zone set activate 3 27 active 3 14 3 17 create 3 27 deactivate 3 27 definition 3 17 discard inactive 3 25 management 3 26 orphan 3 17 remove 3 28 rename 3 28 3 31 tree 3 21 zo...

Page 146: ...SANbox 5600 Series QuickTools Switch Management User Guide Index 6 59235 03 A S Notes...

Reviews: