6 – Performing Diagnostics
Setting Diagnostic Test Parameters
6-18
IS0054602-00 B
S
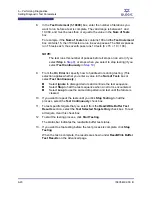
6.
In the
Num Of Tests (1-10000)
box, enter the number of tests you want to
run. The testing session stops when the tests are complete. The valid range
is between 1 and 10,000.
7.
In the
Test Increment (1-10000)
box, enter the number of iterations you
want to run before a test is complete. The valid range is between 1 and
10,000, and must be less than or equal to the value in the
Num of Tests
box.
For example, if the
Num of Tests
box contains 100 and the
Test Increment
box contains 10, then 100 tests are run in ten passes of ten iterations each.
8.
From the
On Error
list, specify how to handle errors during testing. (This
selection applies whether you enter a value in the
Num of Tests
box or
select
Test Continuously
.)
Select
Ignore
to disregard errors and continue the test sequence.
Select
Stop
to halt the test sequence when an error is encountered.
Select
Loop
to test until the failure is cleared.
9.
If you want to repeat the tests until you click
Stop Testing
to halt the
process, select the
Test Continuously
check box.
10. To start the testing process, click
Start Testing
.
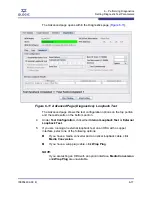
The
Internal
(or
External
)
Loopback Results
area of the Advanced page
shows the
HBA Name
and the number of
Loopback Success
and
Loopback Failure
attempts.
The status bar indicates the loopback test status.
11.
If you want to stop testing before the test process is complete, click
Stop
Testing
.
Running a Read/Write Buffer Test
The read/write buffer test sends specified data through the
SCSI Write Buffer
command to a target device (disk or tape). It then reads the data back through the
SCSI Read Buffer
command and compares the data for errors. The test also
compares the link status of the device before and after the read/write buffer test. If
errors occur, the test indicates a broken or unreliable link between the HBA port
and the device.
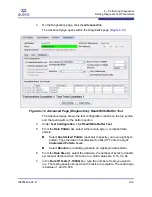
To set read/write buffer test configurations:
1.
On the SANsurfer iSCSI HBA Manager main window HBA tree, select the
HBA port.
2.
Click the
Diagnostics
tab to bring the Diagnostics page to the front.
The top portion of the Diagnostics page contains the HBA port-identifying
information; for details, see
“General Information for the HBA Port” on
page 6-2
.

