background image

Contemporary Research 


QMOD-HDSC 

Setup Tips 


Test Setup 

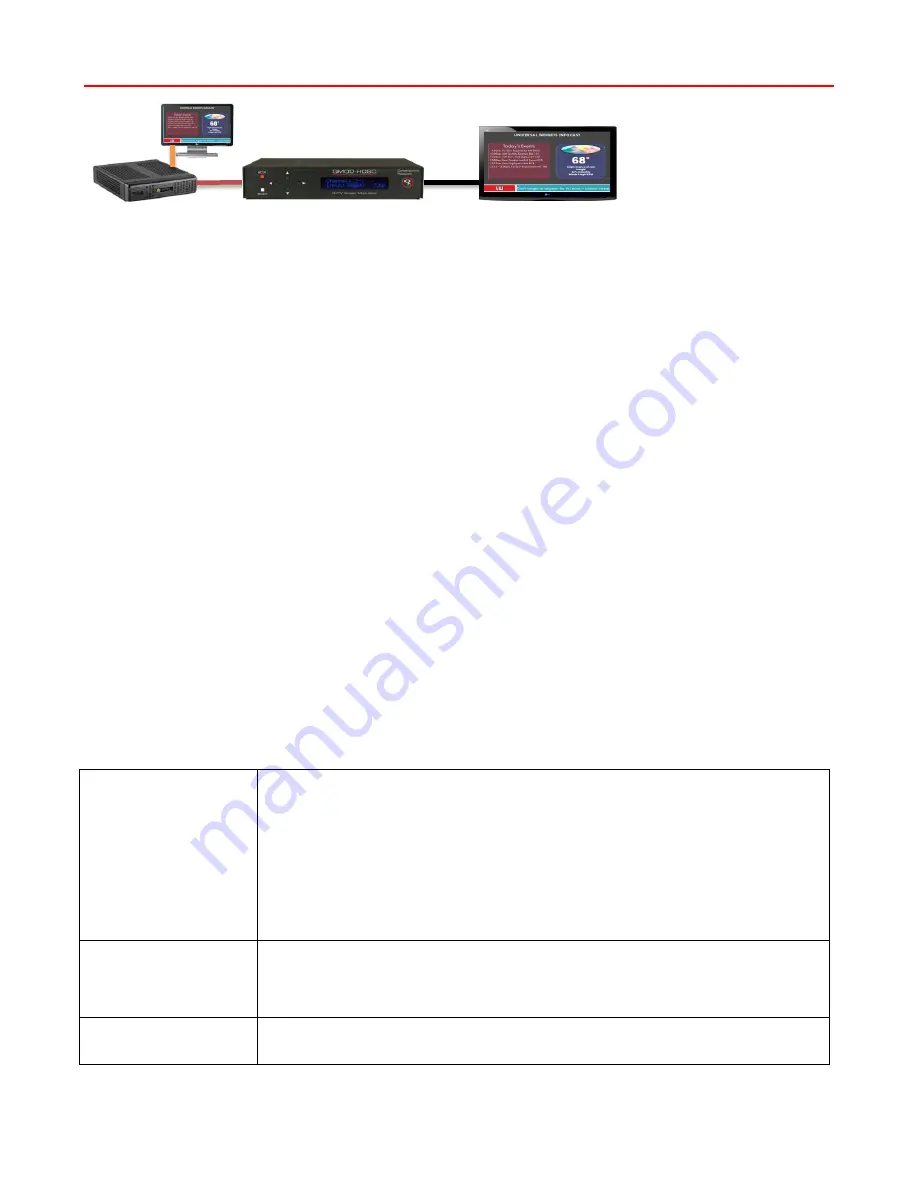
Before connecting to a full RF distribution system, set the system up offline. 


Connect PC or Signage player to VGA In (or Component) 


Set HDSC to RGBHV (or Component, Channel 2, RF Level 13, 1080i or 720p 


Connect RF Out to an HDTV RF In, set the TV to scan for Cable. The set should find Channel 2 

quickly, EXIT scanning 


If the PC is off or the input doesn’t match, you should see a color screen on the TV. 


As a general rule, use the QMOD resolution that is the closest to the input resolution. For example, a 

1080i video will look better at 1080i than downscaling to 720p.  


The reason you want to use a test setup first is to test and format scaling and formatting first. Once you 

know the setup is correct, there’s a lot less to resolve across the system. The major time-saver is setting 

horizontal, vertical, and clock phase visually on a local TV. Trying to do this when the TVs are a few hundred 

feet away is very difficult.  

Testing Resolution 

Once the PC is running and the input is selected, the QMOD-HDSC will tell you the resolution on the bottom 

line of the front-panel display. You’ll get one of three messages: 


RGBHV: 1024 x 768 60 –

 the PC resolution is in the HDSC list. You should see the PC on the TV. 

The display is an exact scan of the input video – on some VGA cards, this can be different than what 

the card states it is.  


RGBHV: NO SIGNAL

 – the input may be incorrect, or the PC isn’t outputting on the VGA out, or a 

bad cable 


RGBHV: Unknown SIG

 – the scaler sees the output, but it does not match the current list in the 

HDSC. See list on page 4. Call CR Support and we’ll work on adding the resolution, if possible 

Formatting 

Hit 

SETUP

 and use the arrows to follow the menus in sequence: 


Scale Horizontal 

The internal in-stream scaling engine handles a number of tasks for you – converting VGA to 
video 1080i/720p, shaping VGA resolutions to 16:9, and compensating for overscanning by TV 
sets. For all that, the process is very intuitive and easy to perform. 
At the 

Horizontal

 menu, press the 

SELECT

 button to start the process – you will see a white bar 

in the middle of the QMOD display.  
- Up zooms the video horizontally, while Down scales the video down 
- Left moves the video left, Right moves the image right – line up the left side first, then zoom out     
  to line up the right edge 

- The solution is automatically saved for that resolution. Repeat for other resolutions, if needed. 
- If you get a crosshatched “green screen”, hold the Up arrow and click SETUP. That will restore 
settings. The usual cause for the screen is shrinking the video to extreme settings. 

Scale Vertical 

At the 

Vertical

 menu, press the 

SELECT

 button to start the process – you will see a white bar in 

the middle of the QMOD display.  
- Up moves the video up, while Down moves  the video down 
- Left zooms the video out vertically, Right scales the video down 
- The solution is automatically saved for that resolution. Repeat for other resolutions, if needed. 

CLK Phase 

This menu tweaks how the scaler scans the video. 

Select values 0-7 and select the best scan result – differences show up more with static images 
rather than videos.  


V

R

Summary of Contents for QMOD-HDSC

Page 1: ...Contemporary Research 1 QMOD HDSC Product Manual QMOD HDSC QMOD HDTV Modulator December 11 2013 Control Firmware 5 6 Encoder Firmware 02E7...

Page 2: ...Troubleshooting 10 RS 232 Control Protocol 12 RS 232 Commands 13 Control Commands 13 Terminal Communication Commands 13 RS 232 Cable Connections 14 Single QMOD HD 14 QMOD HD Daisy Chain 14 Rack Mount...

Page 3: ...nk left right move image on horizontal axis Vertical Up Down rows move image up and down Left Right zooms and shrinks vertically Clock Phase adjust scanning to optimize image QMOD HDSC automatically s...

Page 4: ...280x768 at 60 Hz 1280x720p at 59 94 60 Hz 50 Hz 1152x864 at 75Hz 1024x768 at 60 75 Hz 800x600 at 60 75 Hz 720x576p at 50 Hz 720x480p at 59 94 60 Hz 720x480i 29 97 Hz on Component 640x480 at 60 75Hz Re...

Page 5: ...RCA female jacks Inputs assignable to video inputs F female 75 ohm impedance Agile channels 2 135 48 860 MHz standard HRC or IRC spacing 6 MHz bandwidth fits any open channel without interference to...

Page 6: ...or a bad cable RGBHV Unknown SIG the scaler sees the output but it does not match the current list in the HDSC See list on page 4 Call CR Support and we ll work on adding the resolution if possible Fo...

Page 7: ...e video resolution for the RGBHV Component inputs Video and S Video inputs are automatically set to 480i 1080i 480p 720p default 480i Channel XXX Left Right steps through channel numbers use Left to a...

Page 8: ...n normal systems 11 13 15 18 default 25 MPEG Metadata When you work with a variety of displays old and new you may need to change the settings below to assure all tune the channels equally The setting...

Page 9: ...D display Up zooms the video horizontally while Down scales the video down Left moves the video left Right moves the image right The solution is automatically saved for that resolution Repeat for othe...

Page 10: ...e resolution of your source doesn t match the QMOD settings Black Screen or No Signal Reset the QMOD by pressing the Left and Right arrows together Component No video check input wiring and settings T...

Page 11: ...al and Vertical menus to adust Positioning Use Up down left right scaler adjustments to fit Improve thin lines small text quality Try changing Clock Phase menu DirecTV The DirecTV HD receiver default...

Page 12: ...and end with carriage return ASCII CR Hex 0D or keyboard Enter as an End of command character Responses from the QMOD HD begin with the ASCII less than symbol as an Attention character and end with a...

Page 13: ...S0 Cable Format 0 Standard 1 HRC 2 IRC X2 No Video Background 0 Purple 1 Green 3 Orange F5 Trigger Level 1 4 F2 QAM Type 0 64 1 256 2 CW Continuous Wave F0 DB Level level from 1 6 9 13 17 21 25 29 dB...

Page 14: ...out front panel programming and data communication Pins 4 and 9 are inputs QMOD HD Daisy Chain One QMOD HD and 232 series tuner can be controlled from one RS 232 control port The QMOD HD will be Unit...

Page 15: ...1 Single Unit Rack Mount Attach the long and short rack ears to the side and towards the front of the unit with the four 4 supplied 8 32 by black countersunk screws RK2 Locking Cases together 1 Remove...

Page 16: ...refrain from touching such power lines or circuits as contact with them might be fatal 6 Overloading Do not overload wall outlets and extension cords as this can result in a risk of fire or electric s...

Page 17: ...are sought or a claim is made under this warranty or as a tort claim including negligence and strict product liability a contract claim or any other claim This limitation of liability cannot be waived...

Reviews: