!$
*
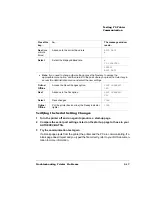
Engine/Def Resolution menu) but the printer continues printing at a lower resolu-
tion, you may need additional memory allocated to the frame buffer.
To allocate the correct amount of memory, use the Admin/Memory menu to
choose the correct resolution and paper size for your printing. See chapter 2,
“Printer Configuration,” in the
Reference
manual for more information.
/,
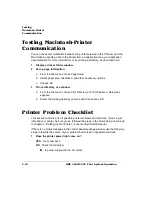
If a blank start-up page ejects or blank pages come out during a printing job, try the
following:
1
Check the toner cartridge.
The image does not print if the cartridge is empty.
2
If the toner cartridge is not empty and blank pages are ejecting, take the car-
tridge out, rock it from side to side, and reinstall it.
3
If this solution doesn’t work, contact your QMS vendor to purchase another
toner cartridge.
(#
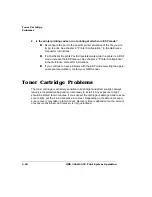
If the printer stops printing in the middle of your file, try the following:
1
Check your cable.
You could have the wrong kind of cable, or your printer may not be configured for
the correct cable and port.
2
Make sure no one pressed the Cancel key while your job was printing.
3
Check the message window to see if the tray you are using is out of media.
8
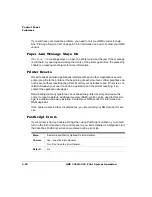
Print quality problems are those related to the appearance of the pages you print.
Print quality problems include white lines on the page, uneven blacks, and other print
distortions.
First, refer to the appendix B, “Technical Specifications,” in the
Reference
manual for
recommended media types. If you are using recommended media and continue to
have problems with the quality of your printed pages, try this quick-check procedure:
Summary of Contents for 3260
Page 1: ......
Page 8: ......
Page 9: ...Introduction on page 1 2 About This Manual on page 1 2...
Page 12: ......
Page 39: ...2 Lift up the handles to unlock the transfer roller 3 Remove the transfer roller...
Page 46: ...1 Pull out the tray 6 2 Open the lower left door of the high capacity input feeder...
Page 48: ......
Page 87: ...2 3 2 1...
Page 90: ......
Page 106: ...4 5 8 1 Open the duplexer 2 Open the upper left door 3 Open the lower left door...
Page 111: ...4 4 5 8 1 Pull on the latch to open the duplexer 2 Open the cover inside of the duplexer...
Page 114: ...4 3 Reinsert the enve lope feeder...
Page 152: ......
Page 153: ...Sources of Support on page A 2 QMS World wide Offices on page A 4...
Page 184: ......
Page 194: ......

