($&#
-
-"#
Handle the printer with care to preserve its life. Abuse may cause damage. Keep the
following guidelines in mind:
Do not place anything on the top of the printer.
Do not spray cleaning solution directly on the printer’s surface; the spray could
penetrate through the air vents of the printer and damage the internal circuits.
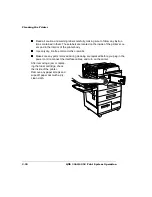
Be careful when cleaning the inside or removing media jams, as the fuser assem-
bly and other internal parts become very hot. Open the printer cover, and let the
interior of the printer cool before handling the inside of the printer.
Always close the printer covers gently. Avoid exposing the printer to vibrations.
Do not cover the printer immediately after using it. Turn it off and wait until it cools
down.
Do not leave the printer open for any length of time, especially in well-lit places;
light may damage the toner cartridge.
Do not open the printer during printing, and do not tap paper stacks on the printer.
Do not tilt, lubricate, or disassemble the printer.
Do not touch the electrical contacts, gears, or laser beam devices. Doing so may
damage the printer and cause the print quality to deteriorate.
Keep media in the output tray at minimum level. If the media stacks too high, your
printer may experience media jams and excessive media curl.
Lift the printer from the bottom only, using the carrying grips under each side cor-
ner. Make sure two people are available to lift the printer when moving it.
Keep the following in mind when storing the printer for an extended period:
— Unplug the printer.
— Remove the toner cartridge from the printer. After removing the cartridge,
return it to its original packaging. If the original packaging is not available, pro-
tect the toner cartridge from spilling toner, and protect it from damage and
light.
— See appendix B, “Technical Specifications,” in the
Reference
manual for stor-
age specifications.
Summary of Contents for 3260
Page 1: ......
Page 8: ......
Page 9: ...Introduction on page 1 2 About This Manual on page 1 2...
Page 12: ......
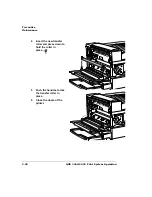
Page 39: ...2 Lift up the handles to unlock the transfer roller 3 Remove the transfer roller...
Page 46: ...1 Pull out the tray 6 2 Open the lower left door of the high capacity input feeder...
Page 48: ......
Page 87: ...2 3 2 1...
Page 90: ......
Page 106: ...4 5 8 1 Open the duplexer 2 Open the upper left door 3 Open the lower left door...
Page 111: ...4 4 5 8 1 Pull on the latch to open the duplexer 2 Open the cover inside of the duplexer...
Page 114: ...4 3 Reinsert the enve lope feeder...
Page 152: ......
Page 153: ...Sources of Support on page A 2 QMS World wide Offices on page A 4...
Page 184: ......
Page 194: ......


