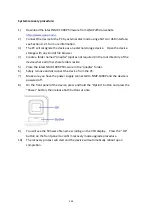
System
recovery
procedure:
1)
Download
the
latest
NMP
‐
1000P
firmware
from
QNAP
official
website
.
2)
Connect
the
device
to
the
PC
by
external
disk
mode
using
eSATA
or
USB
interface;
see
Section
for
more
information.
3)
The
PC
will
recognize
the
device
as
an
external
storage
device.
Open
the
device
storage
with
any
kind
of
file
browser.
4)
Create
a
folder
named
“qnapfw”
(quotes
not
required)
in
the
root
directory
of
the
device
where
all
other
share
folders
reside.
5)
Place
the
latest
NMP
‐
1000P
firmware
in
the
“qnapfw”
folder.
6)
Safely
remove
and
disconnect
the
device
from
the
PC.
7)
Make
sure
you
have
the
power
supply
connected
to
NMP
‐
1000P
and
the
device
is
powered
off.
8)
On
the
front
panel
of
the
device,
press
and
hold
the
“Option”
button
and
press
the
“Power”
button,
then
release
both
buttons
at
once.
9)
You
will
see
the
firmware
file
name
scrolling
on
the
VFD
display.
Press
the
“OK”
button
on
the
front
panel
to
confirm
recovery
mode
upgrade
procedure.
10)
The
recovery
process
will
start
and
the
device
will
automatically
reboot
upon
completion.
163
Summary of Contents for NMP-1000P
Page 27: ...5 Enter the IP address host name of the PC or NAS 6 Enter the network share name or path 27 ...
Page 32: ...d Play the digital contents from the local disk 32 ...
Page 42: ...5 2 1 Language Select a desired language for the user interface 42 ...
Page 44: ...5 2 3 Sleep timer This feature enables you to set the timer to shut down NMP 1000P 44 ...
Page 76: ...5 5 11 Turn off blue light LED You can disable the blue light on the front panel 76 ...
Page 95: ...95 ...
Page 100: ...4 When the management screen is shown you can use QGet to manage the download tasks 100 ...
Page 122: ...122 ...
Page 128: ...128 ...
Page 131: ...9 6 4 Delete Select a share and click Delete Click OK to confirm 131 ...
Page 135: ...135 ...
Page 140: ...9 8 3 System Information You can view the system information e g CPU usage on this page 140 ...
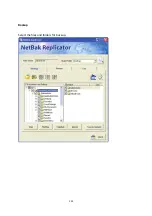
Page 153: ...Backup Select the files and folders for backup 153 ...

