
24
PC Installation
Step 5. Press the “Next>” button.
Step 6. At the next screen you will be prompted with the following
question, “What do you want Windows to do?”. Of the two
choices pick the first choice which is “Search for the best driver
for your device. (Recommended)”.
Step 7. Press the “Next>” button.
Step 8. The next screen will have four choices for you to select a
d e v i c e driver from. Select the last choice “Specify a
l o c a t i o n : ” by checking the adjacent box.
Step 9. Select the “ B r o w s e ” button and find your sytem's CD-ROM
d r i v e (it should be titled “Adaptec CD”) then double click on
the Adaptec CD and select the “QUEUSB~1 folder. After
selecting the QUEUSB~1 folder click the OK button.
Click on the “Next>” button at the next three screens.
Step 10. You should now be at the same screen you were at at the
end of step 4.
Step 11. Press the “Next>” button.
Step 12. Repeat step 6.
Step 13. At the next screen press the “Next>” button.
Step 14. You should now be at the final Add New Hardware Wizard
screen that displays “USB Bridge Module” and “Windows
has finished installing the software that your new hardware
device requires.” Now click on the “Finish” button.
Step 15. Now restart your system
NOTE: At this point the operating system now recognizes the Que! USB Drive
as a CD-ROM drive. Now you need to install the Adaptec software to
write to the device.
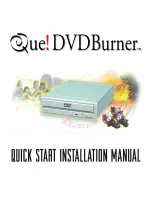
Summary of Contents for Que!
Page 1: ......
Page 5: ...Chapter One Welcome to the CD Recording World...
Page 7: ...Chapter Two Getting Started...
Page 12: ...Notes 10...
Page 13: ...Chapter Three Mac Installation...
Page 20: ...18 Notes...
Page 21: ...Chapter Four PC Installation...
Page 27: ...Chapter Five Handling...
Page 31: ...Chapter Six Troubleshooting...
Page 33: ...Macintosh Troubleshooting...
Page 45: ...PC Troubleshooting...
Page 51: ...Appendix...
Page 58: ...Notes 56...
Page 59: ...Notes 57...
Page 60: ...Notes 58...