background image


Installing the System Hardware

  61 


TIP: 

The XCubeSAN series will remember the current power state when the 
power failed by accent. If the system is online state, after power is 
recovered, the system will power on automatically. If the system is offline, 
the system will keep power off. 

3.10.


Powering OFF the System 

To power off the system, please follow the steps outlined below: 


Stop all I/O from all hosts to the SAN systems. 


Shut down the SAN system by one of the methods that are described below: 

。 

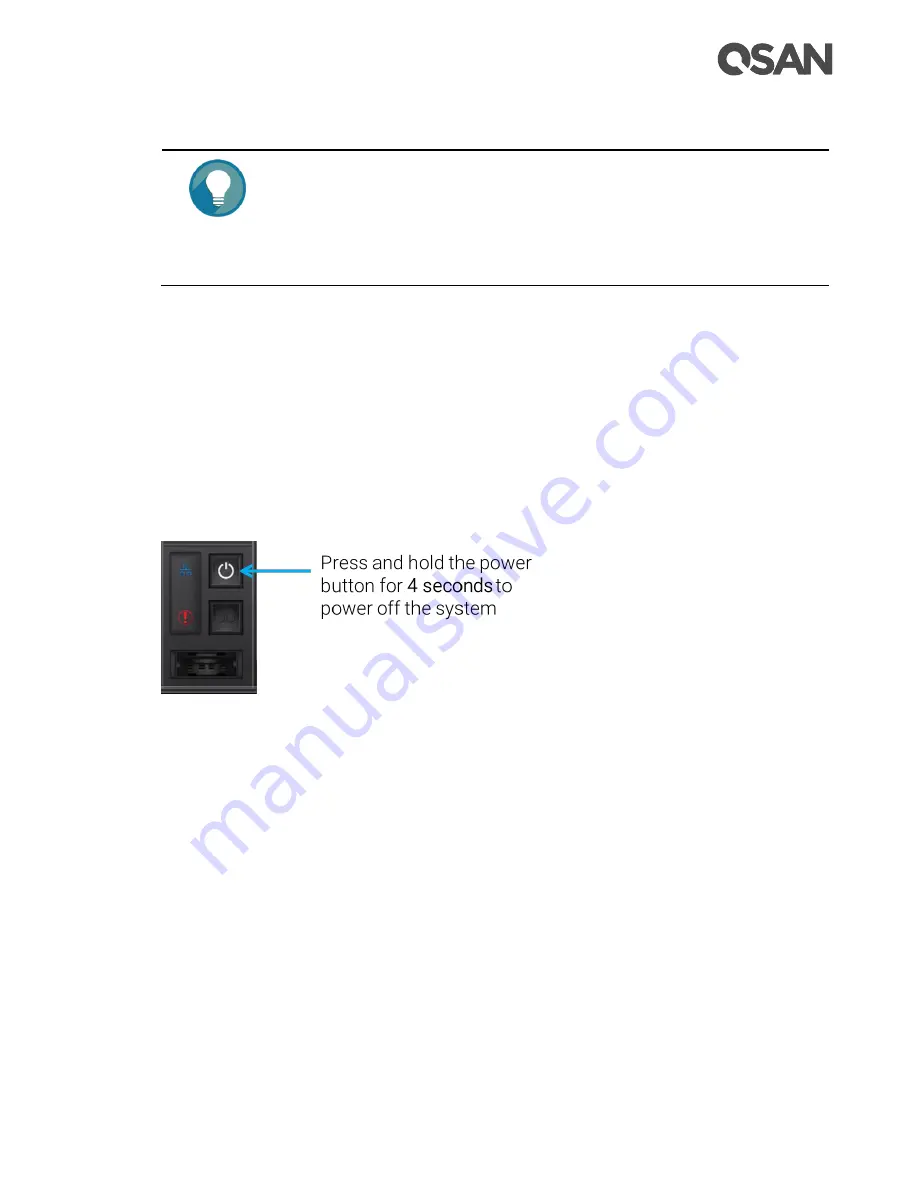
Press and hold the power button for 

4 seconds


Figure 3-34 

Power off the System by Power Button 


。 

Via SANOS UI to shut down the system power. If you want to power off the system 
via Web UI, please go to 

SYSTEM SETTINGS

 -> 

Maintenance

 -> 

Reboot / Shutdown

click Shutdown to power off the system. 


Summary of Contents for XCUBESAN XS5226S XCUBESAN XS3224D

Page 1: ...ual Applicable Models XS5224D XS5216D XS5212D XS5212S XS5226D XS5226S XS3224D XS3224S XS3216D XS3216S XS3212D XS3212S XS3226D XS3226S XS1224D XS1224S XS1216D XS1216S XS1212D XS1212S XS1226D XS1226S QSAN Technology Inc www QSAN com ...

Page 2: ...n is accurate as of its publication date The information is subject to change without notice Trademarks QSAN the QSAN logo XCubeSAN and QSAN com are trademarks or registered trademarks of QSAN Technology Inc Intel Xeon Pentium Intel Inside and the Intel Inside logo are trademarks of Intel Corporation in the United States and other countries Other trademarks and trade names used in this document to...

Page 3: ...Dual Controller LFF 16 disk 3U Chassis XS3216S Single Controller LFF 16 disk 3U Chassis XS1216D Dual Controller LFF 16 disk 3U Chassis XS1216S Single Controller LFF 16 disk 3U Chassis XCubeSAN Storage System 2U 19 Rack Mount Models Model Name Controller Type Form Factor Bay Count and Rack Unit XS5212D Dual Controller LFF 12 disk 2U Chassis XS5212S Single Controller LFF 12 disk 2U Chassis XS3212D D...

Page 4: ...urements will be the same on generally available systems Furthermore some measurements may have been estimated through extrapolation Actual results may vary Users of this document should verify the applicable data for their specific environment This information contains examples of data and reports used in daily business operations To illustrate them as completely as possible the examples include ...

Page 5: ...perature Tma specified by the manufacturer 2 Reduced Air Flow Installation of the equipment in a rack should be such that the amount of air flow required for safe operation of the equipment is not compromised 3 Mechanical Loading Mounting of the equipment in the rack should be such that a hazardous condition is not achieved due to uneven mechanical loading 4 Circuit Overloading Careful considerati...

Page 6: ...aken Access is through the use of a TOOL or lock and key or other means of security and is controlled by the authority responsible for the location Recommended operation temperature 0 40 31 99 103 99 F operation rating 100 127 Vac 50 60Hz 10 0A 200 240 Vac 50 60Hz 5 0A CAUTION English Risk of explosion if battery is replaced by incorrect type Please replace the same or equivalent type battery use ...

Page 7: ...ware and peripheral product s 3 years limited warranty from date of original purchase Battery Backup Module or super capacitor module applies for cache to flash module 1 year limited warranty from date of original purchase For more detail warranty policy please refer to QSAN official web site https www qsan com warranty ...

Page 8: ...w 13 2 1 Front Panel 13 2 2 System Disk Drive Numbering 16 2 3 Supported Disk Drives and SSDs 17 2 4 Rear Panel 18 2 4 1 Rear Panel Layout 18 2 4 2 Controller Module 20 2 5 Power Supply Unit 22 2 6 Fan Module 23 2 7 Cache to Flash Memory Protection 25 2 7 1 Mechanism of Cache Data Protection 27 2 7 2 Features of the Cache to Flash Module 28 3 Installing the System Hardware 29 3 1 Installation Chec...

Page 9: ... Deployment 70 4 2 4 Multi server Attached Cabling Deployment 72 4 2 5 Expansion Topology and Deployment 75 4 2 6 Introduction of Remote Replication 78 5 Descriptions of LEDs and Buttons 82 5 1 Front Panel 82 5 1 1 System Controls and Indicators 82 5 1 2 Disk Drive LEDs 84 5 2 Rear Panel 85 5 2 1 Controller LEDs 85 5 2 2 Power Supply Unit LED 86 5 2 3 Host Card LEDs 87 5 2 4 Cache to Flash Module ...

Page 10: ...viii Copyright 2019 QSAN Technology Inc All Right Reserved Appendix 118 End User License Agreement EULA 118 ...

Page 11: ... Open the Carrier Handle of a Disk Drive Tray LFF 31 Figure 3 3 Unlock and Open the Carrier Handle of a Disk Drive Tray SFF 31 Figure 3 4 Hold the Carrier Handle and Pull out the Disk Drive Tray LFF 32 Figure 3 5 Hold the Carrier Handle and Pull out the Disk Drive Tray SFF 32 Figure 3 6 Align a Disk Drive Install into a Tray LFF to LFF 33 Figure 3 7 Align a Disk Drive Install into a Tray SFF to LF...

Page 12: ...XCubeDAS Single Path 70 Figure 4 3 One Server One HBA Two Switches One XCubeSAN Dual Path 71 Figure 4 4 One Server One HBA One XCubeSAN One XCubeDAS Dual Path 72 Figure 4 5 Two Servers One HBA per Server One XCubeSAN Single Path 72 Figure 4 6 Two Servers One HBA per Server Two Switches One XCubeSAN Dual Path 73 Figure 4 7 Ten Servers One HBA per Server One XCubeSAN Dual Path 74 Figure 4 8 Cascade ...

Page 13: ... Module 102 Figure 6 14 Procedures of Removing the Fan Module 103 Figure 6 15 Procedures of Installing the Fan Module 104 Figure 6 16 Screenshot of the Fan Module Successfully Installed in the SANOS UI 104 Figure 6 17 Example of a Failed Port on the 10GbE iSCSI Host Card 105 Figure 6 18 Procedures of Removing the Host Card from the Controller Cage 105 Figure 6 19 Procedures of Pull out the Host Ca...

Page 14: ...of the Fan Module 25 Table 2 11 Location of the Cache to Flash Module 26 Table 2 12 Protection Memory Capacity by Different Cache to Flash Module 28 Table 3 1 Installation Checklist 29 Table 3 2 Front Side Components of LFF SFF Disk Drive Trays 30 Table 3 3 Available Disk Drive Trays for XCubeSAN Series 35 Table 3 4 Available Host Cards for XCubeSAN Series 36 Table 3 5 Host Card Installation Slots...

Page 15: ...t 16Gb Fibre Channel Host Card SFP LEDs 87 Table 5 6 Descriptions of 2 port 16Gb Fibre Channel Host Card SFP LEDs 88 Table 5 7 Descriptions of 4 port 10GbE iSCSI Host Card SFP LEDs 89 Table 5 8 Descriptions of 2 port 10GBASE T iSCSI Host Card RJ45 LEDs 89 Table 5 9 Descriptions of 4 port 1GBASE T iSCSI Host Card RJ45 LEDs 90 Table 5 10 Descriptions of Flash Module LEDs and Button 91 Table 6 1 Mech...

Page 16: ...empt to service change disassemble or upgrade the equipment s components by yourself Doing so may violate your warranty and expose you to electric shock Refer all servicing to authorized service personnel Please always follow the instructions in this owner s manual Related Documents There are related documents which can be downloaded from the website All XCubeSAN Documents XCubeSAN QIG Quick Insta...

Page 17: ...o important safety and operational information INFORMATION INFORMATION provides useful knowledge definition or terminology for reference TIP TIP provides helpful suggestions for performing tasks more effectively CAUTION CAUTION indicates that failure to take a specified action could result in damage to the system Conventions The following table describes the typographic conventions used in this ma...

Page 18: ...et file square brackets Indicates optional values Example a b indicates that you can choose a b or nothing braces Indicates required or expected values Example a b indicates that you must choose either a or b vertical bar Indicates that you have a choice between two or more options or arguments Slash Indicates all options or arguments underline Indicates the default value Example a b ...

Page 19: ...front panel rear panel redundant power supply and fan modules cache to flash module by using battery backup module or super capacitor module and expansion slots for optional Fibre Channel or 10GbE 1GbE iSCSI host cards This manual will direct you step by step to familiarize you with the XCubeSAN hardware components how to install the system carry out the initial configuration and provide you with ...

Page 20: ...LFF 24 bay 4U Chassis XS3224D Dual Controller LFF 24 bay 4U Chassis XS3224S Single Controller LFF 24 bay 4U Chassis XS1224D Dual Controller LFF 24 bay 4U Chassis XS1224S Single Controller LFF 24 bay 4U Chassis Table 1 2 XCubeSAN Series Storage System 3U 19 Rack Mount Models Model Name Controller Type Form Factor Bay Count and Rack Unit XS5216D Dual Controller LFF 16 bay 3U Chassis XS3216D Dual Con...

Page 21: ...e Controller SFF 26 bay 2U Chassis 1 2 XCubeSAN Series Hardware Features The following is a list of the key hardware components and optional components of the XCubeSAN series for reference Dual Active Active Active controller design architecture Processor XS5200 series Intel Xeon 4 core processor 8 core processor models are also available XS3200 series Intel 4 core processor XS1200 series Intel 2 ...

Page 22: ...tem you have to purchase 6G MUX board from QSAN channel partners Because there are different LFF and SFF disk drive trays 6G MUX board is needed to adapt to the type of bracket SATA 6Gb MUX board for installing 2 5 SATA SSD into LFF 3 5 disk drive tray SATA 6Gb MUX board for installing 2 5 SATA SSD into SFF 2 5 disk drive tray 1 3 XCubeSAN Series Hardware Specifications Following tables are hardwa...

Page 23: ...L SAS SED HDD 2 5 SAS SATA2 SSD Expansion Capabilities Up to 10 expansion units using XD5300 series 12Gb SAS expansion enclosure XD5324 4U 24 bay LFF XD5316 3U 16 bay LFF XD5312 2U 12 bay LFF XD5326 2U 26 bay SFF Max Drives Supported 624 616 612 626 Dimension H x W x D 19 Rack mount 170 3 x 438 x 515 mm 19 Rack mount 130 4 x 438 x 515 mm 19 Rack mount 88 x 438 x 515 mm 19 Rack mount 88 x 438 x 491...

Page 24: ...or Memory per Controller DDR4 ECC 4GB up to 128GB four DIMM slots insert two DIMMs or more will boost performance Host Connectivity per Controller Optional Host Cards at Slot 1 PCIe Gen3 x 8 4 x 16Gb FC SFP ports 2 x 16Gb FC SFP ports 4 x 10GbE iSCSI SFP ports 2 x 10GbE iSCSI RJ45 ports 4 x 1GbE iSCSI RJ45 ports Optional Host Cards at Slot 2 PCIe Gen2 x 4 4 x 16Gb FC SFP ports1 2 x 16Gb FC SFP por...

Page 25: ...pply 770W 850W 1 1 redundant 80 PLUS Platinum Fan Module 2 x hot pluggable redundant fan modules Temperature Operating temperature 0 to 40 C Shipping temperature 10 C to 50 C Relative Humidity Operating relative humidity 20 to 80 non condensing Non operating relative humidity 10 to 90 1 Slot 2 provides 20Gb bandwidth 2 6Gb MUX board needed for 2 5 SATA drives in dual controller system Table 1 6 XS...

Page 26: ...rnal connectors connect with the SAS cable by using mini SAS HD SFF 8644 connector Drive Type Mix match 3 5 2 5 SAS NL SAS SED HDD 2 5 SAS SATA2 SSD 2 5 SAS NL SAS SED HDD 2 5 SAS SATA2 SSD Expansion Capabilities Up to 10 expansion units using XD5300 series 12Gb SAS expansion enclosure XD5324 4U 24 bay LFF XD5316 3U 16 bay LFF XD5312 2U 12 bay LFF XD5326 2U 26 bay SFF Max Drives Supported 624 616 ...

Page 27: ...U 24 bay LFF 3 5 Disk Drive Tray x24 XS5216 XS3216 XS1216 3U 24 bay LFF 3 5 Disk Drive Tray x16 XS5212 XS3212 XS1212 2U 12 bay LFF 3 5 Disk Drive Tray x12 XS5226 XS3226 XS1226 2U 26 bay SFF 2 5 Disk Drive Tray x26 AC Power Cords x2 RS 232 Console Cable x2 for Dual Controller Model x1 for Single Controller Model Screws Pack for Disk Drives Quick Installation Guide 1 5 XCubeSAN Series Optional Acces...

Page 28: ...tect up to 16GB memory per controller C2F BBMD Battery Backup Module for Cache to Flash C2F SP16G Super Capacitor Module for Cache to Flash Protect up to 16GB memory per controller C2F FLHMD Flash Module for Cache to Flash HQ 16F4S2 4 port 16Gb Fibre Channel Host Card SFP HQ 16F2S2 2 port 16Gb Fibre Channel Host Card SFP HQ 10G4S2 4 port 10GbE iSCSI Host Card SFP HQ 10G2T 2 port 10GBASE T iSCSI Ho...

Page 29: ...eter CBL 12SW150 SAS 12G Expansion Cable with Wake on SAS SFF 8644 to SFF 8644 1 5 Meters This cable is not suitable for connecting HBA or RAID card CBL 12SH150 SAS 12G Expansion Cable SFF 8644 to SFF 8644 1 5 Meters LCM U162 Portable USB LCM SLR RM3640 Slide Rail HDT 351 3 5 Disk Drive Tray XS5224 XS5216 XS5212 XS3224 XS3216 XS3212 XS1224 XS1216 XS1212 HDM 351 SATA 6Gb MUX Board and Bracket for H...

Page 30: ...12 Copyright 2019 QSAN Technology Inc All Right Reserved HDT 251 2 5 Disk Drive Tray XS5226 XS3226 XS1226 HDM 251 SATA 6Gb MUX Board and Bracket for HDT 251 ...

Page 31: ...orted Disk Drives and SSDs Rear Panel Power Unit Fan Module Cache to Flash Module 2 1 Front Panel The XCubeSAN Series features a unique design the system controls and indicators is located on the right ear The system controls and indicators module integrates functional buttons and system state indicators which can be easily operated and read by user The figure below contains detailed information a...

Page 32: ...dicators Table 2 1 Descriptions of System Controls and Indicators Number Description 1 System Power Button LED 2 UID Unique Identifier Button LED 3 System Access LED 4 System Status LED 5 USB Port for USB LCM module Figures and the table below illustrate LFF SFF system front panel components ...

Page 33: ...tem Front Panel Components Number Description 1 System Left Ear 2 Disk Drive Tray 3 System Right Ear 4 The System Controls and Indicators Disk Drive Tray Indicators figures and the table below illustrate LFF and SFF disk drive tray indicators Figure 2 3 Disk Drive Indicators of LFF SFF Disk Drive Tray ...

Page 34: ...the XCubeSAN system disk drive numbering The disk drive numbering for LFF system starts from the top of first row in left column this kind of disk drive numbering rule helps to balance the system weight distribution and enable easy management of disk drives zoning The SFF system disk drive numbering is single row from left to right If you want to check the disk drive numbering rule while installin...

Page 35: ...e popular SAS HDDs and SAS SATA SSDs available in the market to ensure that you have the highest level of flexibility in choosing the most advanced HDDs or SSDs available from the manufacturers or purchase the best cost performance SAS HDDs or SAS SATA SSDs from the market to suit your budget performance We hope that this will significantly reduce your IT infrastructure investment cost If you want...

Page 36: ...ds to install optional SATA 6Gb MUX board and bracket for 2 5 disk drive tray model name HDM 251 Please contact a QSAN authorized reseller for details purchasing information 2 4 Rear Panel The following content outlines the detail of the XCubeSAN series rear panel and components In this section you will learn the name and location of the key components and modules in the rear panel 2 4 1 Rear Pane...

Page 37: ... Unit 1 2 Fan Module 1 3 Slot for Cache to Flash Module Flash Module 4 Controller Module 15 5 Controller Module 2 6 Fan Module 2 7 Power Supply Unit 2 8 Slot for Cache to Flash Module Power Module INFORMATION 5 If the XCubeSAN chassis is configured with a single controller module the controller module MUST be installed in the upper slot ...

Page 38: ...of each port LED and host cards optional parts Figure 2 6 General View of the Controller Module Controller Status LED Dirty Cache LED Master Slave LED Unique Identifier LED Figure 2 7 Components of the Controller Module Table 2 6 Description of the Controller Module Components Number Description 1 Host Card Slot 1 host card is an optional part 2 Buzzer Mute Button 3 Host Card Slot 2 host card is a...

Page 39: ...eset admin s Password to 1234 7 Console cable NULL modem cable to connect from console port of the storage system to a RS 232 port on the management PC The console settings are on the following Baud rate 115 200 8 data bit no parity 1 stop bit and no flow control terminal Type vt100 8 XCubeSAN series supports traditional UPS via a serial port and network UPS via SNMP If using the UPS with a serial...

Page 40: ...4U systems and 2U systems are the same but the installation direction is different If you pull out the PSU from the system chassis for 4U 3U system the sticker on the PSU will be at down side for 2U system the sticker will be at right side The images and the table below illustrate the location of PSU in the LFF or SFF system Figure 2 8 Location of the Power Supply Unit in the LFF or SFF System ...

Page 41: ...Cord Connect 3 PSU Handle 4 PSU LED Indicator If you want to learn more about the related color and behavior of the PSU LED please refer to the chapter 5 2 Rear Panel section in the Descriptions of LEDs and Buttons chapter 2 6 Fan Module All XCubeSAN series models are equipped with two redundant and hot swappable fan modules The fan module for 4U 3U systems are the same however 2U systems are diff...

Page 42: ...cal components of the fan module that is installed in the LFF and SFF system Figure 2 10 Location of Each Fan Module Installed in the LFF or SFF System Table 2 9 Location of Each Fan Module Installed in the LFF or SFF System Number Description 1 Fan 1 and Fan 2 2 Fan 3 and Fan 4 ...

Page 43: ... the I O cache data stored in the volatile memory will be lost this can cause data inconsistency especially in database applications The XCubeSAN series can provide an optional Cache to Flash memory protection function that will safely transfer the memory cache data to a non volatile flash device for permanent preservation The optional Cache to Flash module comes with an M 2 flash module and eithe...

Page 44: ...ht 2019 QSAN Technology Inc All Right Reserved Figure 2 12 Location of the Cache to Flash Module Table 2 11 Location of the Cache to Flash Module Number Description 1 Slot for Flash Module 2 Slot for Power Module ...

Page 45: ... is the working sequence of QSAN Cache to Flash workflow Figure 2 15 Cache to Flash Workflow Cache to Flash technology will first flush CPU cache to memory RAM then flush memory RAM to M 2 flash module to maintain the upmost data consistency It leverages the strength of both BIOS and CPU to quickly backup memory RAM data to the flash module In order to quickly move data from memory RAM to flash mo...

Page 46: ...Flash module comes with a M 2 flash module and either a BBM or a SCM All modules are hot pluggable with zero system downtime for extra availability and reliability M 2 flash module can be plugged in on the left hand side from the rear of the chassis Power module can be plugged in on the right hand side from the rear of the chassis Please be noted that the BBM can protect all memory capacity But th...

Page 47: ...g the optional host cards Chapter 3 3 3 Installing the optional memory modules Chapter 3 4 4 Installing the optional cache to flash modules Chapter 3 5 5 Installing the optional slide rails Chapter 3 6 6 Installing the trays into the system Chapter 3 7 7 Connecting the system to a host Chapter 3 8 8 Connecting power cords and powering on the system Chapter 3 9 9 Connecting a UPS Chapter 3 12 10 Co...

Page 48: ...ring transport You must unlock disk drive trays before starting to install drives into the system chassis The following content is the detailed steps for removing a disk drive tray from the system Unlock release button lock shift the lock from left to right LFF and SFF trays Procedure of opening the LFF disk drive tray carrier handle shift the carrier handle release button from right to left then ...

Page 49: ...ock and Open the Carrier Handle of a Disk Drive Tray SFF The following content is the procedure for removing disk drive trays from the system Hold the carrier handle and pull the disk drive tray out until it is free of the disk drive bay Repeat steps above for another empty disk drive trays that you would like to remove ...

Page 50: ...32 Copyright 2019 QSAN Technology Inc All Right Reserved Figure 3 4 Hold the Carrier Handle and Pull out the Disk Drive Tray LFF Figure 3 5 Hold the Carrier Handle and Pull out the Disk Drive Tray SFF ...

Page 51: ...ur disk drive tray screw holes located on both sides of the hard drive Install and tighten all four screws to secure the disk drive within the tray Figure 3 6 Align a Disk Drive Install into a Tray LFF to LFF For installing an SFF disk drive into an LFF tray Place a disk drive tray onto a stable surface Align the disk drive to the tray with the connector facing away from the carrier handle Align f...

Page 52: ...ay SFF to LFF For installing an SFF disk drive into an SFF tray Place a disk drive tray onto a stable surface Remove the supporting bracket Then align the disk drive with the connector facing away from the carrier handle Align four disk drive tray screw holes on both sides of the disk tray Install and tighten all four screws to secure disk drive within the tray ...

Page 53: ...table below shows the available disk drive trays MUX board with bracket and their descriptions Table 3 3 Available Disk Drive Trays for XCubeSAN Series Model Name Picture Description Applied Models HDT 351 3 5 Disk Drive Tray XS5224 XS5216 XS5212 XS3224 XS3216 XS3212 XS1224 XS1216 XS1212 HDM 351 SATA 6Gb MUX Board and Bracket for HDT 351 2 5 SATA drives only HDT 251 2 5 Disk Drive Tray XS5226 XS32...

Page 54: ...r descriptions Table 3 4 Available Host Cards for XCubeSAN Series Model Name Picture Description Applied Models HQ 16F4S2 4 port 16Gb Fibre Channel Host Card SFP XS5200 Series XS3200 Series XS1200 Series HQ 16F2S2 2 port 16Gb Fibre Channel Host Card SFP HQ 10G4S2 4 port 10GbE iSCSI Host Card SFP HQ 10G2T 2 port 10GBASE T iSCSI Host Card RJ45 HQ 01G4T 4 port 1GBASE T iSCSI Host Card RJ45 CAUTION Yo...

Page 55: ...g Location and Combination of the Host Cards Connection Type Model Type Controller Number Slot 1 Slot 2 FC SAN 16Gb FC SFP Single Controller CTRL 1 HQ 16F4S2 N A N A Single Controller CTRL 1 HQ 16F4S2 HQ 16F4S29 N A Single Controller CTRL 1 HQ 16F4S2 HQ 16F2S29 N A Single Controller CTRL 1 HQ 16F2S2 N A N A Single Controller CTRL 1 HQ 16F2S2 HQ 16F2S29 N A Dual Controller CTRL 1 HQ 16F4S2 N A CTRL...

Page 56: ...ual Controller CTRL 1 HQ 10G2T N A CTRL 2 HQ 10G2T N A Dual Controller CTRL 1 HQ 10G2T HQ 10G2T CTRL 2 HQ 10G2T HQ 10G2T iSCSI SAN 1GBASE T RJ45 Single Controller CTRL 1 HQ 01G4T N A N A Single Controller CTRL 1 HQ 01G4T HQ 01G4T N A Dual Controller CTRL 1 HQ 01G4T N A CTRL 2 HQ 01G4T N A Dual Controller CTRL 1 HQ 01G4T HQ 01G4T CTRL 2 HQ 01G4T HQ 01G4T iSCSI SAN 10GbE SFP 10GBASE T RJ45 Single Co...

Page 57: ... 16F2S29 CTRL 2 HQ 10G4S2 HQ 16F2S29 Mix SAN 16Gb FC SFP 10GBASE T RJ45 Single Controller CTRL 1 HQ 16F4S2 HQ 10G2T N A Single Controller CTRL 1 HQ 16F2S2 HQ 10G2T N A Dual Controller CTRL 1 HQ 16F4S2 HQ 10G2T CTRL 2 HQ 16F4S2 HQ 10G2T Dual Controller CTRL 1 HQ 16F2S2 HQ 10G2T CTRL 2 HQ 16F2S2 HQ 10G2T Mix SAN 16Gb FC SFP 1GBASE T RJ45 Single Controller CTRL 1 HQ 16F4S2 HQ 01G4T N A Single Control...

Page 58: ...MATION Due to the total bandwidth of slot 2 is 20Gb It CAN NOT satisfy four ports of 10GbE iSCSI with full speed we strongly recommend combining two ports by enabling link aggregation for failover Such as combining port 1 and port 2 as LAG Link Aggregation Group 1 port 3 and port4 as LAG 2 If you want to learn more about how to setup link aggregation please refer to the chapter 7 3 1 Configure iSC...

Page 59: ...he controller module from the system chassis Use a Phillips screwdriver to loosen the thumb screws on each release levers Pull down both levers at the same time and then pull out about half length of the controller module by holding two release levers Use one hand to hold one end of the controller module the side with release levers and the other hand hold the bottom of the controller pull out the...

Page 60: ...ed Figure 3 11 Steps of Removing the Controller Module Remove the dummy host card cage by loosening two screws of the dummy host card cage and then take dummy host card cage from controller module Figure 3 12 Procedures of Removing the Host Card Dummy Cage ...

Page 61: ... are other host adapter cards need to be installed You must install GBIC s for the Fibre Channel or 10GbE host cards before connecting the cables from the storage system to the host sides Install the controller module into the system chassis if the host card installation completed Confirm the Host Card Installation If the host card is installed properly you can check the host card connections stat...

Page 62: ...DR4 for XS3200 XS1200 and 8GB DDR4 for XS5200 If you purchase additional optional memory module for your storage system please refer to the following image and table for the suggested sequence of memory module installation It is requested that the installation slot and capacity of the memory module MUST be exactly the same for both controller The table below shows the available memory modules and ...

Page 63: ... Memory Module DIM D432GB DDR4 ECC 32GB Memory Module XS5200 Series XS3200 Series In XS3200 and XS5200 there are four DIMM slots for expansion of memory capacity The installation sequence for the memory module with the same capacity should be 3 2 4 due to slot 1 and 2 are memory bank 1 slot 3 and 4 are bank 2 Balance the memory size of two banks will keep the optimized system performance The insta...

Page 64: ...k 2 Total Memory Slot 1 Slot 2 Slot 3 Slot 4 4GB 4GB 4GB 4GB 8GB 4GB 8GB 12GB 4GB 8GB 8GB 20GB 4GB 16GB 20GB 4GB 16GB 16GB 36GB 4GB 4GB 4GB 12GB 4GB 4GB 4GB 4GB 16GB 4GB 4GB 8GB 16GB 4GB 4GB 8GB 8GB 24GB 4GB 4GB 16GB 24GB 4GB 4GB 16GB 16GB 40GB 8GB 8GB 8GB 8GB 16GB 8GB 16GB 24GB 8GB 16GB 16GB 40GB 8GB 8GB 8GB 24GB 8GB 8GB 8GB 8GB 32GB 8GB 8GB 16GB 32GB 8GB 8GB 16GB 16GB 48GB 16GB 16GB 16GB 16GB 32...

Page 65: ...nd the others are UDIMM The platform does not support mixing of DIMM so there are not allowed the combinations of mixing 32GB TIP Insert two DIMMs or more will boost performance In XS1200 there are two DIMM slots for expansion of memory capacity The installation sequence is also applicable for dual or single controller module Figure 3 16 The Installation Sequence of the Memory Module in XS1200 ...

Page 66: ...pected power loss The table below is the available Cache to Flash module list If you want to purchase cache to flash module please contact your nearest local reseller or visit QSAN official web site https qsan com location The table below shows the available cache to flash modules and their descriptions Table 3 11 Available Cache to flash Modules for XCubeSAN Series Model Name Picture Description ...

Page 67: ...d blinking Otherwise the flash module maybe damage For more information about Cache to Flash modules please refer to the chapter 5 2 4 Cache to Flash Module LEDs and Button section and the chapter 6 5 Removing the Cache to Flash Modules section Installing Cache to Flash Modules The following content and images are steps for installing cache to flash modules Install locations for the cache to flash...

Page 68: ...ule Release Tab 2 Flash Module Attention Button 3 Flash Module Handle 4 Flash Module Status LED 5 Flash Module Power LED Power Module 6 Power Module Release Tab 7 Power Module Handle Remove the dummy cache to flash cage by losing the screw on it and then remove the dummy cage from the system chassis Follow the same procedure for both sides Figure 3 19 The Dummy Cage Screw Location of the Cache to ...

Page 69: ...th flash and power modules are facing left hand side while installing into the system 2U chassis release tabs of both flash and power modules are facing upward while installing into the system Figure 3 20 Installing the Flash Module Align the power module cage to the slot and then push it all the way into the system chassis until hear a click sound Figure 3 21 Installing the Power Module ...

Page 70: ...If you did not purchase QSAN qualified slide rails please skip this section The table below shows the available slide rail model name and its description Table 3 13 Available Slide Rails for XCubeSAN Series Model Name Picture Description Applied Models SLR RM3640 Slide Rail XS5200 Series XS3200 Series XS1200 Series INFORMATION Slide rails is an optional part of all XCubeSAN series models if you di...

Page 71: ...all the disk drive trays into the system after the system chassis is mounted in the rack Doing this can reduce the loading of the overall weight when you mount the system chassis in the rack 1 First step of the slide rails installation Take the slide rails from the carton Pull the inner rail out and slide the intermediate rail back Figure 3 23 First Step of the Slide Rails Installation 2 Second st...

Page 72: ... Figure 3 24 Second Step of the Slide Sails Installation 3 Third step of the slide rails installation Install the outer rail bracket assembly to the frame Repeat this installation step for the other side Figure 3 25 Third Step of the Slide Rails Installation ...

Page 73: ...re dedicated for optional slide rails are packed in the screws pack Figure 3 26 Fourth Step of the Slide Sails Installation 3 7 Installing the Trays into the System Before installing please check if the carrier handle is at the open position The following procedure is for installing a tray into both LFF and SFF systems The following content and images are detailed steps for installing a tray into ...

Page 74: ...utton Lock LFF Figure 3 28 Install a Tray into the System and Lock the Release Button Lock SFF 3 8 Connecting the System to a Host The XCubeSAN series products are equipped with two on board 10GbE iSCSI RJ45 ports per controller for data host connections and dual SAS3 expansion ports for expansion by adding up to nine XCubeDAS series enclosures To learn more about advanced types of cabling please ...

Page 75: ...he cabling for the XCubeSAN management ports Figure 3 29 Cabling Example of the Administrator to the XCubeSAN Management Port 3 8 2 Dual Path MPIO Deployment The following images illustrate some examples of deployment types for dual controller XCubeSAN series MPIO MultiPath I O configurations are designed to provide HA High Availability data connections to ensure data consistency in the rare event...

Page 76: ...ver One HBA Two Switches One XCubeSAN Dual Path 3 8 3 Expansion Deployment One Server One HBA One XCubeSAN One XCubeDAS Dual Path The following figure shows an example of a dual controller connect enclosure configuration with one server accessing the storage One server is connected to a dual controller XCubeSAN series using CAT 6 network cables And a dual controller XCubeSAN series connected to a ...

Page 77: ... If you find the power cords included with your XCubeSAN system doesn t match your current country region you may need to buy an adapter for each power cord to connect the power outlet Power cord ratings 100 127V 10A 200 240 V 5A Install all disk drives in the system so the controllers can identify and configure them at power up Connect cables that connect the management port and data ports to you...

Page 78: ...ou purchase must equal to or higher than the minimum requirement to ensure the system safety and reliability Figure 3 33 PSU Power Cord Connects INFORMATION The Following are the operational conditions for all XCubeSAN series models Temperature Operating temperature 0 to 40 C Shipping temperature 10 C to 50 C Relative Humidity Operating Relative Humidity 20 to 80 non condensing Non Operating Relat...

Page 79: ...owering OFF the System To power off the system please follow the steps outlined below Stop all I O from all hosts to the SAN systems Shut down the SAN system by one of the methods that are described below Press and hold the power button for 4 seconds Figure 3 34 Power off the System by Power Button Via SANOS UI to shut down the system power If you want to power off the system via Web UI please go ...

Page 80: ... storage system is shut down for maintenance or other purposes Wake on SAS can avoid unnecessary electricity waste by allowing your devices to be on only when it is necessary A further advantage of Wake on SAS is that when you turn on the SAN the expansion enclosures will wake automatically so there is no need to worry about degrading a volume if you forget to turn them on first The table below sh...

Page 81: ... to power on the attached XD5300 expansion enclosures Figure 3 36 Wake on LAN and Wake on SAS Technology 3 12 Connecting a UPS If users want to install a UPS uninterruptible power supply to provide clean power and also offer protection against mains power failures please follow the following instructions Before you purchase a UPS system please check QSAN XCubeSAN series supported UPS interfaces an...

Page 82: ...15 Available UPS Cable for XCubeSAN Series Model Name Picture Description Applied Models CBL UPS UPS Cable Phone jack 1 Meter XS5200 Series XS3200 Series XS1200 Series For checking the UPS connection and status please refer to the chapter 6 3 3 UPS Settings and Status in the XCubeSAN SANOS 4 0 Software Manual 3 13 Connecting the Optional USB LCM If you purchased the USB LCM please use the enclosed...

Page 83: ...e XCubeSAN SANOS 4 0 Software Manual 3 14 Discover and Carry Out the Initial Configuration for the System After powering on the system the next step is to discover the system on the network and start the initial configuration To discover the system we suggest downloading our QFinder application from the QSAN web site this will hunt the network for your new SAN and allow you to access it via the SA...

Page 84: ...m the host server to the XCubeSAN system In this deployment only one controller in the enclosure is used Dual Path for dual controller models In a dual path deployment two paths are connected from the host server to the XCubeSAN system In this deployment both controllers in the system are used Because dual path deployments provide two paths to the XCubeSAN system for redundancy even in the event o...

Page 85: ...e table below shows the available cable model name and its description Table 4 2 The List of Available Cable for XCubeSAN Series Model Name Picture Description Applied Models CBL 12SW150 SAS 12G Expansion Cable with Wake on SAS SFF 8644 to SFF 8644 1 5 Meters This cable is not suitable for connecting HBA or RAID card XS5200 Series XS3200 Series XS1200 Series CBL 12SH150 SAS 12G Expansion Cable SFF...

Page 86: ...XS5216 XS3216 XS1216 3U 16 bay LFF XD5312 2U 12 bay LFF 10 16 10 x 12 136 1 360TB 1 940TB XD5316 3U 16 bay LFF 10 16 10 x 16 176 1 760TB 2 464TB XD5324 4U 24 bay LFF 10 16 10 x 24 256 2 560TB 3 584TB XD5326 2U 26 bay SFF 10 16 10 x 26 276 784TB 4 217 6TB XD5360 4U 60 bay LFF 10 16 10 x 60 616 6 160TB 8 624TB XS5224 XS3224 XS1224 4U 24 bay LFF XD5312 2U 12 bay LFF 10 24 10 x 12 144 1 440TB 2 016TB ...

Page 87: ...gure shows an example of a single controller direct connect enclosure configuration with one server accessing the storage One server is direct connected to the built in 10GBASE T iSCSI port in a single controller XCubeSAN series using CAT 6 network cable Figure 4 1 One Server One XCubeSAN Single Path One Server One XCubeSAN One XCubeDAS Single Path The following figure shows an example of a single...

Page 88: ...e designed to provide HA High Availability data connections to ensure data consistency in the rare event of a failure in the host connectivity from a single path One Server One HBA Two Switches One XCubeSAN Dual Path The following figure shows an example of a dual controller connect enclosure configuration with one server accessing the storage via switches One server is connected to a dual control...

Page 89: ...f a dual controller connect enclosure configuration with one server accessing the storage One server is connected to a dual controller XCubeSAN series using CAT 6 network cables And a dual controller XCubeSAN series connected to a dual controller XCubeDAS XD5300 series using mini SAS HD to mini SAS HD cable SAS 12G expansion cable with Wake on SAS SFF 8644 to SFF 8644 XCubeSAN Switch Server ...

Page 90: ...One HBA per Server One XCubeSAN Single Path The following figure shows an example of a single controller direct connect enclosure configuration with two servers accessing the storage Two servers are direct connected to the built in 10GBASE T iSCSI port in a single controller XCubeSAN series using CAT 6 network cables Figure 4 5 Two Servers One HBA per Server One XCubeSAN Single Path XCubeSAN Serve...

Page 91: ...ure shows an example of a dual controller connect enclosures configuration with two servers accessing the storage via switches Two servers are connected to a dual controller XCubeSAN series using CAT 6 network cables Figure 4 6 Two Servers One HBA per Server Two Switches One XCubeSAN Dual Path XCubeSAN Switch Server ...

Page 92: ... shows an example of a dual controller direct connect enclosure configuration with ten servers accessing the storage Two servers connect to the on board 10GbE iSCSI RJ45 ports Eight servers connect to the optional host cards To learn more about host cards support and installation please refer to the chapter 3 3 Installing the Optional Host Cards Figure 4 7 Ten Servers One HBA per Server One XCubeS...

Page 93: ...ascade Topology One XCubeSAN One XCubeDAS Dual Path The following figure shows an example of a dual controller XCubeSAN series connected to a dual controller XCubeDAS XD5300 series using mini SAS HD to mini SAS HD cable SAS 12G expansion cable with Wake on SAS SFF 8644 to SFF 8644 Figure 4 8 Cascade Topology One XCubeSAN One XCubeDAS Dual Path XCubeSAN XCubeDAS Wake on SAS Cable Wake on SAS Cable ...

Page 94: ...ed to a dual controller XCubeDAS XD5300 series which is in turn connected to the second dual controller XCubeDAS XD5300 series using mini SAS HD to mini SAS HD cable SAS 12G expansion cable with Wake on SAS SFF 8644 to SFF 8644 Figure 4 9 Cascade Topology One XCubeSAN Two XCubeDAS Dual Path XCubeSAN XCubeDAS 1 XCubeDAS 2 Wake on SAS Cable Wake on SAS Cable Wake on SAS Cable Wake on SAS Cable ...

Page 95: ...DAS XD5300 series which is in turn connected to the second dual controller XCubeDAS XD5300 series using mini SAS HD to mini SAS HD cable SAS 12G expansion cable with Wake on SAS SFF 8644 to SFF 8644 The connection in forward direction is shown as blue cables The connection in backward direction is shown as orange cables Figure 4 10 Reverse Topology One XCubeSAN Two XCubeDAS Dual Path INFORMATION R...

Page 96: ...o SFF 8644 Figure 4 11 Tree Topology One XCubeSAN Two XCubeDAS Dual Path INFORMATION Tree topology is available in SANOS firmware 1 1 0 4 2 6 Introduction of Remote Replication If users purchase two or more XCubeSAN series systems and plan to deploy them in different locations the Remote Replication function in QSAN SANOS supports multiple topologies to suit various disaster recovery configuration...

Page 97: ...mote replication topology Bi Directional Figure 4 13 Bi Directional Remote Replication Each system in a two system topology acts as a replication target for the other s production data A Source Volume S1 in Site A is replicating to a Target Volume T1 in Site B And a Source Volume S2 in Site B is replicating to a Target Volume T2 in Site A One to Many Figure 4 14 One to Many Remote Replication ...

Page 98: ...e D Many to One Figure 4 15 Many to One Remote Replication Multiple source systems replicate to a single target system A Source Volume S1 in Site B is replicating to a Target Volume T1 in Site A At the same time a Source Volume S2 in Site C is replicating to a Target Volume T2 in Site A So does S3 in Site D to T3 in Site A Many to Many Figure 4 16 Many to Many Remote Replication Combination with b...

Page 99: ...e that all supported topologies have a 1 to 1 configuration for each individual replication session in the topology The maximum replication task quantity per system is 32 It means that 32 systems are the maximum quantity of any many to one or one to many replication configuration If you want to learn more about the operations on remote replication please refer to the Chapter 12 3 Managing Remote R...

Page 100: ...rstanding about the current status of the system or specific components by recognizing the LED status 5 1 Front Panel In this session we will describe the system controls and indicators and the disk drive LEDs in the front panel 5 1 1 System Controls and Indicators XCubeSAN features the button and indication module on the right ear Please refer to the following content for definitions of LED behav...

Page 101: ...press it again to turn it OFF UID Unique Identifier LED Press the button to turn it ON and press it again to turn it OFF Solid Blue The system has been identified Off The system has not been identified 3 Enclosure Access LED Enclosure Access LED Indicate the host interface connectivity Blinking Blue The host interface activity is on going Off There is no host interface activity 4 Enclosure Status ...

Page 102: ...ons of Disk Drive LEDs Number Description Definition 1 Disk Drive Power LED Solid Blue The disk drive is inserted and no data access Blinking Blue The disk drive is accessing data Off There is no disk drive inserted 2 Disk Drive Status LED Solid Amber There is disk drive error Blinking Amber interval of 0 5 sec The disk drive is rebuilding Blinking Amber interval of 0 05 sec Identify the disk driv...

Page 103: ...on Definition 1 Controller Status LED Solid Green Controller status is normal Solid Red System is booting or the controller is failed 2 Master Slave LED only for dual controllers Solid Green This is the Master controller Off This is the Slave controller 3 Dirty Cache LED Solid Amber Data on the cache is waiting for flush to disks Off There is no data on the cache 4 UID Unique Identifier LED Solid ...

Page 104: ...Please refer to the following content for definitions of the LED behaviors Figure 5 4 The Power Supply Unit LED Table 5 4 Descriptions of the Power Supply Unit LED Number Description Definition 1 PSU LED Solid Green The PSU is on and normal Blinking Green The PSU is off 5VSB Standby is on Solid Amber There is critical event caused shutdown Blinking Amber There are PSU warning events including high...

Page 105: ...ion Definition 1 Activity LED Solid Green Asserted when the link is establish Link OK without I O Blinking Green Asserted when the link is established and packets are being transmitted along with any receive activity Access Off No link is detected or link fails 2 Speed LED Solid Blue Asserted when a 16G link is established and maintained Solid Amber Asserted when an 8G link is established and main...

Page 106: ...k OK without I O Blinking Green Asserted when the link is established and packets are being transmitted along with any receive activity Access Off No link is detected or link fails 2 Speed LED Solid Blue Asserted when a 16G link is established and maintained Solid Amber Asserted when an 8G link is established and maintained Solid White Asserted when a 4G and below link is established and maintaine...

Page 107: ... is established and maintained Off No link is detected or link fails 2 port 10GBASE T iSCSI Host Card RJ45 LEDs Figure 5 8 2 port 10GBASE T iSCSI Host Card RJ45 LEDs Table 5 8 Descriptions of 2 port 10GBASE T iSCSI Host Card RJ45 LEDs Number Description Definition 1 Access LED Blinking Green Asserted when the link is established and packets are being transmitted along with any receive activity Acc...

Page 108: ...en the link is established and packets are being transmitted along with any receive activity Access Off No link is detected or link fails 2 Speed LED Solid Amber Asserted when a 1G link is established and maintained Solid Green Asserted when a 100M link is established and maintained Off No link is detected or link fails 5 2 4 Cache to Flash Module LEDs and Button Please refer to the following cont...

Page 109: ...or wrong PCIe connection speed 3 Attention Button Used to prompt system that the flash module can be removed later CAUTION The flash module of Cache to Flash is hot swappable because it is a PCIe device Before removing the flash module from the system chassis you must press the attention button until the flash module status LED finished blinking Otherwise the flash module maybe damage For more inf...

Page 110: ...by a certified technician Do not attempt to carry out any maintenance outside of those outlined in the following section of this guide System damage due to incorrect maintenance or FRU replacement can affect your product warranty If you are unsure of the problem related to your XCubeSAN series system we strongly recommend you to contact or get help from QSAN support team Via the Web https qsan com...

Page 111: ...er cage provided for the empty slot to ensure the proper system cooling If you see the system health becomes Controller Degraded in the SANOS UI Dashboard System Information or the controller status LED shows solid red color which means your controller module is encountering an issue or a hardware configuration mismatch different memory size or different types of host cards are installed in the sa...

Page 112: ...of the Controller Module Table 6 1 Mechanical Components of the Controller Module Number Description 1 Release Lever 2 Thumb Screw The following are detailed steps for removing the controller module from the system chassis Use a Phillips screwdriver to loosen the thumb screws on each release levers Pull down both release levers at the same time and then pull out about half length of the controller...

Page 113: ...ng content and images are the detail steps of installing the controller module into the system chassis Make sure the position of both release levers of the controller is at downward Align and place the controller to the empty controller slot Push the controller module all the way into the controller slot until the position of two release levers move upward automatically Pull up both release leaver...

Page 114: ...er about 150 seconds from the time you have installed the controller module into the system chassis the status LED will show solid green color if controller module is successfully installed then the web UI will show figure 6 6 System Healthy is Good Figure 6 6 Screenshot of the Controller Module Successfully Installed in SANOS UI ...

Page 115: ...nded place for removing the controller module the system is in a well secured rack or on a stable surface If you see the System Health showing PSU Fault or the PSU LED shows solid or blinking amber color which means your PSU has encountered an issue and need to be replaced immediately You need to follow the procedure of how to remove problematic PSU module and install a healthy one Figure 6 7 Warn...

Page 116: ... the PSU Number Description 1 PSU Release Tab 2 PSU Handle Before removing the PSU disconnect the power cord from the wall outlet then remove the other end that is connected to the PSU The following are detailed steps of removing a PSU from the system chassis Hold the PSU handle first and then press the release tab Pull out the power supply about half of the total PSU length Use one hand to hold o...

Page 117: ...eps of installing the PSU into the system chassis Use one hand to hold one end of the power supply unit the side with release tab and handle and the other hand hold the bottom of the power supply unit then align the PSU with the empty PSU slot Push the PSU all the way into the empty slot until you hear the click sound from the release tab ...

Page 118: ... Figure 6 11 System Health is Good and no warning message on the upper right side of the SANOS UI Figure 6 11 Screenshot of the PSU Successfully Installed in the SANOS UI 6 3 Removing Installing the Fan Module The standard XCubeSAN system comes with two redundant fan modules that allow you to hot swap it when one of the fan modules encounters an issue In the event that the fan module fails it can ...

Page 119: ...ng or removing is highly recommended Recommended place for installing removing a fan module the system is on the well secured rack or onto stable surface If you see the System Health showing Fan Fault that means your fan module has encountered an issue and needs to be immediately replaced You need to follow the procedures below to remove problematic fan module and install a healthy one Figure 6 12...

Page 120: ...odule Handle The following details the steps of removing the fan module from the system chassis Hold the fan module handle first and then press the release tab Pull out the fan module around half of the total fan module length Use one hand to hold one end of the fan module the side with release tab and handle and the other hand hold the bottom of the module pull out the module until it is free fro...

Page 121: ...odule into the system chassis Use one hand to hold one end of the fan module the side with release tab and handle and the other hand hold the bottom of the module then align it with the empty slot Installation direction of LFF and SFF systems is the same Push the fan module all the way into the empty slot until hear the click sound from the release tab ...

Page 122: ...S UI Figure 6 16 Screenshot of the Fan Module Successfully Installed in the SANOS UI 6 4 Removing the Host Card If you encounter data connection problems from the host s side but you don t know which port or which host card is with problem please go to SANOS UI HOST CONNECTIVITY Overview it will show all host cards you have installed If the host card has fault all of the ports will have a fault an...

Page 123: ...st card with the connector in the controller cage Pull the host card out until it is free from the controller cage Install the substitute host card The detailed steps of installing a host card please refer to the chapter 3 3 Installing the Optional Host Cards section Install the dummy host card cage in the empty host card slot and tighten two screws Repeat the procedures above if there are other h...

Page 124: ...he to Flash Modules Navigate to the SANOS UI SYSTEM SETTINGS Power Cache to Flash and view the status of the power module or flash module If it shows Failed that means your power module or flash is not functioning correctly and can t provide real time data protection anymore You may need to replace the power module or flash to ensure continued protection The following figure is the example of a fa...

Page 125: ...from the system chassis you must press the attention button until the flash module status LED finished blinking Otherwise the flash module maybe damage For more information about Cache to Flash modules please refer to the chapter 3 5 Installing the Optional Cache to Flash Modules section and the chapter 5 2 4 Cache to Flash Module LEDs and Button section The following content and image are detail ...

Page 126: ...ress the release button of flash module and pull it out until it is free from system chassis Install the substitute flash module The detailed steps of installing the flash module please refer to the chapter 3 5 Installing the Optional Cache to Flash Modules section Install the dummy cache to flash cage and then use a Phillips screw driver to tighten it Figure 6 24 The Procedure of Removing the Fla...

Page 127: ... chassis Install the dummy cache to flash cage and then use a Phillips screw driver to tighten it To ensure proper cooling of the system please install all dummy cache to flash module cages if the flash or power module is removed Figure 6 25 The Procedure of Removing the Power Module from the System Chassis ...

Page 128: ...san support Service hours 09 30 02 00 Monday Friday UTC 8 Summer time 09 30 01 00 Via Email support qsan com Information to Collect Product name model or version and serial number Operating system name and version Firmware version Error messages or capture screenshots Product specific reports and logs Add on products or components installed Third party products or components installed Information ...

Page 129: ...Support and Other Resources 111 Figure 7 1 Download Service Package in the SANOS UI ...

Page 130: ...procedures below to setup the online help environment for QSAN support team The following procedure will help you to setup the serial console via the console cable that is enclosed in the shipping carton The following image is the appearance of the console cable Figure 7 2 Appearance of a Console Cable Procedures to Setup the Serial Console 1 Setup the serial cable between the controller and one s...

Page 131: ...tion is made INFORMATION For more information about terminal software please refer to HyperTerminal http www hilgraeve com hyperterminal PuTTY http www putty org 3 Here we first demonstrate HyperTerminal The console settings are on the following Baud rate 115200 8 data bit no parity 1 stop bit and no flow control Terminal type vt100 ...

Page 132: ...114 Copyright 2019 QSAN Technology Inc All Right Reserved Figure 7 4 The Procedures of Setup Serial Console by HyperTerminal 4 If you are using PuTTY instead please refer to below ...

Page 133: ...Support and Other Resources 115 ...

Page 134: ...ne Support Following is the procedure to setup the connection for online support via TeamViewer 1 Please download the TeamViewer from following hyper link https www teamviewer com en download 2 Install TeamViewer 3 Please provide the ID password showed on the application to QSAN support team member to join the online support session 7 3 Accessing Product Updates To download product updates please ...

Page 135: ...mentation that meets and exceeds your expectations To help us improve the documentation email any errors suggestions or comments to docsfeedback qsan com When submitting your feedback include the document title part number revision and publication date located on the front cover of the document ...

Page 136: ...er a personal non exclusive non transferable non distributable non assignable non sub licensable license to install and use the Product pursuant to the terms of this EULA Any right beyond this EULA will not be granted Intellectual Property Right Intellectual property rights relative to the Product are the property of QSAN or its licensor s User will not acquire any intellectual property by this EU...

Page 137: ...S WHATSOEVER INCLUDING BUT NOT LIMITED TO LOSS OF DATA INFORMATION REVENUE PROFIT OR BUSINESS ARISING OUT OF OR RELATING TO THE USE OR INABILITY TO USE THE PRODUCT OR OTHERWISE UNDER OR IN CONNECTION WITH THIS EULA OR THE PRODUCT WHETHER BASED ON CONTRACT TORT INCLUDING NEGLIGENCE STRICT LIABILITY OR OTHER THEORY EVEN IF QSAN HAS BEEN ADVISED OF THE POSSIBILITY OF SUCH DAMAGES Limitation of Liabil...

Page 138: ...ithout condition This EULA will be binding upon and will inure to User s successors and permitted assigns This EULA shall be governed by and constructed according to the laws of R O C Any disputes arising from or in connection with this EULA User agree to submit to the jurisdiction of Taiwan Shilin district court as first instance trial ...

Reviews: