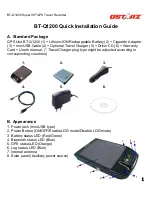
BT-Q1200 Super 99
®
GPS Travel Recorder
2
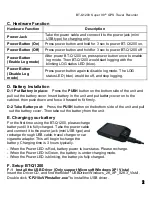
C. Hardware Function
Hardware Function
Description
Power Jack
Take the power cable and connect it to the power jack (mini
USB type) for charging only
Power Button (On)
Press power button and hold for 3 sec to power BT-Q1200 on.
Power Button (Off)
Press power button and hold for 3 sec to power BT-Q1200 off
Power Button
(Enable Log mode)
After power BT-Q1200 on, press power button once to enable
log mode. Then BT-Q1200 would start logging with the
blinking LOG status LED (blue).
Power Button
(Disable Log
mode)
Press power button again to disable log mode. The LOG
status LED (blue) would be off, and stop logging.
D. Battery Installation
D-1 Put Battery in place:
Press the
PUSH
button on the bottom side of the unit and
pull out the battery cover. Insert battery in the unit and put battery cover on to the
cabinet, then push down and force it forward to fit firmly.
D-2 Take Battery out:
Press the
PUSH
button on the bottom side of the unit and pull
out the battery cover. Then take out the battery from the unit.
E. Charging your battery
For the first time using the BT-Q1200, please charge
battery until it is fully charged. Take the power cable
and connect it to the power jack (mini USB type) and
recharge through USB cable, travel charger or car
cigarette adaptor. This will begin to charge the
battery. Charging time is 3 hours typically.
- When the Power LED is Red, battery power is low status. Please recharge.
- When the Power LED is Green, the battery is under charging mode.
- When the Power LED is blinking, the battery is fully charged.
F. Setup BT-Q1200
F-1 Install the USB Driver (Only support Microsoft Windows XP / Vista)
Insert the Driver CD, and find the folder
“USBDriver\Windows_2K_XP_S2K3_Vista”.
Double click
“CP210xVPInstaller.exe”
to install the USB driver.

